How to install Apache, PHP, MySQL, and phpMyAdmin on Windows XP
Table of contents
2. Create a Web Server Structure
3. How to install Apache on Windows XP
4. How to install PHP on Windows XP
5. Install MySQL on Windows XP
Apache for Windows XP
Nowadays, all the current versions of Apache are run on Windows 7 SP1, Vista SP2, 8 / 8.1, 10, Server 2008 SP2 / R2 SP1, Server 2012 / R2, Server 2016.
Thus, it is currently impossible to run modern versions of Apache on Windows XP. Also, Apache will not work on Windows Server 2003.
On Windows XP, you can only run Apache 2.2. And your Windows XP system must have Service Pack 3.
Before I continue, I recommend that you upgrade to a newer version of Windows - starting with the Windows Seven, you can install any modern version of Apache and PHP. Old versions of Apache and PHP may contain bugs. If you plan to use a local web server to study the administration of web applications and programming in PHP, then Windows XP is not the best platform - here you will deal with long-obsolete software.
If I did not convince you, then follow this step-by-step instruction to run Apache on Windows XP.
Create a Web Server Structure
Create the directory structure of our server. The main idea is to split executable files with website files and databases. It is convenient for maintenance, including for backup.
At the root of the C:\ drive, create the Server directory. In this directory, create 2 subdirectories: bin (for executable files) and data.
Go to the data directory and create sub-folders DB (for databases) and htdocs (for websites).
How to install Apache on Windows XP
Download the httpd-2.2.25-win32-x86 file (the latest workable with Windows XP version in the archive).
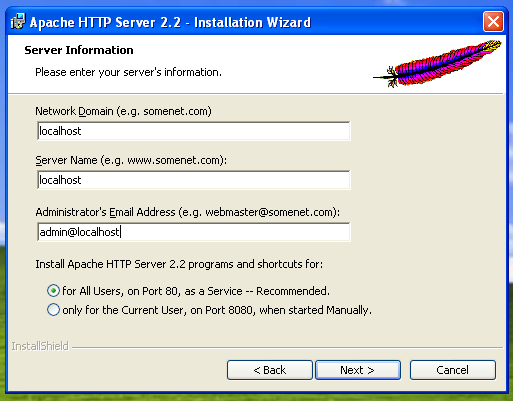
Run this file with a double click and then continue with the usual installation wizard. When you get to this window, then as the Network Domain and Server Name enter localhost, as Email - any address:
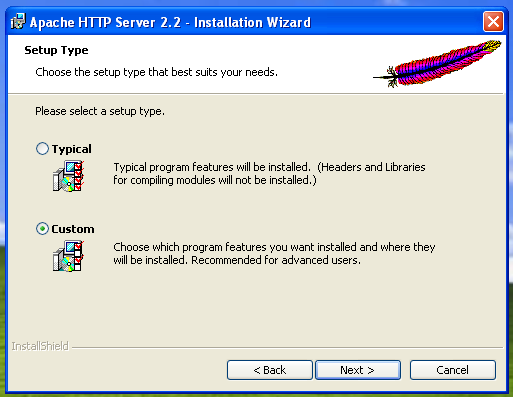
Select Custom installation:
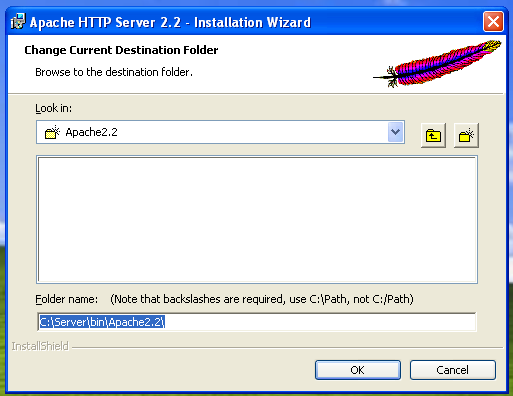
Change the installation folder to C:\Server\bin\Apache2.2\:
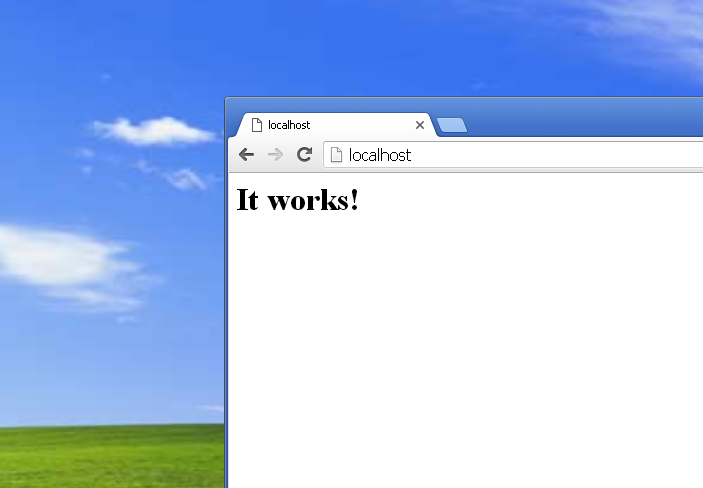
After the installation is completed, open http://localhost/:
Navigate to the C:\Server\bin\Apache2.2\conf\ directory and open the httpd.conf file with any text editor.
In it we need to replace a number of lines.
Replace
#ServerName localhost:80
with
ServerName localhost:80
replace
DocumentRoot "C:/Server/bin/Apache2.2/htdocs"
with
DocumentRoot "C:/Server/data/htdocs/"
replace
<Directory "C:/Server/bin/Apache2.2/htdocs">
with
<Directory "C:/Server/data/htdocs/">
replace
DirectoryIndex index.html
with
DirectoryIndex index.php index.html index.htm
replace
# AllowOverride controls what directives may be placed in .htaccess files.
# It can be "All", "None", or any combination of the keywords:
#   Options FileInfo AuthConfig Limit
#
AllowOverride None
with
# AllowOverride controls what directives may be placed in .htaccess files.
# It can be "All", "None", or any combination of the keywords:
#   AllowOverride FileInfo AuthConfig Limit
#
AllowOverride All
and replace
#LoadModule rewrite_module modules/mod_rewrite.so
with
LoadModule rewrite_module modules/mod_rewrite.so
Save and close the file. Restart the Web server or reboot your computer for the changes to take effect.
Place your sites in the folder C:\Server\data\htdocs\.
How to install PHP on Windows XP
In Windows XP with this Apache version only PHP 5.4 will run, the latest version of this branch is PHP 5.4.9, so that file we download from the archive.
Download and install the file ‘Microsoft Visual C++ 2008 Redistributable Package (x86)’ for this version of PHP. The Microsoft Visual C++ 2008 Redistributable Package (x86) installs runtime components of Visual C++ Libraries required to run applications developed with Visual C++ on a computer that does not have Visual C++ 2008 installed.
In the folder C:\Server\bin\ create another folder named PHP, in it unpack the contents of the downloaded php-5.4.9-Win32-VC9-x86.zip file.
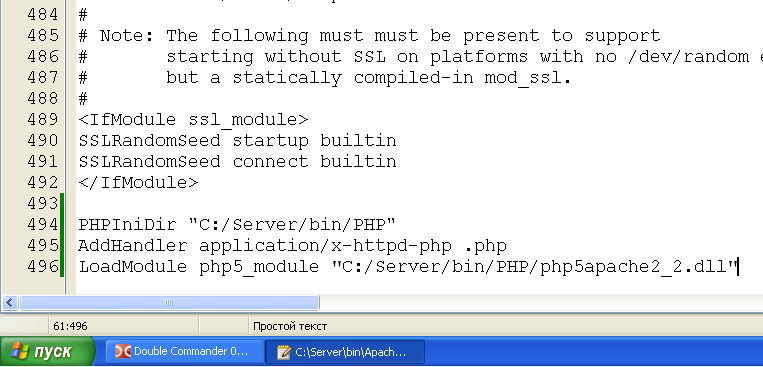
In the C:\Server\bin\Apache2.2\conf\httpd.conf file at the very end, add the lines
PHPIniDir "C:/Server/bin/PHP"
AddHandler application/x-httpd-php .php
LoadModule php5_module "C:/Server/bin/PHP/php5apache2_2.dll"
Now in the C:\Server\bin\PHP\ folder find the php.ini-development file and rename it in php.ini.
Open this php.ini file in any text editor, looking for a line
; extension_dir = "ext"
and replace it with
extension_dir = "C:\Server\bin\PHP\ext\"
Now find the group of strings:
;extension=php_bz2.dll
;extension=php_curl.dll
;extension=php_fileinfo.dll
;extension=php_gd2.dll
;extension=php_gettext.dll
;extension=php_gmp.dll
;extension=php_intl.dll
;extension=php_imap.dll
;extension=php_interbase.dll
;extension=php_ldap.dll
;extension=php_mbstring.dll
;extension=php_exif.dll ; Must be after mbstring as it depends on it
;extension=php_mysql.dll
;extension=php_mysqli.dll
;extension=php_oci8.dll ; Use with Oracle 10gR2 Instant Client
;extension=php_oci8_11g.dll ; Use with Oracle 11gR2 Instant Client
;extension=php_openssl.dll
;extension=php_pdo_firebird.dll
;extension=php_pdo_mysql.dll
;extension=php_pdo_oci.dll
;extension=php_pdo_odbc.dll
;extension=php_pdo_pgsql.dll
;extension=php_pdo_sqlite.dll
;extension=php_pgsql.dll
;extension=php_pspell.dll
;extension=php_shmop.dll
and replace it with:
extension=php_bz2.dll
extension=php_curl.dll
extension=php_fileinfo.dll
extension=php_gd2.dll
extension=php_gettext.dll
;extension=php_gmp.dll
;extension=php_intl.dll
;extension=php_imap.dll
;extension=php_interbase.dll
;extension=php_ldap.dll
extension=php_mbstring.dll
extension=php_exif.dll ; Must be after mbstring as it depends on it
extension=php_mysql.dll
extension=php_mysqli.dll
;extension=php_oci8.dll ; Use with Oracle 10gR2 Instant Client
;extension=php_oci8_11g.dll ; Use with Oracle 11gR2 Instant Client
extension=php_openssl.dll
;extension=php_pdo_firebird.dll
extension=php_pdo_mysql.dll
;extension=php_pdo_oci.dll
;extension=php_pdo_odbc.dll
;extension=php_pdo_pgsql.dll
extension=php_pdo_sqlite.dll
;extension=php_pgsql.dll
;extension=php_pspell.dll
;extension=php_shmop.dll
now uncomment the lines in this group:
;extension=php_soap.dll
;extension=php_sockets.dll
;extension=php_sqlite3.dll
;extension=php_sybase_ct.dll
;extension=php_tidy.dll
;extension=php_xmlrpc.dll
;extension=php_xsl.dll
;extension=php_zip.dll
should be:
extension=php_soap.dll
extension=php_sockets.dll
extension=php_sqlite3.dll
;extension=php_sybase_ct.dll
;extension=php_tidy.dll
extension=php_xmlrpc.dll
extension=php_xsl.dll
;extension=php_zip.dll
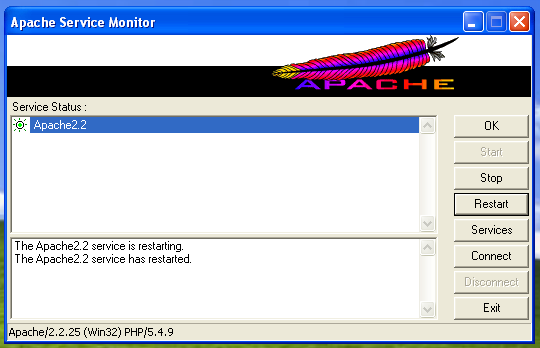
Restart the Web server:
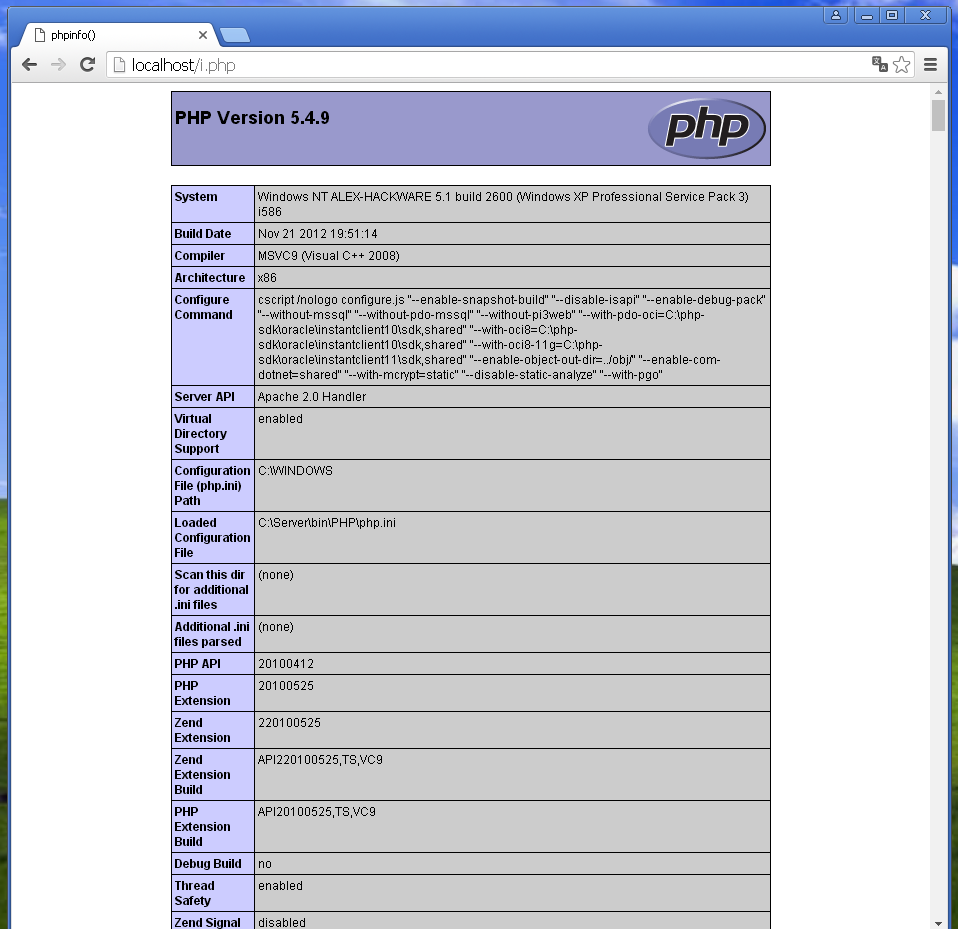
In the C:\Server\data\htdocs\ directory, create a file named i.php
Copy to this file:
<?php
phpinfo ();
In the browser, open the http://localhost/i.php link. If you see the same thing as in the picture, then PHP works:
Install MySQL on Windows XP
Download MySQL version 5.5 - it works on Windows XP.
Unpack the downloaded archive to the C:\Server\bin\ folder. Rename the new folder in mysql5.5.
We go into this folder and create the my.ini file. Now open this file with any text editor.
Add the following lines to it:
[mysql]
default-character-set=utf8

[mysqld]
datadir="c:/Server/data/DB/data/"
Save and close it.
Move the entire C:\Server\bin\mysql5.5\data\ folder to C:\Server\data\DB\.
Open the Windows command prompt by pressing the Win+r keys and type
cmd
On the command line, insert two commands in sequence and after each press Enter:
C:\Server\bin\mysql5.5\bin\mysqld --install
net start mysql
How to install phpMyAdmin
The fourth branch of phpMyAdmin requires PHP version 5.5 or higher. Let me remind you that we have PHP 5.4, so we are downloading the latest version from 3.* branch: https://files.phpmyadmin.net/phpMyAdmin/3.5.8.2/phpMyAdmin-3.5.8.2-all-languages.zip
Unpack the downloaded file into C:\Server\data\htdocs\. Rename this folder (phpMyAdmin-3.5.8.2-all-languages) to phpmyadmin.
In the directory c:\Server\data\htdocs\phpmyadmin\ create the config.inc.php file and copy there:
<?php

/* Servers configuration */
$i = 0;

/* Server: localhost [1] */
$i++;
$cfg['Servers'][$i]['verbose'] = '';
$cfg['Servers'][$i]['host'] = 'localhost';
$cfg['Servers'][$i]['port'] = '';
$cfg['Servers'][$i]['socket'] = '';
$cfg['Servers'][$i]['connect_type'] = 'tcp';
$cfg['Servers'][$i]['extension'] = 'mysqli';
$cfg['Servers'][$i]['auth_type'] = 'cookie';
$cfg['Servers'][$i]['user'] = 'root';
$cfg['Servers'][$i]['password'] = '';
$cfg['Servers'][$i]['nopassword'] = true;
$cfg['Servers'][$i]['AllowNoPassword'] = true;

/* End of servers configuration */

$cfg['blowfish_secret'] = 'kjLGJ8g;Hj3mlHy+Gd~FE3mN{gIATs^1lX+T=KVYv{ubK*U0V';
$cfg['DefaultLang'] = 'ru';
$cfg['ServerDefault'] = 1;
$cfg['UploadDir'] = '';
$cfg['SaveDir'] = '';

?>
Now in the web browser open the address http://localhost/phpmyadmin/:

As the User name, type root, and leave the password blank.

Conclusion
As you can see, on Windows XP you can run a full-fledged web server, even if not with the latest components of the programs.
Recommended for you 'How to protect the Apache web server from hacking in Windows'.
Related articles:
- How to install web server on Windows 10 (Apache 2.4, PHP 8, MySQL 8.0 and phpMyAdmin) (100%)
- Web server installation guide on Windows: Apache, PHP, MariaDB and phpMyAdmin. How to provide local web server security (100%)
- How to protect the Apache web server from hacking in Windows (100%)
- Web Server on Windows 11 (Apache, MySQL, PHP and phpMyAdmin): step-by-step installation guide (100%)
- How to upgrade from MySQL 5 to MySQL 8 (91.1%)
- How to change Kali Linux language without reinstalling the system (RANDOM - 50%)