How to make proxy with Tor in Windows
Table of contents
1. Windows-based proxy via Tor
3. Static IP in Windows and the installation of the Tor service
5. Web proxies and SOCKS are not the same thing!
6. Installing and Running Privoxy on Windows
7. Configuring devices to connect to a proxy-Tor
7.1 Setting up a mobile phone (Android) to use a proxy
7.2 Configuring proxy settings in Windows
7.3 Configuring proxy settings in Linux
7.4 Configuring VirtualBox Virtual Machine Proxy Usage
Windows-based proxy via Tor
You can turn your computer into a web proxy for other devices on your local network. To hide the real IP address we will configure the proxy to use Tor network. That is, in the settings of other devices as a proxy you will need to specify the IP address of your computer, and all devices that access the Internet through your proxy will mask their IP.
In this case, the computer where your proxy is working can be used in the normal mode. You can configure so that other programs (web browser, for example) will also use a proxy or connect online directly.
Alternatives
Obviously, in order for this to work, a computer that acts as a proxy must be constantly turned on. And this, at least, means the electricity costs. Alternatively, I can recommend to use routers that have built Tor support. An example of such routers are the Asus series RT-AC* with the Asuswrt-Merlin firmware.
Screenshot of already outdated RT-N66U:

In such routers it is enough to enable Tor and select, use the connection via Tor network for all devices, or only for certain ones.
It’s really convenient. And if you need the function of redirecting the traffic of all devices on the local network via Tor, but you do not need additional proxy server functions (traffic filtering, for example), then I recommend that you think about buying such an advanced router.
Another alternative to a Windows-based proxy is a Linux-based proxy. Although, probably, this is already a matter of personal preferences.
Static IP in Windows and the installation of the Tor service
It is necessary to make sure that the IP of the computer does not change. How to make permanent IP in Windows can be read in the article ‘How to make a web-server on Windows accessible to others’ - there is a lot of theory and detailed how to configure a static local IP for a computer with Windows installation. If you do not configure a permanent local IP, then after changing the IP address the proxy will not funcionante.
Of course, you need to install the Tor service. How to do this is described in the article ‘How to install Tor and create Tor hidden service on Windows’. It is enough to install and run the Tor service - other actions are optional.
Initial conditions
I will show on a concrete example. My local IP 192.168.0.49, and the Tor service is running on its standard port 9050. If you configure the proxy with me, then in the subsequent commands/settings, replace 192.168.0.49 with your local IP address. Also, if you changed the default Tor port, replace the 9050 in the following examples with port as it is set on your machine.
Web proxies and SOCKS are not the same thing!
A proxy is a collective name for technology when one computer acts as an intermediary between another computer and the target server. Now the most popular are the web proxy (also called HTTP or HTTPS proxy).
To connect to Tor, the SOCKS protocol is used.
SOCKS in its function is also a proxy. But it differs from the web proxy that it is a different technology, with a different implementation and a few other functions.
The most important practical conclusion: if the device or application only works with a Web proxy, then in its settings you can not just specify the Tor port - this will not work, because Web Proxy and SOCKS are two different things.
SOCKS is one of the application protocols, other examples of application protocols: HTTP, FTP, SMTP, RDP, SNMP, DHCP.
Unlike HTTP proxy servers, SOCKS transmits all data from the client without adding anything from itself, that is, from the perspective of the destination server, the data it received from the SOCKS proxy is identical to data that the client would transmit directly, without proxying. SOCKS is more universal, it does not depend on specific application-level protocols. But the HTTP proxy caches the data and can more thoroughly filter the contents of the transmitted data.
Web proxies and SOCKS are like HDMI and VGA: their functions are similar but yet you can not just plug the VGA cable into the HDMI socket - you need an adapter.
So with Tor. If the application you are using supports SOCKS, then it can directly connect to Tor. If not - then you need to install the ‘adapter’ program.
Such a program, for example, is Privoxy.
Installing and Running Privoxy on Windows
Privoxy works on different platforms including Windows. Follow the link: https://www.privoxy.org/sf-download-mirror/Win32/ and select the folder with the latest version (it’s not so easy!):
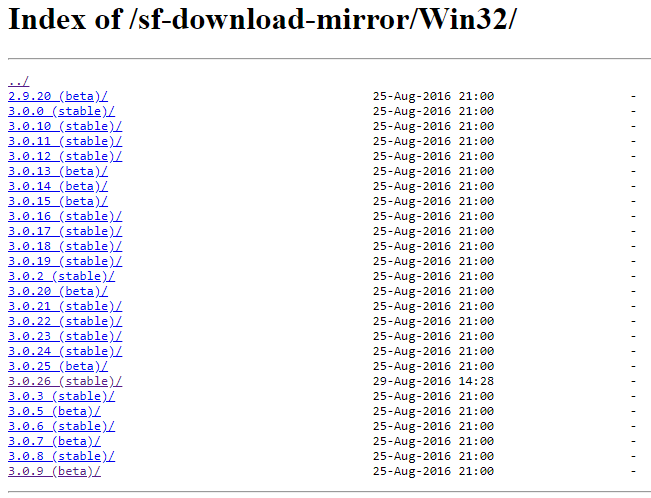
Download the file with the extension .zip (portable version) or .exe (installer).
I will use the portable version. Unpack it to any place.
Go to the program directory.
Find and open the config.txt file in a text editor.

There are various settings in this file. For example, you can disable or enable various filtering rules - it’s not known how relevant they are and how this will affect the efficiency of the sites being opened.
But most importantly, find the listen-address directive. Its default value is:
listen-address 127.0.0.1:8118
This means that the proxy accepts connections only from programs running on the same computer. In order for the proxy to accept connections from computers and mobile phones running on the local network, replace 127.0.0.1 with the local IP address of the computer. For me it:
listen-address 192.168.0.49:8118
If you want, you can also change the port - select any unoccupied.
At the very end, write:
forward-socks4 / localhost:9050 .
forward-socks4a / localhost:9050 .
forward-socks5t / localhost:9050 .
Save the changes and close the file.
Run the privoxy.exe file with a double click. Most likely, the firewall will warn you that the new program is trying to use the network:
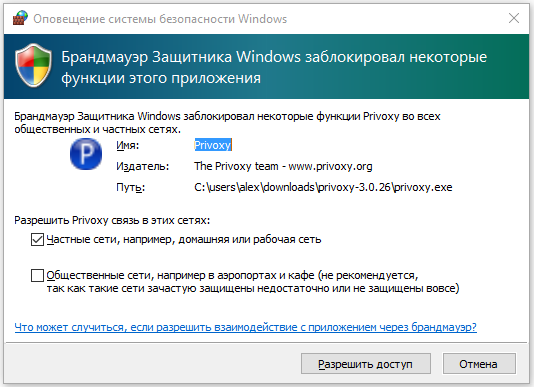
Click “Allow access”.
Configuring devices to connect to a proxy-Tor
Setting up a mobile phone (Android) to use a proxy
Go to your Wi-Fi connection settings. Click and hold the connection that the proxy should use until the pop-up window appears.
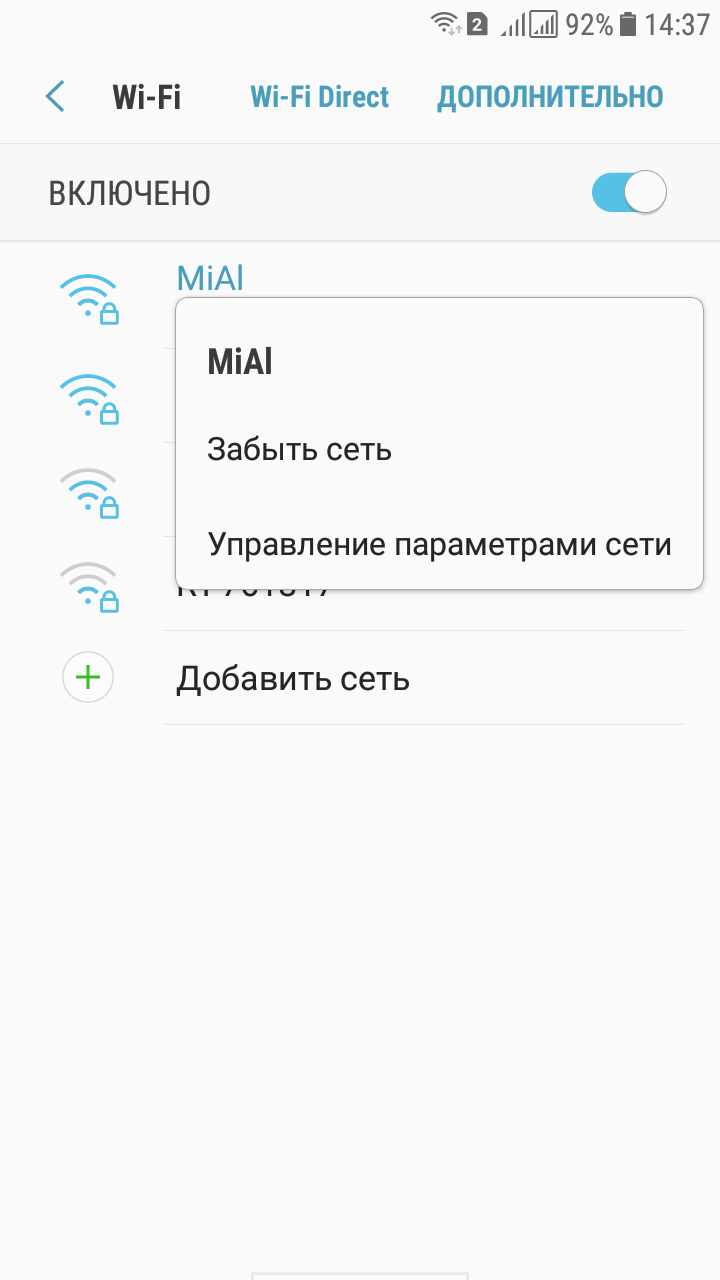
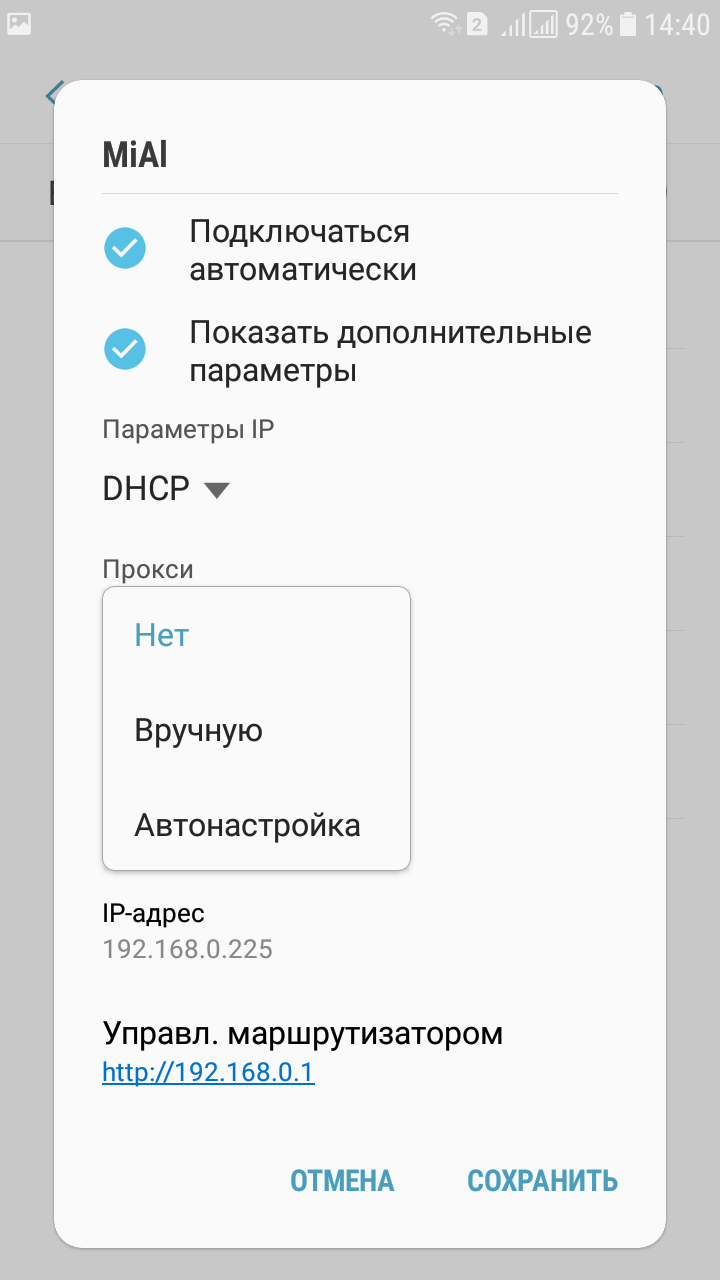
Select ‘Manage network settings’ and click ‘Show advanced options’:
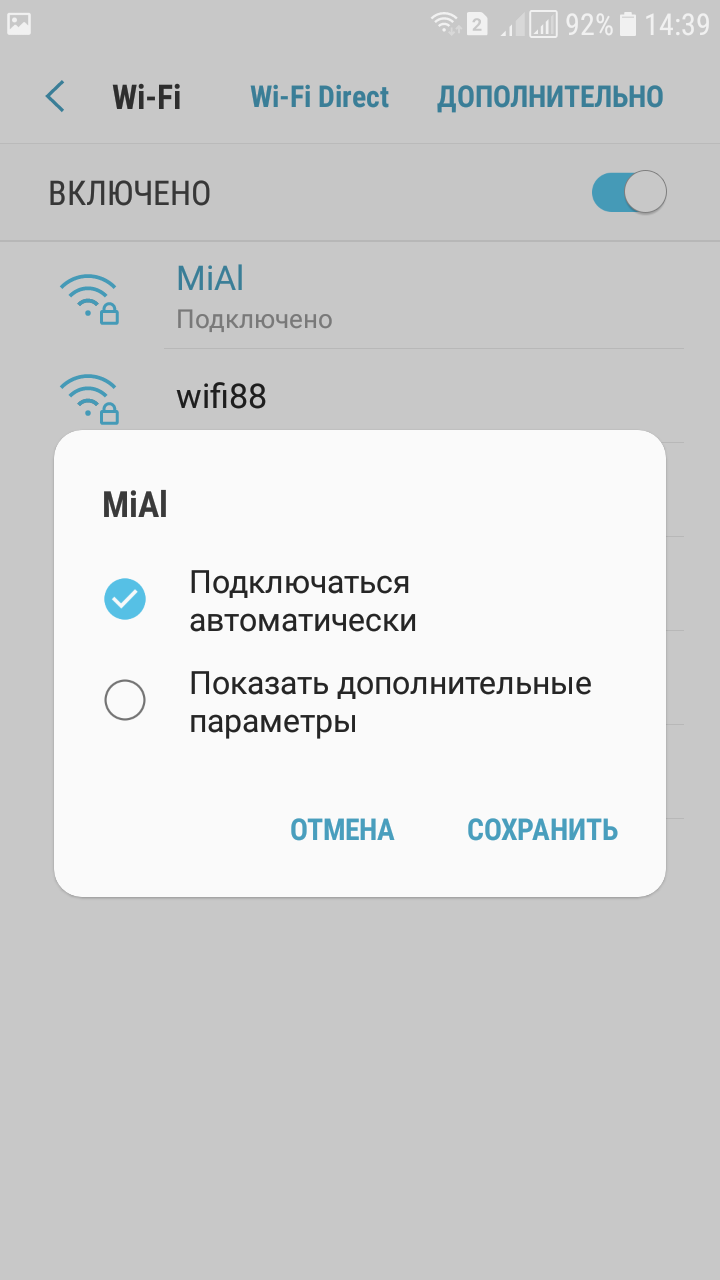
Where ‘Proxy’ set ‘Manually’:
Enter the IP of the computer that acts as a proxy and the port:
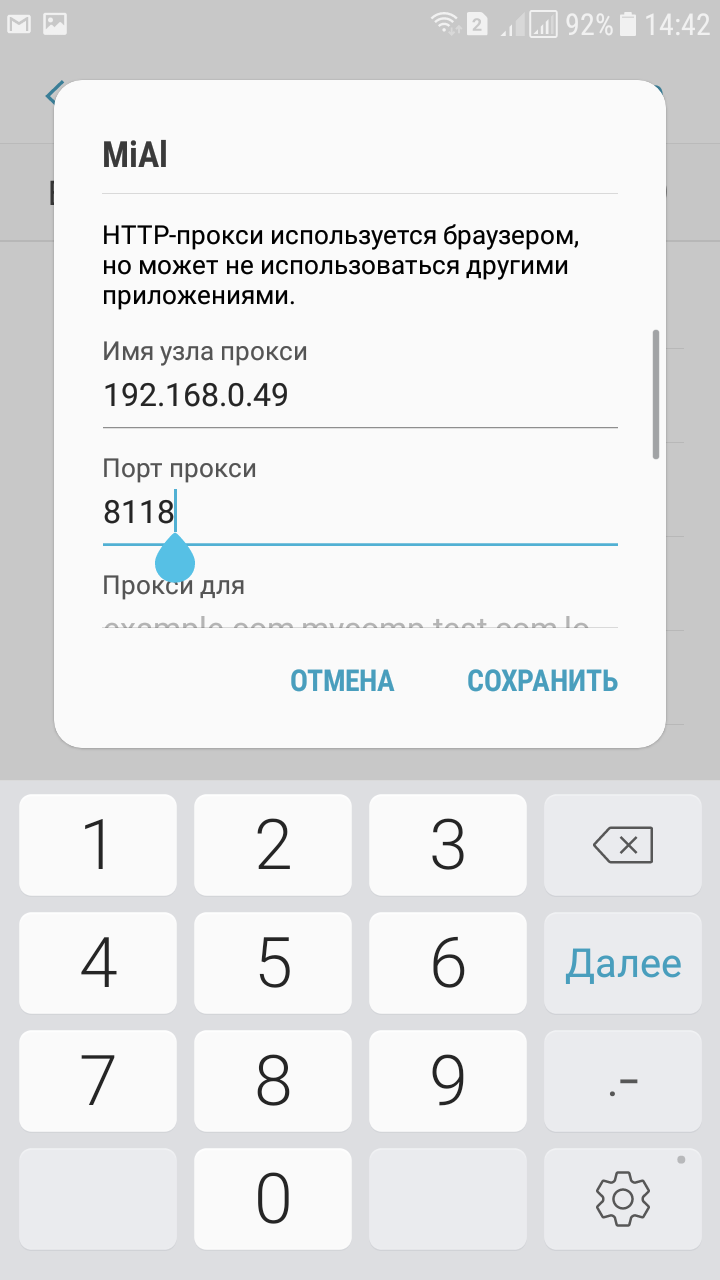
Click Save.
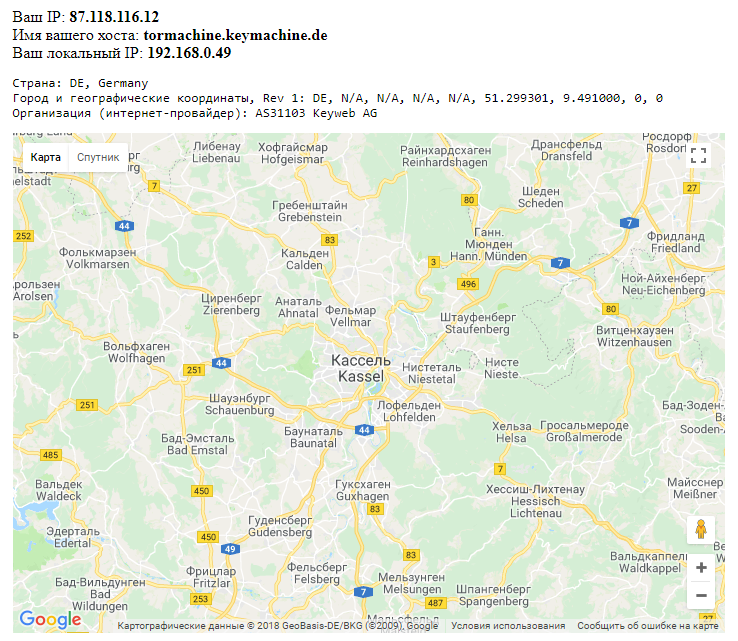
Now check your IP, for example, you can go to the web browser's page https://suip.biz/?act=myip:
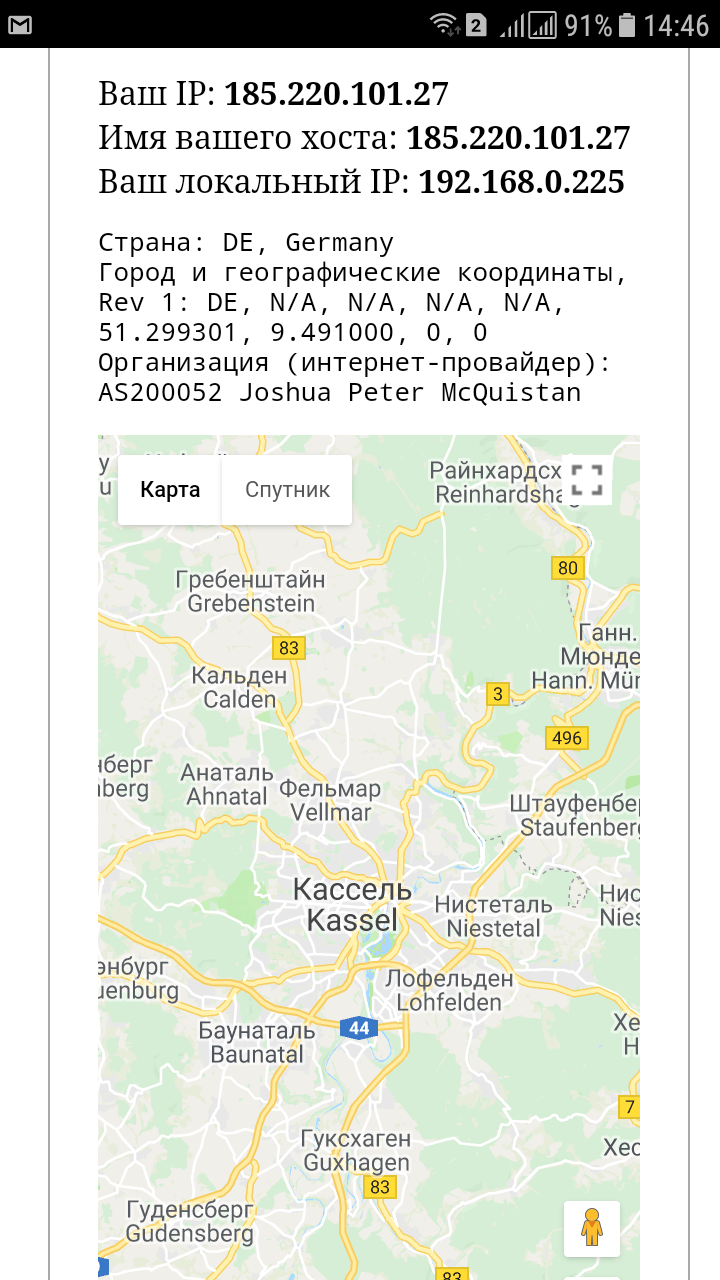
Note the warning that the proxy is used in the browser and maybe not be used by other applications. Some applications have their own proxy settings - set them.
Configuring proxy settings in Windows
Go to ‘Settings’,
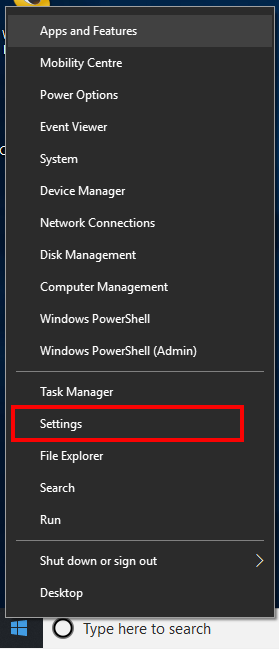
start writing ‘proxy’ and select “Change manual proxy server settings’:

Enable ‘Use proxy server’, enter IP and port, tick ‘Don't use proxy server for local (intranet) addresses’:
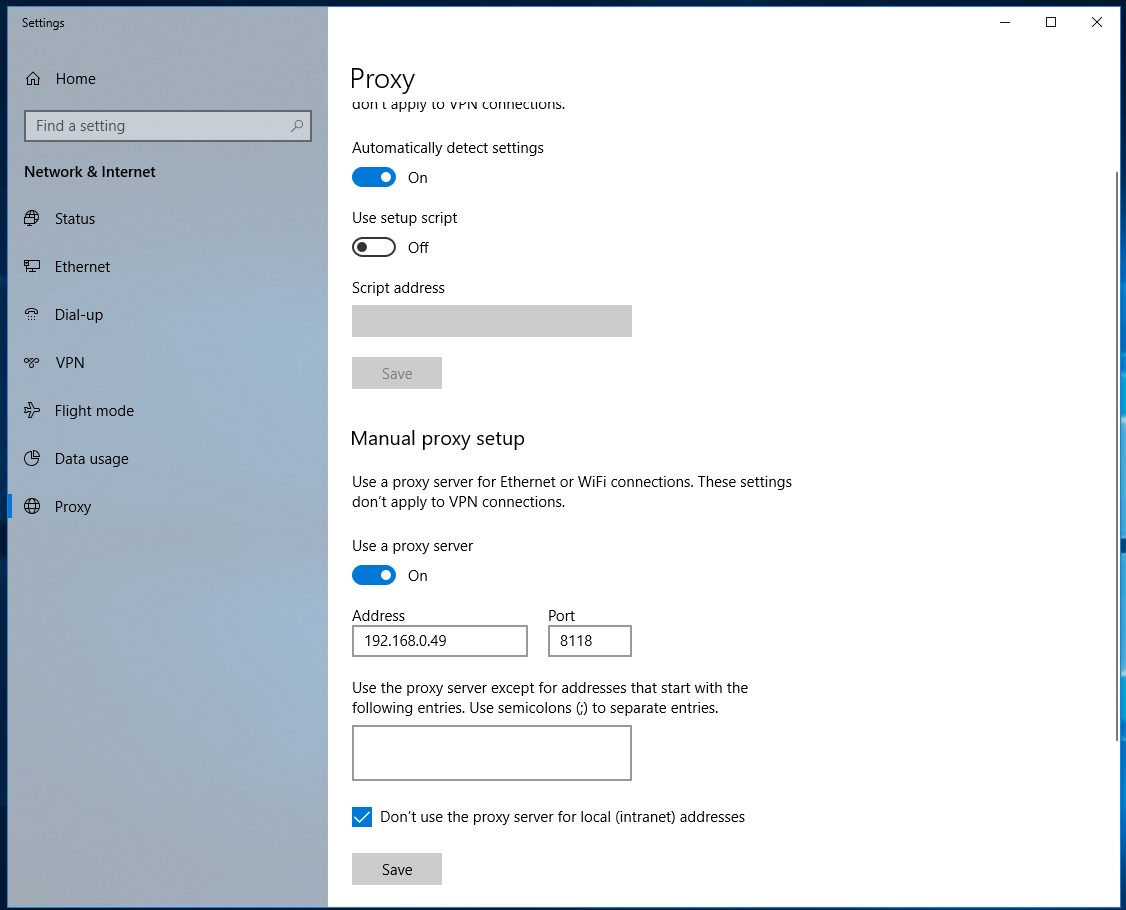
Save the settings. Check in the browser https://suip.biz/?act=myip:
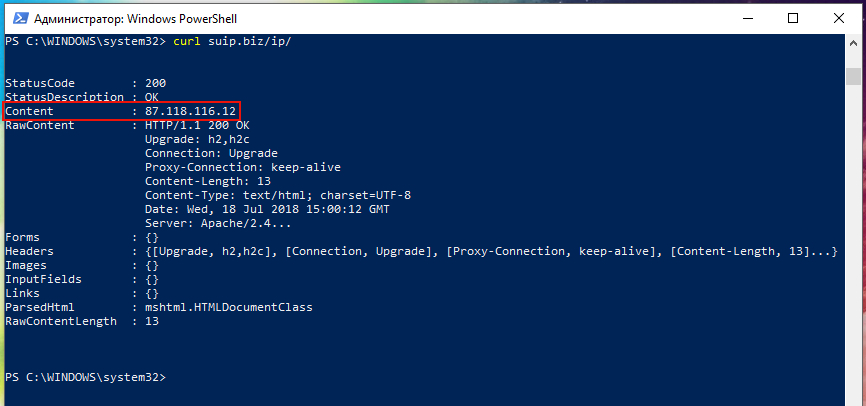
And in other programs, for example, in the Windows command line:
curl suip.biz/ip/
Configuring proxy settings in Linux
In Linux, the proxy settings can be changed in many ways. For example, this can be done for individual applications or for the entire system; in the GUI or in the command line.
If you are using a graphical interface, go to Settings -> Network. Click the gear where ‘Network Proxy’:

Switch to ‘Manual’ and enter your data:

For all IP, enter the address of the computer where the proxy is running. As a port for HTTPS, HTTP, FTP, enter the Privoxy port, and for Socks enter the Tor port (default is 9050 if you have not changed it).
After this, both the web browsers and the console utilities will use the proxy settings. But be careful with programs like Nmap, Masscan - they send raw packets, bypassing system calls - in other words, they do not use proxy settings.

Way without the GUI, enter the commands in the console:
export all_proxy="socks://192.168.0.49:9050/"
export http_proxy="http://192.168.0.49:8118/"
export https_proxy="http://192.168.0.49:8118/"
export no_proxy="localhost,127.0.0.1,::1,192.168.1.1,192.168.0.1"
In them, 192.168.0.49, replace the IP of your proxy, and ports 8118 and 9050 with Privoxy and Tor respectively.
These settings are saved only until reboot!
For the settings to be permanent and working after the computer reboot, add these same lines to the /etc/bash.bashrc file (again, replace the IP and port):
export all_proxy="socks://192.168.0.49:9050/"
export http_proxy="http://192.168.0.49:8118/"
export https_proxy="http://192.168.0.49:8118/"
export no_proxy="localhost,127.0.0.1,::1,192.168.1.1,192.168.0.1"
Save the file.
Configuring VirtualBox Virtual Machine Proxy Usage
Be careful with the configuration of virtual machines! In VirtualBox, the ‘File’ -> ‘Settings’ menu item has a ‘Proxy’ tab. Be aware that this setting works only when VirtualBox checks and downloads updates.
For virtual machines, you need to configure the proxy individually within the operating system of each one.
System-wide proxy settings for the host machine do not necessarily work for the virtual machine, because it uses its own drivers and virtual network interfaces.
Related articles:
- Errors in Kali Linux ‘W: Failed to fetch’ and ‘W: Some index files failed to download. They have been ignored, or old ones used instead.’ (SOLVED) (88.1%)
- How to connect to OpenVPN via proxy or Tor (87.8%)
- How to create a proxy on shared hosting (60.9%)
- Tor tips and usage examples (56.2%)
- Guide to GPS Metadata in Photos (51%)
- NetBIOS: what it is, how it works and how to use in information security (RANDOM - 12.2%)
Hi Alex, could you do a blog post on setting up wireguard? Thanks
Thank you for this!
Just a comment: You make the effort to write in english. Tough we sometimes struggle with screenshos with cyrillic caracters.