How to add reCAPTCHA v3 to protect against parsing and spam
In this post I will show code examples for integrating reCAPTCHA v3 on the site to protect from browsing the page with bots (parsing), to protect against automatic actions on the site and to block spam.
The reCAPTCHA v3 integration documentation for the site is rather poor and confusing. I will step by step show an example of adding reCAPTCHA v3 to the site and explain the code used (PHP and JavaScript) so that if necessary you can make the necessary changes.
And since I too (like most other webmasters) integrate reCAPTCHA v3 into an already running project with an extensive source code, I chose the minimal intervention approach to the already existing code of the website for myself. For example, when reCAPTCHA v3 is added to validate requests made from forms, the source code of the forms will not change at all – a small fragment of JavaScript code will be inserted, which adds listener to events and making necessary changes on the fly.
Google reCAPTCHA v3 differs from the previous version (which is still available for use) reCAPTCHA v2 in that absolutely no action is required from the user. That is, the test passes automatically and imperceptibly. Thanks to this approach, besides the usual integration into forms (for sending comments, feedback, access to the service), reCAPTCHA v3 can also be used to protect browsing pages from bots.
It means the following situation: the user requests a page, but before the response, a check is performed – whether this user is a bot. If the user is not a human, then we prohibit him from displaying the page. This option, in principle, can be implemented with reCAPTCHA v2, but you can be sure that when someone sees the captcha to get access to the page (even if they only need to click the mouse once), many users simply close the browser tab. Google reCAPTCHA v3 does not have this drawback, because the user is not shown anything and does not need to take any action from him.
What are the consequences of blocking access to bots to the site
Although the blocking technique for accessing all bots’s site described below effectively helps prevent sites from being parsed while they are completely invisible to normal users, complete blocking of bots has very important consequences. Therefore, consider what you need to remember when blocking access to bots site.
First, the described technique will block not only bad bots, but also good ones – such as search engines like Google. This will lead to the fact that if additional measures are not taken (for example, allowing access to a site with an IP belonging to Google bypassing the captcha), then as a result the site will fall out of the index of search engines.
Secondly, some affiliate programs do not allow ads to be displayed on pages for which bots are denied access (bots such as Mediapartners-Google and AdsBot-Google* for Google AdSense). If advertising is shown on the protected site, then you need to provide access to the pages bypassing the captcha – since these robots themselves are not able to pass the “human test”.
At the same time, the quality check of bots for access to bypassing the captcha should in no case be based solely on the client's User Agent, since it can be easily spoofed.
Because of the important effect of blocking access to bots, this article has considered two options for blocking:
- block to view the site
- and softer option – blocking form submission
You can choose the most suitable for you. Or, combine both techniques: configure full blocking of access, for example, for authorization pages, and regular blocking – on feedback pages, commenting forms, etc.
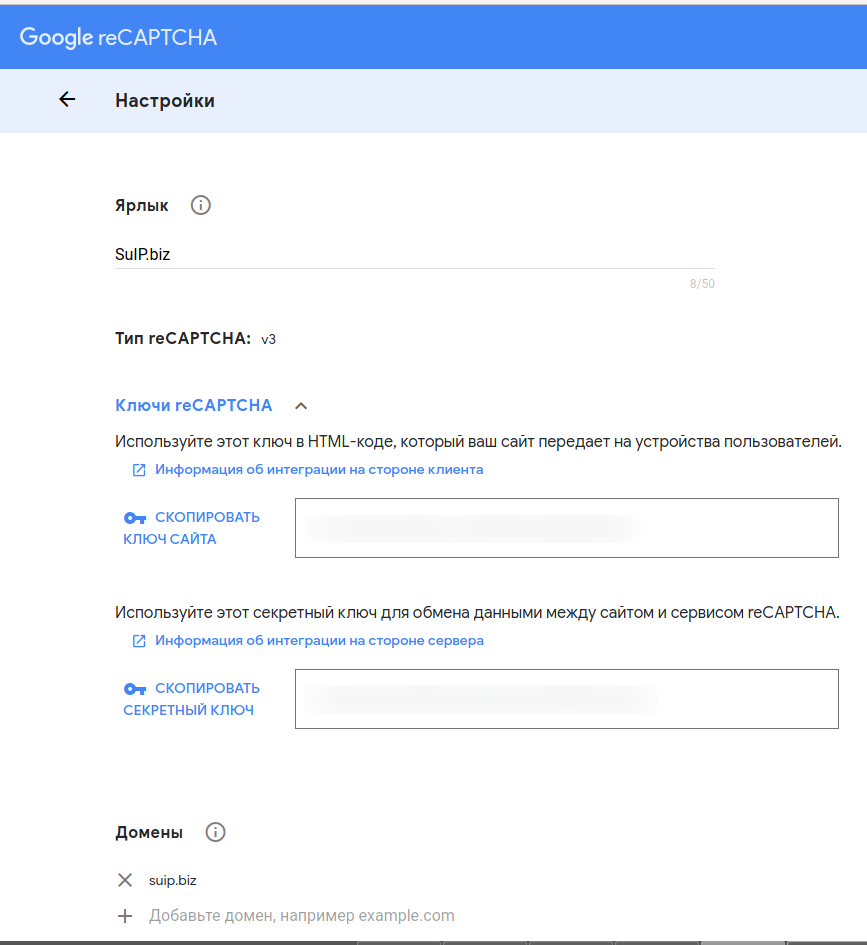
Where to get Google keys reCAPTCHA v3
Using reCAPTCHA v3 is free. You just need to specify the domain and choose reCAPTCHA v3 or v2. In this manual, I will consider the third version.
To get your keys, click the link: https://www.google.com/recaptcha/admin/create
By the way, there it is written so interestingly:
You agree to notify website visitors about the availability of reCAPTCHA v3 verification and that they need to comply with the Privacy Policy and Google Terms of Use. This system can only be used to combat spam and other violations. It is prohibited to use it for other purposes, for example, to determine creditworthiness, performance, financial status or insurance opportunities.
I would very much like to know how with the help of reCAPTCHA v3 you can determine the financial status.
Subsequently, you can view statistics and access the settings from https://www.google.com/recaptcha/admin.
How reCAPTCHA v3 works
The initial stage of user evaluation (bot or person) is carried out exclusively by JavaScript. That is, bots without JavaScript support are eliminated already at this stage. By the way, apparently, these bots also do not fall into the statistics of requests.
During its work, reCAPTCHA v3 collects data about the interaction with the site and forms a long string – the token.
This token needs to be transferred to the server serving the site and already the server using the secret key must make a request to the reCAPTCHA v3 service. The answer will be probabilistic in nature – a number will be sent ranging from 0 (bot) to 1 (person). You yourself need to decide what threshold is a pass for this site.
Based on this information, the server must decide whether to process the request received from the user (for example, whether to show him the page, accept the data sent from the form, etc.).
PHP example to enable reCAPTCHA v3
My implementation consists of two pieces of PHP code. The first is better placed at the beginning of the file. The second fragment should be positioned so that the HTML output by it is located near the end of the source code of your site. And you do not need to do this exclusively with PHP – you can insert this fragment in a different way – only in this case, note that there are single quotes escaped – do not forget to cancel the escaping (remove backslashes).
Before showing the code (in which I also put in a lot of comments), I’ll start by explaining how it works. At the very beginning, a check is made – whether the user has a token. If not, instead of showing the site page to the user, HTML/JavaScript code is output, which only receives the token and immediately returns the user to the index page (all GET requests are saved, in addition another variable is added to them, it is token).
Then it is checked again whether the user has a token, if it already exists, then a request is made to the reCAPTCHA v3 service. If the answer is positive (this is a person), then the code ends its work – control is transferred to the main code of the site. If the answer is negative (this is a bot), then the code terminates the subsequent processing of this request – that is, it immediately stops working and does not transfer control to the main site code.
The first piece of code is responsible for checking bots when accessing the site, and for checking bots when sending forms.
The first fragment:
<?php
$blockPageAccess = 0;
$blockFormAccess = 1;
$checked = 0;
// The function of sending a request to the Google server reCAPTCHA
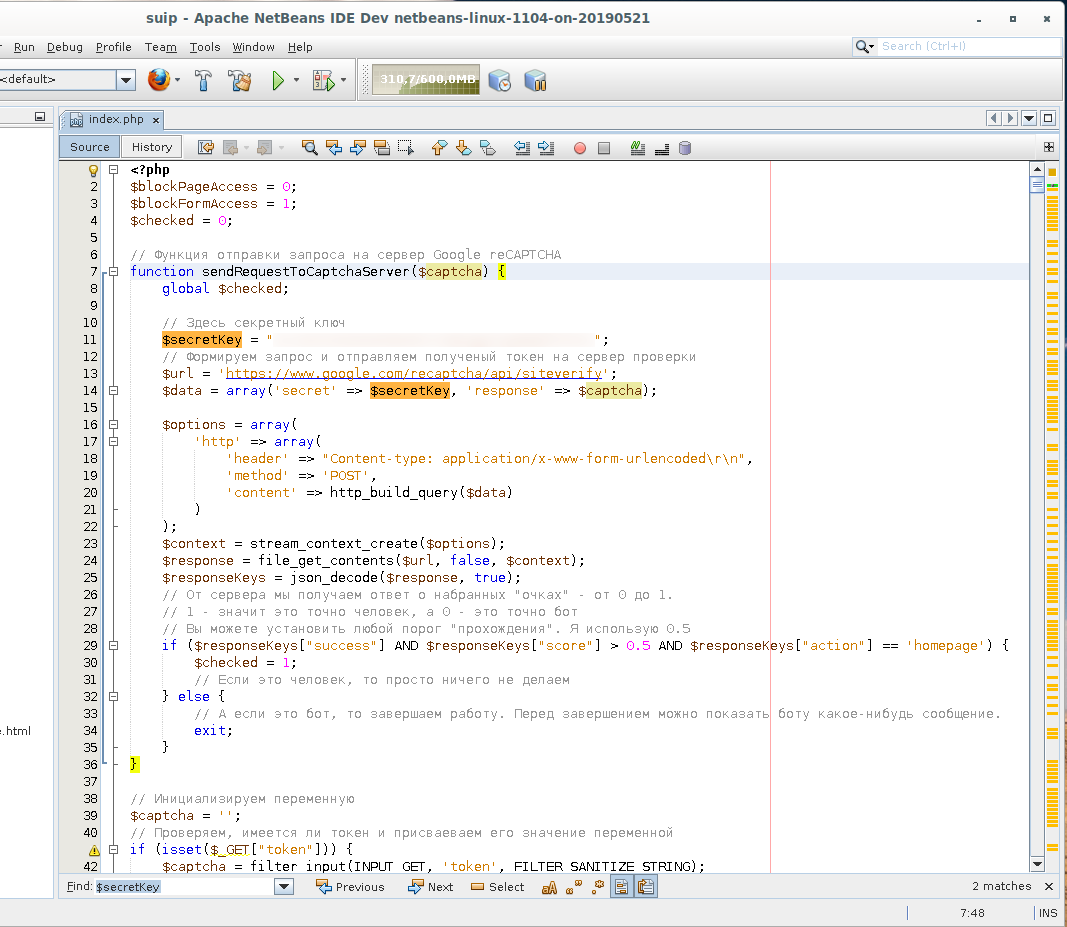
function sendRequestToCaptchaServer($captcha) {
global $checked;
// Here is the secret key
$secretKey = "HERE A SECRET KEY";
// We form a request and send the received token to the verification server
$url = 'https://www.google.com/recaptcha/api/siteverify';
$data = array('secret' => $secretKey, 'response' => $captcha);
$options = array(
'http' => array(
'header' => "Content-type: application/x-www-form-urlencoded\r\n",
'method' => 'POST',
'content' => http_build_query($data)
)
);
$context = stream_context_create($options);
// Request to google.com/recaptcha server and catch errors
set_error_handler(
function ($severity, $message, $file, $line) {
throw new ErrorException($message, $severity, $severity, $file, $line);
}
);
try {
$response = file_get_contents($url, false, $context);
} catch (Exception $e) {
echo $e->getMessage();
}
restore_error_handler();
// $response = file_get_contents($url, false, $context);
$responseKeys = json_decode($response, true);
// From the server we get an answer about the scores - from 0 to 1.
// 1 means it’s definitely a person, and 0 means it’s a bot
// You can set any threshold for “passing”. I use 0.5
if ($responseKeys["success"] AND $responseKeys["score"] > 0.5 AND $responseKeys["action"] == 'homepage') {
$checked = 1;
// If this is a person, then we simply do nothing.
} else {
// And if this is a bot, then we terminate the work. Before the quit, you can show the bot some message.
exit;
}
}
// Initialize the variable
$captcha = '';
// Check if there is a token and assign its value to the variable.
if (isset($_GET["token"])) {
$captcha = filter_input(INPUT_GET, 'token', FILTER_SANITIZE_STRING);
} elseif (isset($_POST["token"])) {
$captcha = filter_input(INPUT_POST, 'token', FILTER_SANITIZE_STRING);
}
// This section only works if the blocking of bots to pages is enabled.
if ($blockPageAccess) {
// Check if the value is empty
if (!$captcha) {
// If the token is missing, then you need to show the token generating page.
// The initial request may have GET parameters - we collect them to pass to the final page
$get = '';
foreach ($_GET as $key => $value) {
$get = $get . "&$key=$value";
}
// Print the token generating code
echo '
<!DOCTYPE html>
<html>
<head>
<title>Are you a human being?</title>
<meta charset="UTF-8">
<meta name="viewport" content="width=device-width, initial-scale=1.0">
<script src="https://www.google.com/recaptcha/api.js?render=HERE SITE KEY"></script>
</head>
<body>
<script>
grecaptcha.ready(function () {
grecaptcha.execute(\'HERE SITE KEY\', {action: \'homepage\'}).then(function (token) {
//alert(token)
window.location.replace("?token=" + token + "' . $get . '");
});
});
</script>
</body>
</html>
';
// No more business - quit. Now the user will come again, but with the token
exit;
}
// If a use has the token, then initiate a request to the server.
sendRequestToCaptchaServer($captcha);
}
// This section is triggered if you need to validate requests from forms.
// And if bot checking is enabled when accessing pages, it means that the token has already
// been used for verification and it makes no more sense to do it again.
// In any case, it is impossible to use the same token a second time.
if ($blockFormAccess AND ! $checked) {
// If the $ _POST array contains more than zero values, then sending from the form takes place.
// Otherwise, we have nothing to do.
if (count($_POST) > 0) {
if (!$captcha) {
// If the captcha is empty, then we terminate the work.
die('Your request is not accepted.');
} else {
// If a use has the token, then initiate a request to the server.
sendRequestToCaptchaServer($captcha);
}
}
}
Note the variables:
$blockPageAccess = 0;
$blockFormAccess = 1;
The first enables checking when accessing pages (disabled by default), the second – checking when accepting a form. Set the values to the configuration you need (they work independently of each other).
The second fragment:
<?php
if ($blockFormAccess) {
    echo '
        <script src="https://www.google.com/recaptcha/api.js?render=HERE SITE KEY"></script>
        <script>
            document.forms[0].addEventListener(\'submit\', function (evt) {
                evt.preventDefault();
                grecaptcha.ready(function () {
                    grecaptcha.execute(\'HERE SITE KEY\', {action: \'homepage\'}).then(function (token) {
                        var el = document.createElement("input");
                        el.type = "hidden";
                        el.name = "token";
                        el.value = token;
                        document.forms[0].appendChild(el);
                        document.forms[0].submit();
                    });
                });
            })
        </script>';
}
?>
This code is needed only if bot checking is enabled when submitting forms. The meaning of this code is that a token is added to a form before each form submission. The token itself is obtained when the form is sent – there is no additional delay between clicking on the “Send” button and the sending itself.
This is pure JavaScript without jQuery. Notice how I address the form:
document.forms[0]
The fact is that I have a form without a name and without an identifier. Moreover, a unique form on each page of the site, of which there are more than a hundred. Fortunately on each page is only one form, so I refer to it by its order number. You can edit it under your conditions.
Do not forget to set your own keys:
- in the first fragment you need to set a private key and two times the key of the site (in the output HTML/JavaScript code)
- in the second fragment, you only need to install the site key twice – it will also be in the HTML/JavaScript code intended for user
Official Google Documentation reCAPTCHA v3
Official information and instructions can be found on the pages:
As is often the case with official documentation – on its basis it is impossible to understand anything and it is impossible to configure anything to a working state…
The most important information about the implementation of reCAPTCHA I borrowed from this article:
At the same time, this instruction contains a critical logical error – the success field sent is used to make a decision. But the fact is that this field only indicates whether the sent token was the correct token for this site – whether the bot is or not a bot, this field does not indicate. The real value to be guided by is score. About it a little later. That is, if you use success in your checks, then even explicit bots that may have scored 0 points, but who managed to get a token, will successfully pass the test.
Nevertheless, the official documentation has several cognitive facts about reCAPTCHA – let’s consider them.
First, it says that the result of the check from the reCAPTCHA service is returned as a JSON object. After converting to an array, it looks like this:
Array
(
	[success] => 1
	[challenge_ts] => 2019-05-28T15:39:16Z
	[hostname] => suip.biz
	[score] => 0.9
	[action] => homepage
)
The value of the fields is as follows:
{
  "success": true|false,      // whether this request was a valid reCAPTCHA token for your site
  "score": number             // the score for this request (0.0 - 1.0)
  "action": string            // the action name for this request (important to verify)
  "challenge_ts": timestamp,  // timestamp of the challenge load (ISO format yyyy-MM-dd'T'HH:mm:ssZZ)
  "hostname": string,         // the hostname of the site where the reCAPTCHA was solved
  "error-codes": [...]        // optional
}
reCAPTCHA v3 without user interaction returns points for each request. These points are based on interactions with your site and give you the opportunity to make decisions based on them.
Token Limitations
Each reCAPTCHA user response token is valid for two minutes and can only be verified once (to prevent replay attacks). If you need a new token, then restart the reCAPTCHA verification.
After you receive the response token, you need to use the appropriate APIs to verify it within two minutes with reCAPTCHA to make sure that it is valid.
Placement on your site
reCAPTCHA v3 will never interrupt your users, so you can run it whenever you want without negative influences. reCAPTCHA works better when it has the most context in place about interactions with your site, which helps to see both legitimate and non-compliant users. For these reasons, it is recommended to include reCAPTCHA checking on forms or actions, as well as in the background of pages for analysis.
Note: you can perform reCAPTCHA as many times as you want with different actions on the same page.
Interpretation of points
reCAPTCHA v3 returns points (1.0 is very likely good interaction, 0.0 is very likely a bot). Based on these score, you can take various actions in the context of your site. Each site is different, but below are a few examples of how sites use score. As examples below, to better protect your site, follow the steps behind the scenes instead of blocking traffic.
| Use Case | Recommendation |
|---|---|
| homepage | Watch the full picture in your admin panel: how many of the users come are, and how many parsers of all sorts |
| login | If scores are low, ask for 2-factor authentication or mail verification to prevent attack-related credentials |
| social | Send comments from users with suspicion of bots for moderation, limit for them the number of unanswered requests to friends |
| e-commerce | Give priority to real customers and identify requests that may be unreal |
reCAPTCHA is trained by observing the real traffic on your site. For this reason, points at the development stage and immediately after implementation may differ from production. Since reCAPTCHA v3 does not manifest itself at all, you can first run reCAPTCHA without taking any action, and then decide on the thresholds, analyzing the results obtained in the administrator console. By default you can use a threshold of 0.5.
Conclusion
I wrote this code for specific features of my site. It is possible that the same could be done more elegantly. But its main advantages:
- it works
- you only need to insert these fragments – you do not need to correct the already existing code. You don’t even need to give the form a name or identifier – if you don’t have them
- if necessary, you can disable the work of the code by setting the values of the variables to zero – no need to perform deeper editing
In fact, there is a lot of space for improvement: for example, in the above implementation, every request received from a user is checked. For example, after the first check, you can save the approved IP address on the server for a while and allow it to be accessed without checks. Or, you can generate a unique token and store it in the user's cookies and in the database on the server, making this token valid, for example, for 10 minutes.
When installing a full access check, you can add a function to check IP by WHOIS and let access to the site without captcha IP owned by Google – so that search robots can continue to scan the site.
The solution seems to work, but it will slow the load time of the page.
I think this is very long process can you short this code