How to enable SSH in Kali Linux. How to connect to Kali Linux via SSH
SSH allows ones to connect to a remote computer and execute commands on it, connecting and transmitting data occurs via an encrypted channel, which is protected from various attacks of interception and data sniffing and spoofing.
SSH includes two programs: a server and a client. The server is installed on a remote machine, to which you need to connect and execute commands on it. The client is designed to connect to a remote machine.
The SSH server acts as a service that listens on port 22 by default. When connecting by default, password authentication is used – you need to enter the user password on the remote Linux system. You can also configure public key based authentication – this option is more convenient (no password is required) and more secure (keys are less prone to brute force).
Speaking about SSH in Kali Linux, you need to consider that this distribution is available in various versions (see details ‘Where to download Kali Linux. What is the difference between Kali Linux versions’): for personal computers, for ARM computers, for mobile phones, for virtual machines. Consider the specific of SSH in Kali Linux for PC and for ARM.
SSH on Kali Linux on ARM computers
Since usually ARM devices are resource-limited computers without a display, you can only manage them by connecting via SSH. For this reason, the SSH service on such devices is already installed and running by default.
In such systems, use a couple as login credentials:
- User: kali
- Password: kali
The problem with ARM devices without a screen may be that their IP address is not known, because in most local networks IP addresses are automatically assigned by the DHCP protocol. Typically, routers allow you to view a list of devices and their IP addresses. If you do not have such an opportunity, then IP can be found by scanning the network, for example, with the command:
sudo nmap -p 22 _gateway/24
Or by the command:
sudo nmap -sn _gateway/24
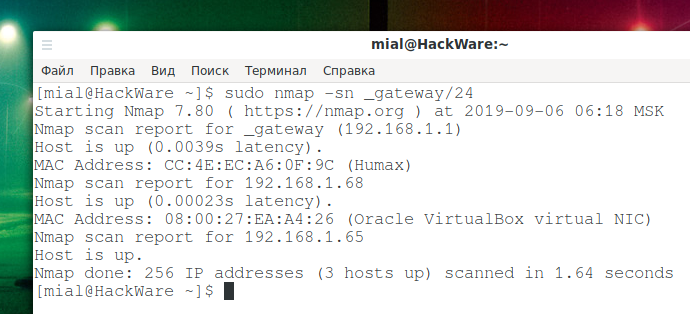
Instead of _gateway, the Linux operating system will substitute the IP address of your router, as a result, you will get _gateway/24, that is, your local network will be scanned, for example, 192.168.1.0/24. Or, explicitly specify the range for scanning.
SSH in Kali Linux on desktop computers
Kali Linux has already installed the SSH package, but its automatic launch is disabled (like all other network services). Therefore, to connect to Kali Linux via SSH, you need to start this service. If desired, it can be added to auto startup.
There are two options for starting the SSH service:
- ssh.service – SSH service will always be running
- ssh.socket – the system will open port 22 for listening and will wait for a connection to it. If connection happened, the system will start the SSH service. For the rest of the time (when there is no SSH connection), the SSH service will be stopped and will not consume system resources.
The second option is more preferred.
To start the SSH service on Kali Linux:
sudo systemctl start ssh.socket
To add a service to startup:
sudo systemctl enable ssh.socket
To check the status of a service:
systemctl status ssh.socket

How to connect to Kali Linux via SSH
The command to connect is as follows:
ssh REMOTE_ USER@IP_ADDRESS
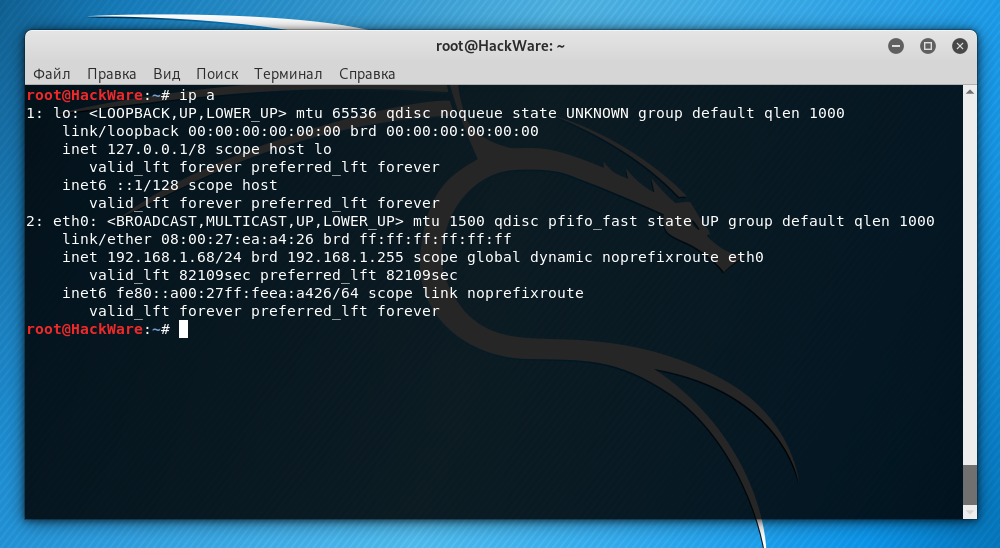
As the IP_ADDRESS of the remote system, you need to specify its IP. You can find out the IP address with the command:
ip a
By the way, in order for Kali Linux to always have the same IP address after rebooting, you need to configure a static IP, as described in the article “How to configure Kali Linux to use a static IP address”.
In this case, the Kali Linux IP address is 192.168.1.68. The default user is root. Then the command should be as follows:
ssh root@192.168.1.68
But the problem is that in SSH, by default, the authentication via password for the root user is blocked. There are two options to cope the problem:
- authentication via password for root
- configure authentication with keys
We will consider both of them, but I recommend the second option, as safer and more convenient.
Why SSH does not accept root password
SSH service configuration is performed in the /etc/ssh/sshd_config file. Let's open it:
gedit /etc/ssh/sshd_config
Find the line
#PermitRootLogin prohibit-password
and replace it with:
PermitRootLogin yes
Save and close the file.
You do NOT need to restart the SSH service, because when you select the ssh.socket option, this service is already stopped and will only be launched the next time you try to connect via SSH.
We connect:
ssh root@192.168.1.68
At the very first connection, the program will display a message:
Are you sure you want to continue connecting (yes/no/[fingerprint])?
We type: yes
Then enter the password and we find ourselves in Kali Linux:
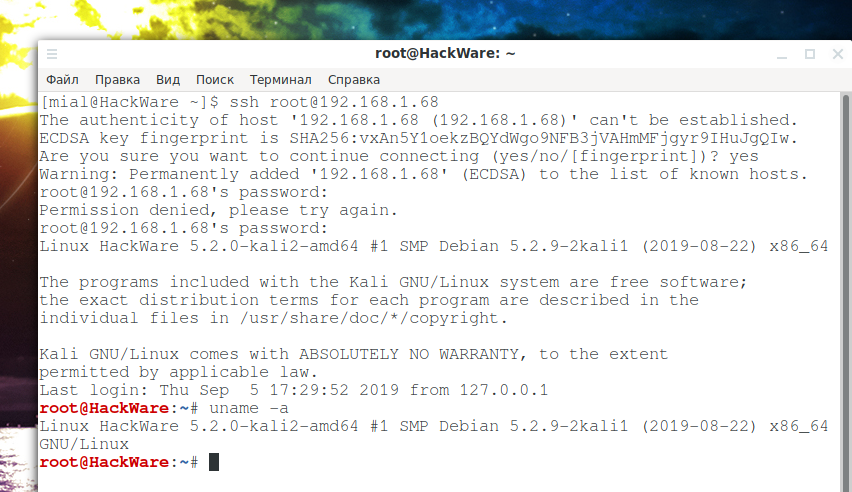
The fact that we are in a different system is indicated by the changed command line prompt – now there is the username and host name of the remote system.
How to configure key authentication in Kali Linux (SSH without password)
Disconnect from the remote machine. And on the local machine, execute the command:
ssh-keygen -t rsa
Again, without a preliminary connection, we execute the command on the remote machine (change the IP and username to yours):
ssh root@192.168.1.68 mkdir .ssh
Now we need to copy the contents of the id_rsa.pub file to the remote machine. It is very simple to do this (do not forget to change the data to your own):
cat .ssh/id_rsa.pub | ssh root@192.168.1.68 'cat >> .ssh/authorized_keys'
After that, we connect as usual, but the login will no longer require a password:
ssh root@192.168.1.68
Related articles:
- Configuring and starting network services on Kali Linux (Apache, MySQL, SSH, PostgreSQL, NetworkManager and Bluetooth) (59.6%)
- How to transfer files via SSH (55.5%)
- Introduction to IPv6 Addresses: How to Use and How to Explore the Network (Part 2) (55.5%)
- How to update Kali Linux (54.1%)
- How to replace Default Desktop Environment with Cinnamon in Kali Linux (54.1%)
- How to find usernames on social media using Sherlock (RANDOM - 4.1%)