How to create and configure a Squid proxy server
Table of contents
2. Should I choose Squid or 3proxy?
3. How to install Squid on Linux
4. How to install Squid on Windows
6. Configuring Squid as an HTTP Proxy on Linux. How to allow only certain IPs to connect to proxies
7. How to hide that a Squid proxy is in use
8. Configuring a connection to the Squid proxy server by login and password
8.1 How to configure HTTP Basic Authentication in Squid
8.2 How to configure HTTP Digest Authentication in Squid
9. How to disable caching in Squid
10. How to block sites on the Squid proxy server
12. How to configure Squid to use different IP addresses
13. How to make Squid use IPv4 instead of IPv6
14. How to add, change and remove HTTP headers in Squid
15. Frequently asked questions about setting up and using Squid. Squid configuration examples
15.1 How to configure your web browser (or Windows) to work through a proxy
15.2 How to allow access to certain sites by password
15.3 How to block specific keywords in URLs with Squid
15.4 Squid configuration for different users
15.5 How to launch Squid in foreground
15.6 How to block all destinations except one
15.7 How to allow only one address to access a specific URL
15.8 Why Squid recommends blocking some ports
15.9 How to see which IP addresses the Squid proxy is listening on
15.10 How to make Squid proxy listen on local port only
15.11 Why Squid Opens UDP Ports
15.12 How to set up caching in Squid proxy
15.13 Does Squid support SOCKS4 or SOCKS5
15.14 Directives from the minimum recommended configuration
15.15 How to configure Squid proxy to work with multiple users
15.16 Configuring Squid to Work with OpenVPN
15.17 How to edit the Access denied page in Squid? How to insert custom pictures and mail?
15.18 How to set Squid cache manager e-mail?
16. Possible errors and problems when using a proxy server
16.1 Error “The proxy server is refusing connections”
16.2 Squid can open websites over HTTP protocol, but cannot open HTTPS
Squid proxy server
In this manual, we will get acquainted with the basics of setting up Squid, that is, we will be able to set up our own proxy server on our server, we will learn how to configure the Squid proxy server to work with multiple IP addresses, we will configure various methods of client authentication, we will learn the nuances of Squid functioning that may have attitude towards anonymity.
A proxy server is a computer that is used as an intermediary between the client and other servers from which the client can request resources. A simple example of this:
- when a client makes online requests (for example, wants to open a web page), he first connects to the proxy server;
- the proxy then checks its local disk cache and if the data can be found there, it will return the data to the client
- and if they are not already cached, it will make a request on behalf of the client using the proxy IP address (different from the client's one), and then return the data to the client;
- the proxy server will try to cache new data and will use it for future requests to the same server.
See also: Proxy types, how to use proxy, how to check the quality of proxies
Web proxies have been around for quite some time and are used by millions of people around the world. They have a wide range of purposes, the most popular of which is online anonymity, but there are other ways to use web proxies as well. Here are some ideas:
- Online anonymity
- Enhancing online security
- Reduce loading times
- Block malicious traffic
- Keep track of your online activity
- To bypass regional restrictions
- May reduce bandwidth usage (network load) in some cases
- Restricting access to certain resources with flexible configuration options: introducing restrictions only for certain users, on a schedule, requiring authentication, and so on
Squid is the most popular web (HTTP) proxy server with caching and forwarding, its main application is hiding the IP address of users, as well as caching web pages from the web server to increase the speed of the web server, reduce the response time and reduce the use of network bandwidth.
The commands for installing Squid are different on different Linuxes, but the subsequent setup is the same across all distributions. In this tutorial, we will be using Squid as a non-cached HTTP/HTTPS proxy.
In this article, we will explain how to install squid proxy on Linux distributions and Windows and use it as HTTP/HTTPS proxy.
Should I choose Squid or 3proxy?
If such functionality as caching is not important for you, but it is important first of all to hide the IP address or make requests from multiple IP addresses, then the functionality of Squid and 3proxy is similar in this regard. 3proxy and was created as a replacement for Squid. In fact, this instruction was originally thought about 3proxy, but I was unable to start it: after spending a few fruitless hours, I gave up and stopped trying to start the service, which simply exits without outputting any messages to stderr, or to the system log, or in any file. Yes, I read manuals, read the official documentation on the site, even googled the instructions – it didn't work…
It worked out pretty quickly with Squid, so now you're reading about the Squid proxy server.
But 3proxy is also a popular proxy server and I will definitely deal with it and a separate article will be devoted to it. Something tells me that despite the abundance of documentation on the official website, I'm not the only one who needs a working and understandable instruction for working with 3proxy and setting it up))
How to install Squid on Linux
How to install Squid on Debian, Linux Mint, Ubuntu, Kali Linux
The Squid package is available for installation from the base repository of these distributions, but before doing so, be sure to update your package cache by running:
sudo apt update
After updating the package information, you can proceed with the squid installation:
sudo apt -y install squid
Installing Squid on Arch Linux, Manjaro and derivatives
Update the cache of information about the installation packages and install the package with the following command:
sudo pacman -Sy squid
Installing Squid on CentOS
Updating package information:
yum -y update
Installing a proxy server:
yum -y install squid
Launching and adding Squid to startup
The following commands are the same across all Linux distributions to run Squid.
To start the proxy server run:
sudo systemctl start squid
At this point, your Squid web proxy should already be running and you can check the status of the service with:
systemctl status squid
Output example:

To add the Squid service to startup, run the command:
sudo systemctl enable squid
Next, we will make changes to the proxy server configuration file, for them to take effect, run:
sudo systemctl restart squid
To stop and remove the proxy server service from startup, use the commands:
sudo systemctl stop squid
sudo systemctl disable squid
How to install Squid on Windows
Squid can be compiled and run on Windows as a system service using the Cygwin emulation environment, or it can be compiled in Windows native mode using the MinGW + MSYS development environment. Windows NT 4 SP4 and later are supported.
Known Limitations
- Squid features that don't work on Windows:
- DISKD: still needs to be ported
- Transparent proxy: missing non-commercial intercept driver for Windows
- WCCP: These features have not been ported. Without transparent proxy support, this is not necessary.
- SMP support: Windows equivalent of UDS sockets is not implemented
- Certain sections of code can make blocking calls.
- Some external helpers may not work.
- The number of file descriptors is strictly limited to 2048 when building with MinGW.
- Squid-3.x of all official releases has serious build problems.
Squid prebuilt binaries for Windows
This is the easiest way to get Squid on Windows: open source project https://github.com/diladele/squid-windows provides Windows MSI installer files for Squid Proxy Server. It makes it possible to install Squid in just a few clicks. The current build is based on the latest Squid 4.14 build for Cygwin under Windows 64 bit.
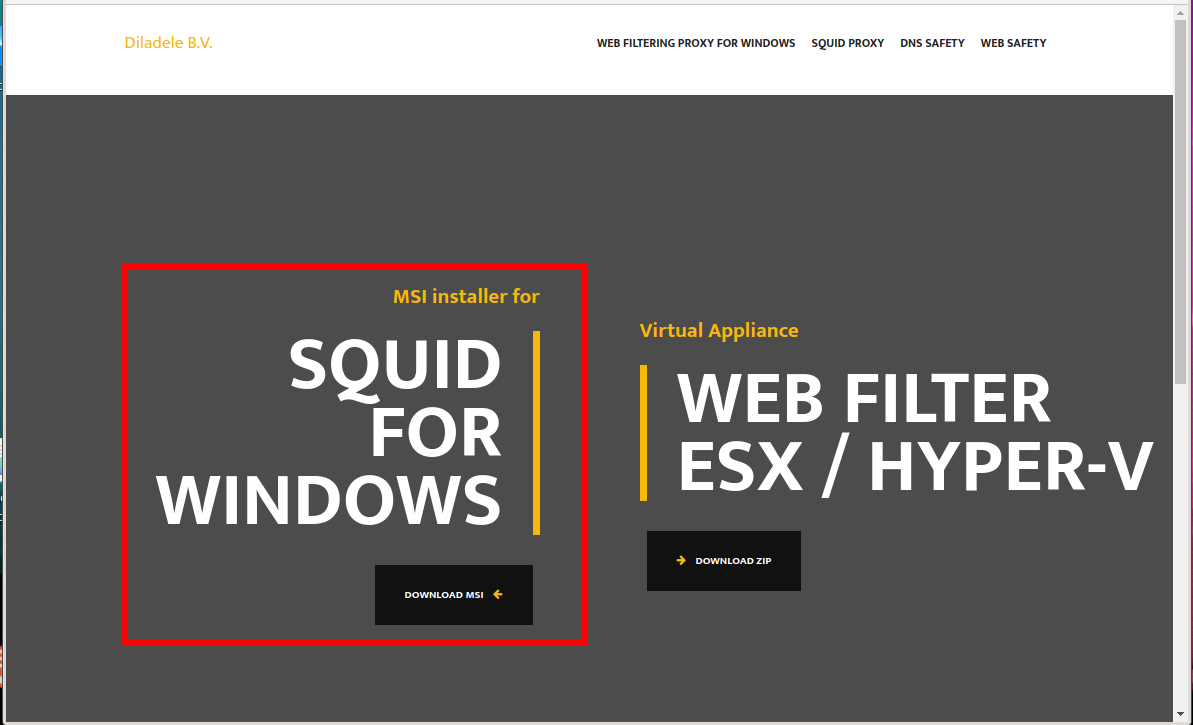
To download the installer, go to the website: https://squid.diladele.com/ and click the link “MSI installer for SQUID FOR WINDOWS”.
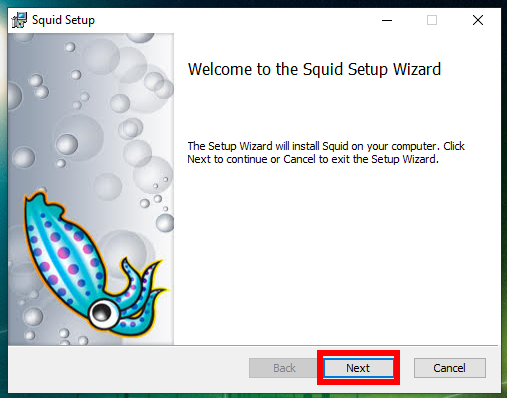
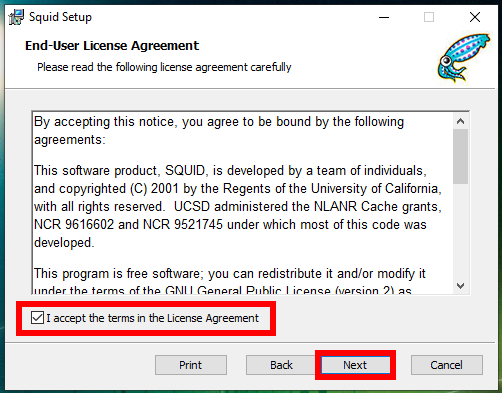
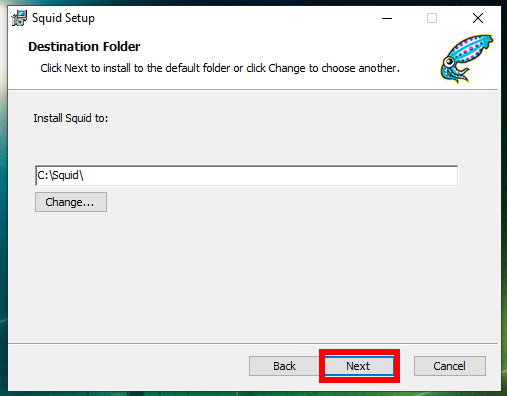
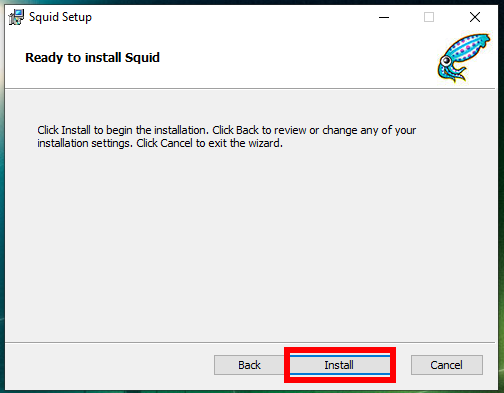
Run the downloaded file with a double click and follow the prompts of the installer.
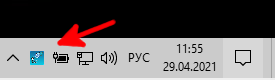
Immediately after the installer completes, an icon will appear next to the clock to control the Squid service:
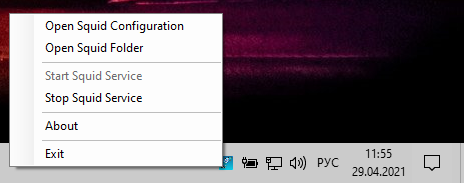
When you click on it, the following options will be available:
- Open Squid Configuration
- Open Squid Folder
- Start Squid Service
- Stop Squid Service
- About
- Exit
The path to the configuration file in Windows: C:\Squid\etc\squid\squid.conf. Keep this in mind, as all subsequent sections will show the setup using a Linux example.
For the changes made in the configuration file to take effect, you need to restart the Squid service, to do this, stop and start it again.
The Squid service will automatically start when the computer is turned on, and for the icon to appear in the tray for managing Squid, you need to run the file C:\Squid\bin\Diladele.Squid.Tray.exe.
In the config file you can see paths like this: “/cygdrive/d/squid/cache”. To understand them, see How to access disks in Cygwin. In this case /cygdrive/d/squid/cache is D:\squid\cache.
There will also be paths like this: /var/cache/squid – these are all directories inside the C:\Squid folder. That is, for example, /var/cache/squid is actually C:\Squid\var\cache\squid\.
To check if the Squid service is actually listening on a port to connect, you can do the following:
1. Press Win+x and select “Windows PowerShell (admin)” in the menu that opens.
2. Run the commands in sequence:
cmd
for /f "tokens=1,2,3,4,5*" %i in ('netstat -aon ^| findstr ":3128" ^| findstr /i listening') do echo %j %l & @tasklist | findstr %m
You will verify that Squid is indeed listening on port 3128.

Remember that if you are using a firewall, then you need to open the port that the proxy service is listening on, if you have not changed it, then by default it is 3128.
The following steps are shown using Linux as an example, since Squid is much more common on Linux, not Windows. However, you Windows users can use the following information to configure Squid on Windows. But you need to keep in mind the following nuances:
1. When the command to open a file is given, you must open your configuration file, the path to which is given just above.
2. When it is said that you need to restart the service and the command is given for this, you need to open the assistant in the tray and stop, and then start the service there.
If you are an advanced user, you can manage the service from the command line (open with administrator rights):
net stop squidsrv
net start squidsrv
See also: How to manage services on Windows
To control the autostart of a service, see the article “How to disable autostart of programs and services in Windows”.
3. Most likely (I did not check) you will not be able to configure authorization by login and password on the proxy server, since many (or all) helpers do not work in Windows.
4. In the configuration file, the paths to the files in Linux and Windows may be the same, since Cygwin emulates the Linux working environment, but double-check.
Squid config file
Below are some important Squid file locations that you should be aware of:
- Squid config file: /etc/squid/squid.conf
- Squid access log: /var/log/squid/access.log
- Squid cache log: /var/log/squid/cache.log
By default, the Squid configuration file is not empty – its contents differ depending on the Linux distribution and in any case there are quite a few directives with settings in it. Do not rush to delete them – the Squid proxy server is designed in such a way that if the connection is not explicitly allowed in its settings, then it rejects all connections.
On Debian-based distributions (Kali Linux, Linux Mint, Ubuntu), the /etc/squid/squid.conf file contains complete documentation (8500 lines), including settings interspersed – uncommented lines start after 1200+ lines). On Arch Linux based distributions, the /etc/squid/squid.conf file contains only the recommended minimum configuration, which is shown below.
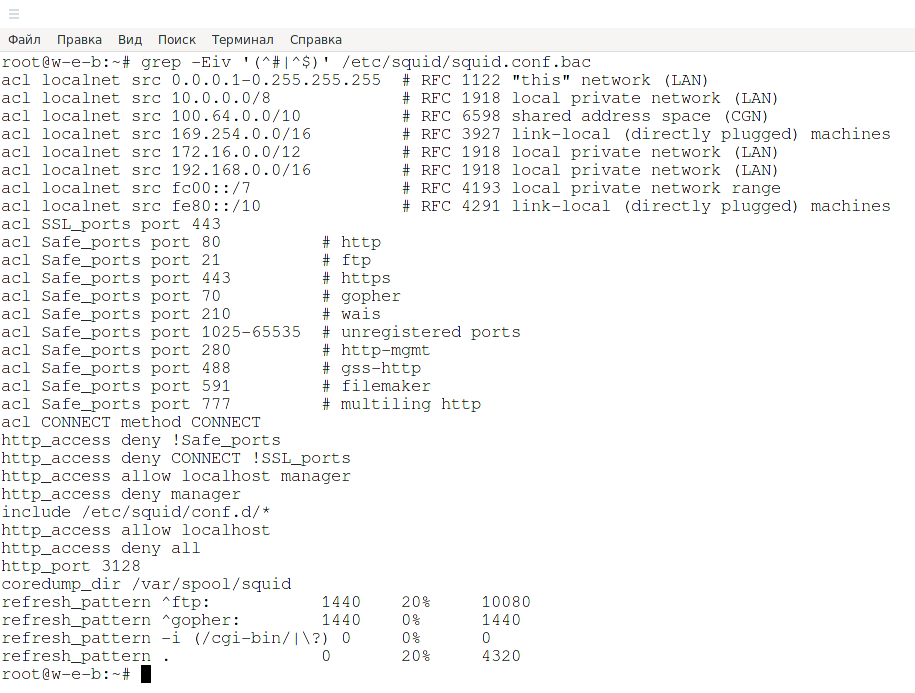
You can see which directives are enabled by default in Debian with the following command:
grep -Eiv '(^#|^$)' /etc/squid/squid.conf
Let's take a brief look at the contents of the configuration file by its comments.
#
# Recommended minimum configuration:
#

# Example rule allowing access from your local networks.
# Adapt to list your (internal) IP networks from where browsing
# should be allowed
acl localnet src 0.0.0.1-0.255.255.255	# RFC 1122 "this" network (LAN)
acl localnet src 10.0.0.0/8		# RFC 1918 local private network (LAN)
acl localnet src 100.64.0.0/10		# RFC 6598 shared address space (CGN)
acl localnet src 169.254.0.0/16 	# RFC 3927 link-local (directly plugged) machines
acl localnet src 172.16.0.0/12		# RFC 1918 local private network (LAN)
acl localnet src 192.168.0.0/16		# RFC 1918 local private network (LAN)
acl localnet src fc00::/7       	# RFC 4193 local private network range
acl localnet src fe80::/10      	# RFC 4291 link-local (directly plugged) machines

# So in the previous section we created an access rule called localnet.

# Create another rule named SSL_ports and SSL_ports and list the ports in it
acl SSL_ports port 443
acl Safe_ports port 80		# http
acl Safe_ports port 21		# ftp
acl Safe_ports port 443		# https
acl Safe_ports port 70		# gopher
acl Safe_ports port 210		# wais
acl Safe_ports port 1025-65535	# unregistered ports
acl Safe_ports port 280		# http-mgmt
acl Safe_ports port 488		# gss-http
acl Safe_ports port 591		# filemaker
acl Safe_ports port 777		# multiling http
acl CONNECT method CONNECT

#
# Recommended minimum Access Permission configuration:
#
# Deny requests to certain unsafe ports
http_access deny !Safe_ports

# Deny CONNECT to other than secure SSL ports
http_access deny CONNECT !SSL_ports

# Only allow cachemgr access from localhost
http_access allow localhost manager
http_access deny manager

# We strongly recommend the following be uncommented to protect innocent
# web applications running on the proxy server who think the only
# one who can access services on "localhost" is a local user
#http_access deny to_localhost

#
# INSERT YOUR OWN RULE(S) HERE TO ALLOW ACCESS FROM YOUR CLIENTS
#

# Example rule allowing access from your local networks.
# Adapt localnet in the ACL section to list your (internal) IP networks
# from where browsing should be allowed
# Next, we configure access, allowing it to everyone who is listed in the rule named localnet, as well as localhost (local host):
http_access allow localnet
http_access allow localhost

# And finally deny all other access to this proxy
http_access deny all

# Squid normally listens to port 3128
http_port 3128

# Uncomment and adjust the following to add a disk cache directory.
#cache_dir ufs /var/cache/squid 100 16 256

# Leave coredumps in the first cache dir
coredump_dir /var/cache/squid

#
# Add any of your own refresh_pattern entries above these.
#
refresh_pattern ^ftp:		1440	20%	10080
refresh_pattern ^gopher:	1440	0%	1440
refresh_pattern -i (/cgi-bin/|\?) 0	0%	0
refresh_pattern .		0	20%	4320
IMHO, it is more convenient to do the setup from scratch, especially if you have the entire documentation in this file. Therefore, we will make a backup copy of the configuration file:
mv /etc/squid/squid.conf /etc/squid/squid.conf.bac
And in the future, we will write configuration directives to a new empty file.
Configuring Squid as an HTTP Proxy on Linux. How to allow only certain IPs to connect to proxies
Let's take a look at how to configure squid as an HTTP proxy using only the client's IP address for authentication. That is, we will not yet set a login and password for accessing the proxy server, but we will deny access to it for everyone except the specified IP address.
Adding a Squid ACL
If you want to allow only one IP address to access the Internet through your new proxy, you will need to set a new acl (access control list) in the configuration file. More details about ACL will be given later.
sudo vim /etc/squid/squid.conf
You should add the following acl rule:
acl localnet src XX.XX.XX.XX
http_access allow localnet
http_port ПОРТ
Where:
- XX.XX.XX.XX – IP-address of the client machine for which the connection is allowed. This ACL should be added to the beginning of the ACL section as shown in the following screenshot
- PORT – the port to which the client machine will connect
- the name “localnet” is used only because the default configuration already contains this list and the “allow” rule is already set for it. In fact, you can choose any other name that will reflect the contents of the list, for example “allowed_hosts”
You may have seen examples of acl rules above.
It is always recommended to leave a comment next to the ACL that will describe, for example, who is using this IP address.
acl localnet src 192.168.0.102 # boss IP address
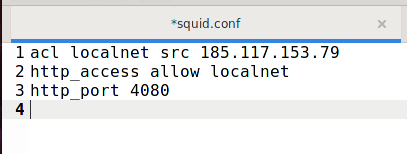
An example of a minimal configuration, when connection to the proxy server is allowed only from the IP address 185.117.153.79, 4080 is used as the proxy server port:
acl localnet src 185.117.153.79
http_access allow localnet
http_port 4080
You will need to restart the Squid service for the new changes to take effect.
sudo systemctl restart squid
Let's check the connection to the proxy server using a web browser.
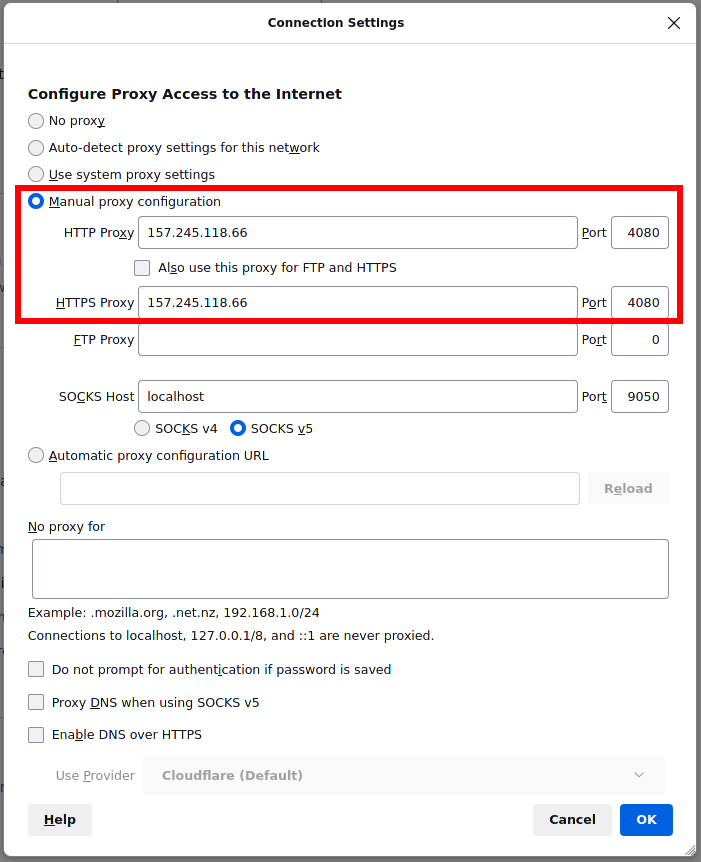
The first attempt was made to connect NOT from 185.117.153.79 (the only allowed IP address):
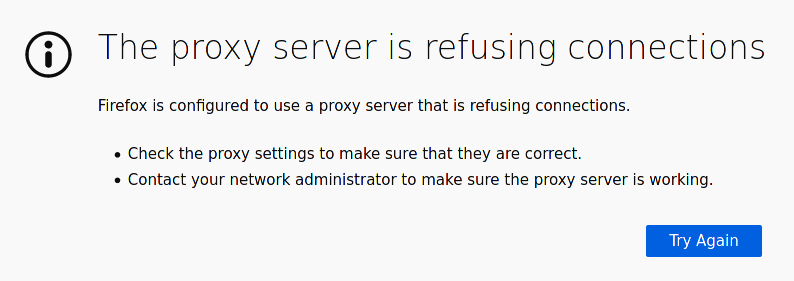
We got the expected error:
The proxy server is refusing connections

Firefox is configured to use a proxy server that is refusing connections.

    Check the proxy settings to make sure that they are correct.
    Contact your network administrator to make sure the proxy server is working.
After I changed my IP address to 185.117.153.79 (the only allowed IP address), the connection went fine.
Let's look at the proxy server connection log:
cat /var/log/squid/access.log
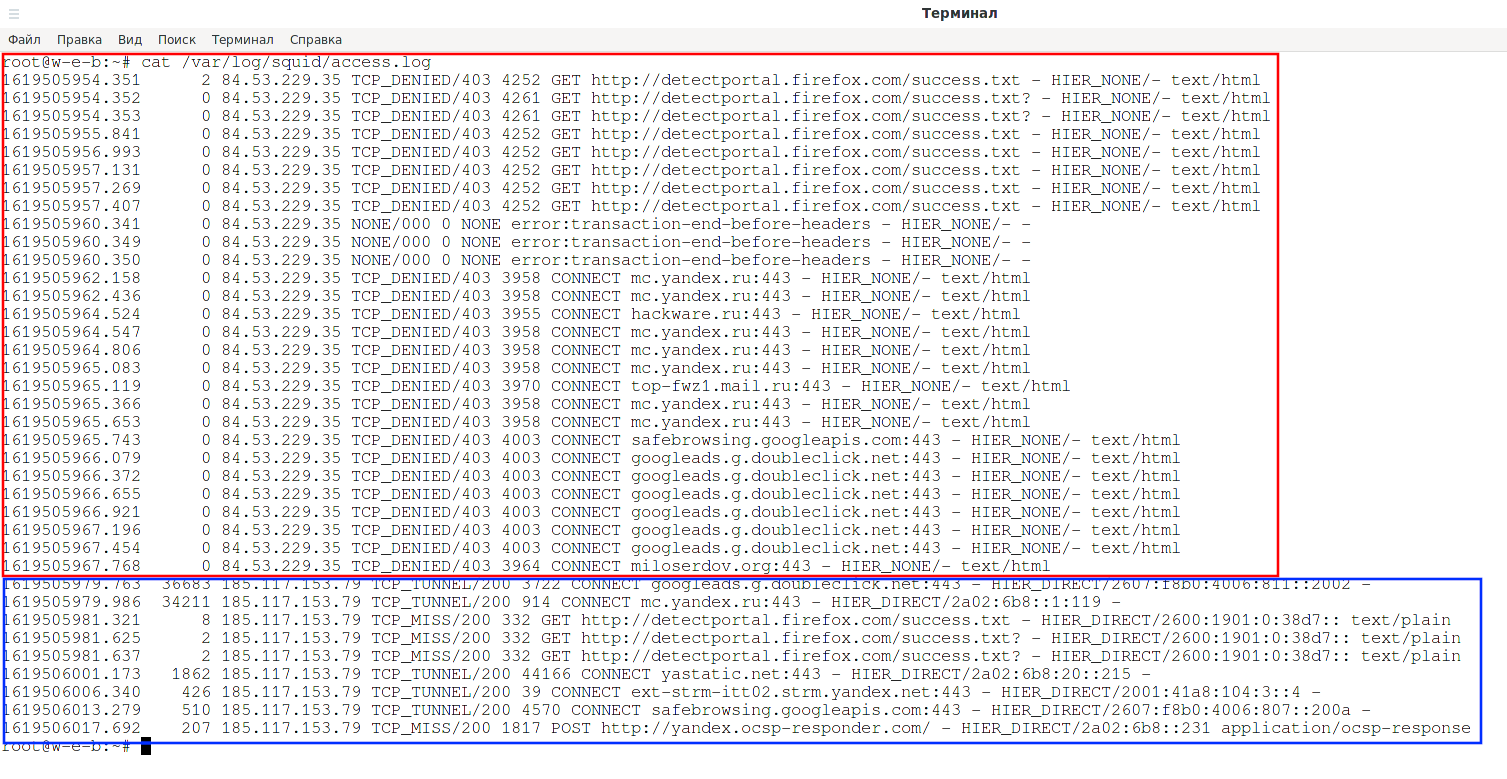
As you can see, all requests from the IP address 84.53.229.35 have the status “TCP_DENIED/403”, that is, denied. And requests from the allowed IP address 185.117.153.79 have the status “TCP_TUNNEL/200” and “TCP_MISS/200”.
Let's look at my IP: https://suip.biz/?act=myip

Shown is the IPv6 address of my proxy server.
How to hide that a Squid proxy is in use
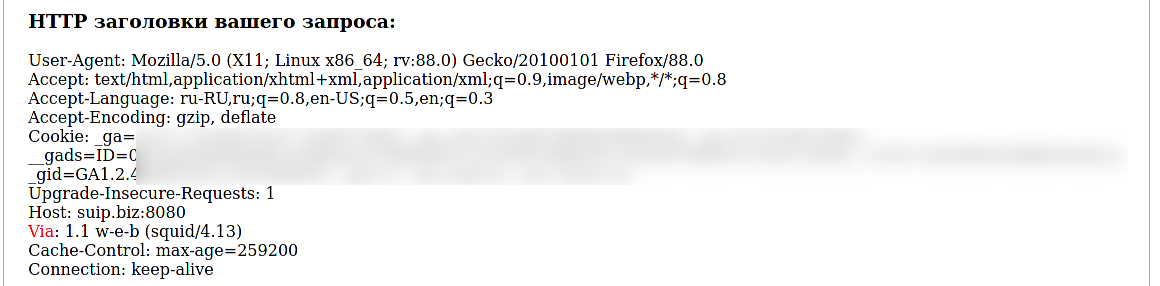
Let's go to the proxy server detection service: http://suip.biz:8080/?act=proxy-checker
And the proxy was successfully detected, the HTTP header revealed me:
Via: 1.1 w-e-b (squid/4.13)
RFC2616 requires proxies to add this header to the request and response. Squid Proxy can be compiled to violate HTTP standards. Previously, this required compiling with the --enable-http-violations option, but now support for violations of standards is enabled by default (to disable it, you need to compile with the --disable-http-violations option). You can add the following directive to the configuration file, as a result of which the HTTP Via header will not be added:
via off
The X-Forwarded-For header is not required by the standards and is disabled by default, however, to be sure you can disable it explicitly:
forwarded_for off
The forwarded_for tag can have one of the following values:
- on
- off
- transparent
- truncate
- delete
If set to “on”, Squid will add your client's IP address to the HTTP requests it forwards. By default, it looks like this:
X-Forwarded-For: 192.1.2.3
If set to “off”, It will display as
X-Forwarded-For: unknown
If set to “transparent”, Squid will not change the X-Forwarded-For header in any way.
If set to “delete”, Squid will remove the entire X-Forwarded-For header.
If set to “truncate”, Squid will remove any existing X-Forwarded-For entries and place the client's IP address as the only entry.
After adding “via off” and restarting the proxy server, this HTTP header disappeared.
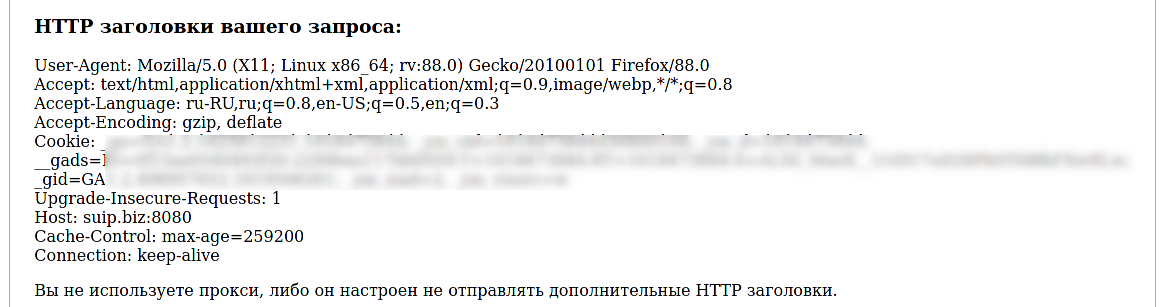
But it was not possible to outwit the services for finding leaks:

They were able to determine that a proxy was being used based on the following criteria:
- Open web proxy ports
- Difference in time zones (browser and IP)
- Belonging to an IP hosting provider
- Tunnel detection (two-way ping)
But they could not find out the real IP of the user behind the proxy.
Please note that the proxy server can perform any manipulations with traffic, including with HTTP headers, only if the website is running on the HTTP protocol, when using the HTTPS protocol, any changes in the transmitted data are impossible, since the traffic is encrypted. That is, when accessing sites on the HTTPS protocol, the Via header is not added in any case.
Configuring a connection to the Squid proxy server by login and password
How to configure HTTP Basic Authentication in Squid
To allow users to authenticate before using the proxy, you need to enable basic HTTP authentication in the config file, but before that you need to install the package containing the htpasswd utility.
On Debian and derivatives, this is the apache2-utils package, use the following command to install it.
sudo apt install apache2-utils
On Arch Linux and derivatives, this utility is contained in the apache package:
sudo pacman -S apache
On CentOS, the package you need is called httpd-tools, install it:
yum -y install httpd-tools
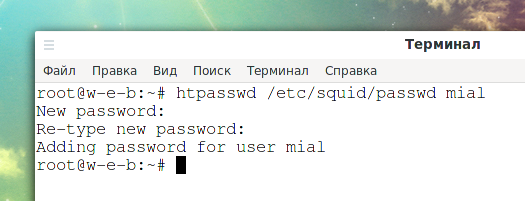
Now we will create an entry for a user named “mial” and set his password.
sudo htpasswd -c /etc/squid/passwd mial
Output:
New password:
Re-type new password:
Adding password for user mial
The -c option in the previous command is needed to create a new file (or overwrite the existing one), if you want to modify the file (change the password for one of the users or create a new entry for another user), run the command without this option:
sudo htpasswd /etc/squid/passwd USER
Now, to enable HTTP Basic Authentication, open the config file.
sudo vim /etc/squid/squid.conf
You can combine IP address and password authentication, or you can configure password authentication allowing access from any IP, I choose the second option, that is, anyone, knowing the password, can use a proxy server. Therefore, I remove the lines from the config file:
acl localnet src 185.117.153.79
http_access allow localnet
After the ACLs (if any) add the following lines:
auth_param basic program /usr/lib64/squid/basic_ncsa_auth /etc/squid/passwd
auth_param basic children 5
auth_param basic credentialsttl 2 hours
auth_param basic casesensitive on
auth_param basic realm Squid proxy for HackWare.ru
acl auth_users proxy_auth REQUIRED
http_access allow auth_users
A few clarifications on these directives:
- We need to tell Squid which auth helper to use with the auth_param directive by specifying the program name (most likely /usr/lib/squid/ncsa_auth or /usr/lib64/squid/basic_nsca_auth), as well as any command line options if needed (in this case /etc/squid/passwd).
- The /etc/squid/passwd file is created using htpasswd, a tool for managing basic authentication via files. This will allow us to add a list of usernames (and their corresponding passwords) that will be allowed to use Squid.
- credentialsttl 2 hours means that the user will need to enter a password every two hours (you can also specify this time interval in minutes using the word “minutes”).
- casesensitive on indicates that usernames and passwords are case sensitive.
- realm is the text of the authentication dialog that will be shown to the user in the squid authentication window.
- children 5 defines the maximum number of authenticator processes to start. If you run too few of them with Squid, other users will have to wait for their turn to authenticate, which will slow down the process. When password checking is done over a (slow) network, you will probably need a lot of authentication processes. On the other hand, limiting the number of simultaneous login and password checks will greatly slow down brute force (password cracking) for your proxy server
- Finally, proxy access is only granted upon successful authentication (proxy_auth REQUIRED).
Please note that the path to the basic_ncsa_auth file may differ slightly on different Linux distributions:
- /usr/lib64/squid/basic_ncsa_auth (Arch Linux, CentOS)
- /usr/lib/squid/basic_ncsa_auth (Debian, Linux Mint, Ubuntu, Kali Linux)
On some systems the file is located in both directories (Arch Linux).
You can check where exactly the file is located on your system:
ls -l /usr/lib64/squid/basic_ncsa_auth
ls -l /usr/lib/squid/basic_ncsa_auth
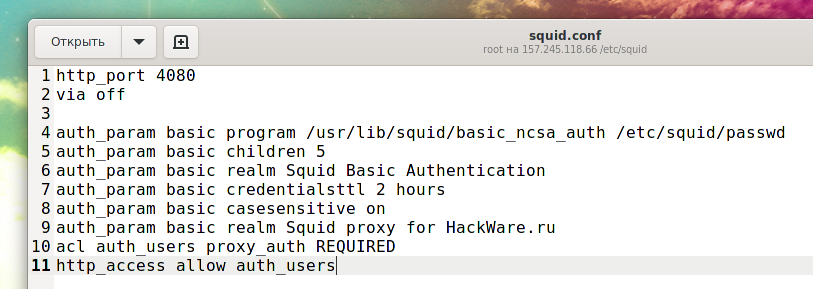
On the server that I configure the path to the file is /usr/lib/squid/basic_ncsa_auth and the proxy server uses port 4080, then the configuration is as follows:
http_port 4080
via off

auth_param basic program /usr/lib/squid/basic_ncsa_auth /etc/squid/passwd
auth_param basic children 5
auth_param basic realm Squid Basic Authentication
auth_param basic credentialsttl 2 hours
auth_param basic casesensitive on
auth_param basic realm Squid proxy for HackWare.ru
acl auth_users proxy_auth REQUIRED
http_access allow auth_users
Save the file and restart squid for the new changes to take effect:
sudo systemctl restart squid
Let's try to open a website in a web browser using our proxy:
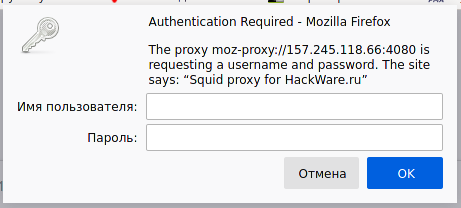
After entering the username and password, we can browse sites through a proxy.

Let's see the log /var/log/squid/access.log:
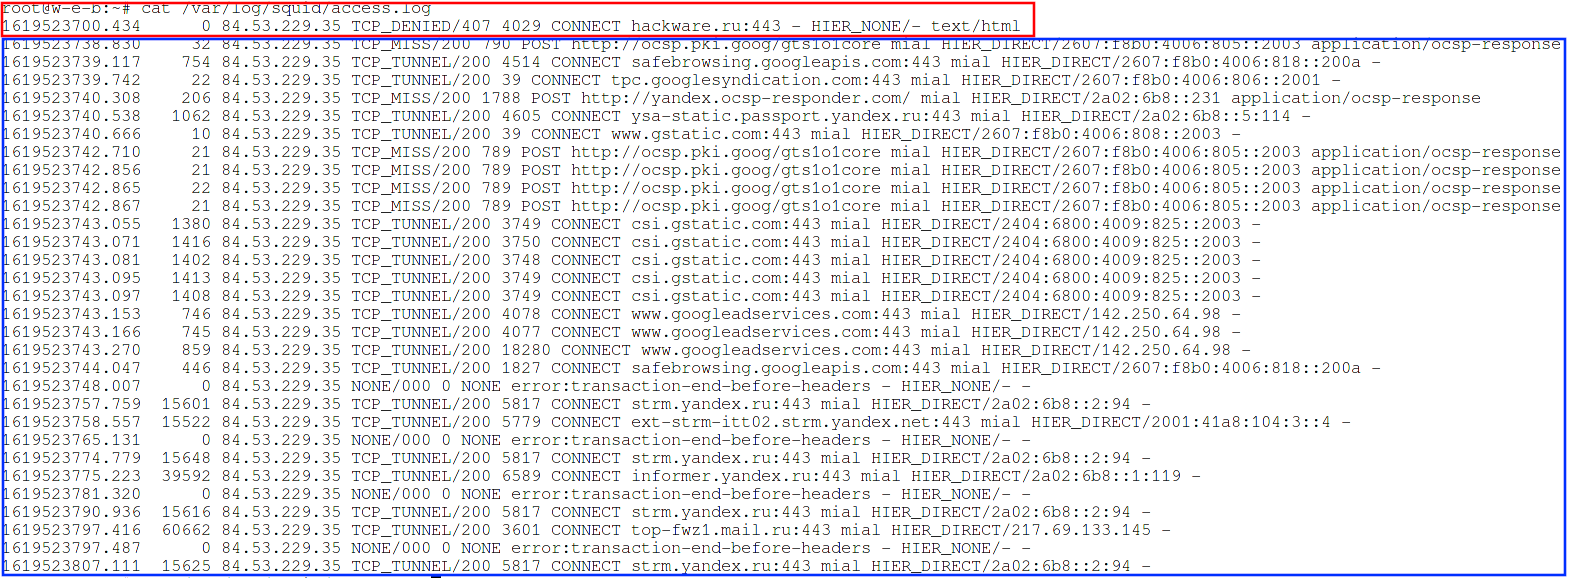
You can see that at first the status is TCP_DENIED, that is, the request is denied, but after entering the login and password, the proxy began to accept requests. Also note that requests are now accepted regardless of the user's IP address.
How to configure HTTP Digest Authentication in Squid
Basic authentication is bad because the password is actually transmitted in plain text (encoded in Base64). See the article “How to hack HTTP Basic and Digest Authentication” for details.
Therefore, it is preferable to use Digest authentication on the Squid proxy server.
Let's start by creating a file with a password hash, this is done with a command like:
sudo htdigest -c /etc/squid/passwd_digest REALM USER
REALM is a field of application. Any string can be used as a REALM, but remember that this same string will subsequently be shown in the form for entering a username and password.
An example of a command that creates a file with a password hash for the mial user:
sudo htdigest -c /etc/squid/passwd_digest 'Squid proxy for HackWare.ru' mial
Example configuration file for HTTP Digest authentication in Squid:
http_port 4080
via off
cache deny all

auth_param digest program /usr/lib/squid/digest_file_auth -c /etc/squid/passwd_digest
auth_param digest children 5
auth_param digest credentialsttl 2 hours
auth_param digest casesensitive on
auth_param digest realm Squid proxy for HackWare.ru
acl auth_users proxy_auth REQUIRED

http_access allow auth_users
http_access deny all
Pay attention to the line “auth_param digest realm Squid proxy for HackWare.ru”, in it, instead of “Squid proxy for HackWare.ru”, enter the same line that you specified when using the htdigest command.
For an explanation of the directives, see the section “Configuring HTTP Basic Authentication in Squid” above.
Note that not only has the helper program (digest_file_auth) been changed, but also the -c option is used after it, followed by the path to the file with the user's password hash. All other directives are similar to HTTP Basic authentication, except that the word “basic” is replaced with the word “digest”.
How to disable caching in Squid
Caching is a useful technology, the advantages of which are described above. But if you are using a proxy server to change your IP address, then in most cases caching is not required. But at the same time, the cache consumes server resources – RAM and disk space.
If you want to disable caching in Squid, add the following directive:
cache deny all
How to block sites on the Squid proxy server
To block access to unwanted websites, first create a file named “blacklisted_sites.acl”, which will store the blacklisted sites.
sudo vim /etc/squid/blacklisted_sites.acl
Now add the websites you want to block access, for example:
.badsite1.com
.badsite2.com
The starting point tells squid to block all URLs for these sites, including the subdomains www.badsite1, subsite.badsite1.com, and so on.
Now open the Squid config file.
sudo vim /etc/squid/squid.conf
And add the following lines to it:
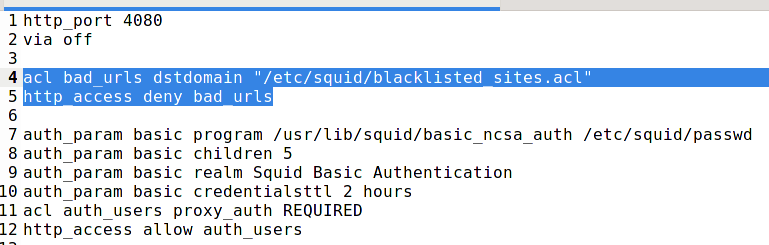
acl bad_urls dstdomain "/etc/squid/blacklisted_sites.acl"
http_access deny bad_urls
The order of http_access is very important – if your configuration file contains the directive described above to enable authentication on the proxy server by password (“http_access allow auth_users”), then domain blocking must go before it, otherwise it will not work:
Now save the file and restart squid:
sudo systemctl restart squid
This blocking works for sites using the HTTP protocol, as well as for sites using the HTTPS protocol. But depending on the protocol used, the error message will be different. For HTTP sites, there will be a clear message:
ERROR
The requested URL could not be retrieved
You can also configure your own error messages for HTTP sites, including for each site separately.
For sites on HTTPS, there will be the error “The proxy server is refusing connections”. The difference is due to the fact that the HTTP protocol allows you to interfere with the transmitted traffic and completely change the page of the site, in this case showing an error. As for HTTPS, the proxy server cannot modify the transmitted data in any way, but it can still block the request from the user at the stage of name resolution (DNS query) or at the stage of SSL/TLS handshake, when the requested domain is transmitted in the plaintext. Therefore, the proxy has no other measures than to interrupt the connection.
In addition to dstdomain, there are also such ACL types as dstdom_regex (domains by regular expressions), url_regex (search for a match by regular expressions in a full URL), urlpath_regex (search for a match by regular expressions in a URL path) and some others. They are discussed in more detail in the program card: https://en.kali.tools/?p=1385
How Squid ACL works
Squid ACL Basics
Let's now dwell on how exactly ACLs work.
The Squid web proxy access control scheme consists of two different components:
- ACL entries are directive strings that begin with the word “acl” and represent the types of tests that are performed on any request transaction.
- Access list rules consist of an allow or deny action followed by a series of ACL entries and are used to specify which action or restriction should be applied to a given request. They are checked in order, and the list search stops as soon as one of the rules matches. If a rule has multiple ACL entries, it is implemented as a logical AND operation (all ACL entries of the rule must be met for the rule to be considered a match).
Acl syntax:
acl NAME TYPE DEFINITION1 DEFINITION2 DEFINITION3 ...
Examples:
acl localnet src 192.168.0.102
acl Safe_ports port 80
acl accesses_to_google dstdomain .google.com
acl accesses_to_search_engines dstdomain .yahoo.com .google.com .vivisimo.com
acl accesses_from_marketing_department src 10.52.0.0/16
acl need_to_authenticate proxy_auth
You can also use definition lists, which are stored in files on your hard drive. Let's say you have a list of search engine URLs that you want to allow:
cat /etc/squid/search-engines-urls.txt:
.google.com
.bing.com
.yandex.ru
.duckduckgo.com
.yahoo.com
Then the ACL for this file will look like this:
acl accessess_to_search_engines dstdomain "/etc/squid/search-engines-urls.txt"
The quotes are needed here to tell Squid to look for definitions in this file.
In addition to the already mentioned types src, port, dstdomain, proxy_auth, there are dozens of other types, for example:
- localip
- localport
- proto
- method
- url_regex
- arp
- browser
- http_status
- req_header
- rep_mime_type
- time
- referer_regex
For a complete list, see the squid documentation.
By themselves, acl elements do not change anything in the behavior of the proxy server, they are only lists for further use with Access List Rules. As the documentation quirky says, these tests themselves do nothing, for example, the word “Sunday” corresponds to the day of the week, but does not indicate what day of the week you are reading it.
Using ACL: http_access
If you only wrote down ACLs, then nothing is actually blocked – these are just definitions. ACLs can be used in various places in your squid.conf. The most useful function they can be paired with is the http_access instruction. It works in a similar way to how a firewall handles rules. For every request that Squid receives, it will look through all http_access statements in order until it finds a matching string. It then either accepts or rejects the request depending on your settings. The rest of the rules following the triggered one are ignored.
The general syntax for http_access is as follows:
http_access (allow|deny) acl1 acl2 acl3 ...
Examples:
http_access allow localnet
http_access allow localhost
http_access deny !Safe_ports
http_access deny all
http_access allow auth_users
http_access allow all
The next set will allow admin access (no matter what this ACL looks like; the src ACL probably points to the subnet on which the administrator workstations are located). For everyone else, it will deny access to porn urls. The third rule will allow everyone to access the websites at lunchtime (except for porn sites). And finally, in all other cases, there will be a ban on connecting to the Internet.
http_access allow accesses_from_admins
http_access deny accesses_to_porn_urls
http_access allow accesses_during_lunchtime
http_access deny all
That is, administrators have access to all sites (even porn) at any time, while other users have access to the network only during lunchtime.
Combining ACLs (AND/OR)
You often need to combine ACLs. Let's say you want to allow only back office access to google.com. To do this, you need to combine two ACLs using a logical AND. It would look like this:
http_access allow accesses_to_google.com accesses_from_back_office
If you want to use OR and say that either access from back office or access to google.com is allowed, the rule would look like this:
http_access allow accesses_to_google.com
http_access allow accesses_from_back_office
To summarize: for AND, you need to place conditions on one line. OR requires separate lines.
The following set of rules is wrong, it will never work:
acl ME src 10.0.0.1
acl YOU src 10.0.0.2
http_access allow ME YOU
To allow access through a proxy to IP addresses 10.0.0.1 and 10.0.0.2, the rule must be written as follows:
acl ME src 10.0.0.1
acl YOU src 10.0.0.2
http_access allow ME
http_access allow YOU
Other access list rules
Besides http_access, there are a couple of dozen other types, for example:
- http_reply_access
- icp_access
- miss_access
- cache
- url_rewrite_access
Full list in the documentation: http://www.squid-cache.org/Doc/config/
Default http_access rule
If there are no lines with “http_access” in the entire configuration file, the request is rejected by default.
If none of the “http_access” lines match, the default is the opposite of the last line in the list. If the last line was deny, the default is allow. Conversely, if the last line is allow, deny will be applied by default. Tricky, right? For these reasons, it is recommended that you have a “deny all” entry at the end of your access lists to avoid possible confusion. That is, after all the rules, just add the line:
http_access deny all
So, back to our combination of rules “blocking sites + authorization on a proxy server”, why is the following set incorrect?
http_port 4080
via off

auth_param basic program /usr/lib/squid/basic_ncsa_auth /etc/squid/passwd
auth_param basic children 5
auth_param basic realm Squid Basic Authentication
auth_param basic credentialsttl 2 hours
auth_param basic casesensitive on
auth_param basic realm Squid proxy for HackWare.ru
acl auth_users proxy_auth REQUIRED
http_access allow auth_users

acl bad_urls dstdomain "/etc/squid/blacklisted_sites.acl"
http_access deny bad_urls
The fact is that first the rule that requires authorization on the server is triggered, namely “http_access allow auth_users”. All subsequent http_access directives are simply skipped, so sites are not blocked.
Consider the following example:
http_port 4080
via off

# Site blocking here
acl bad_urls dstdomain "/etc/squid/blacklisted_sites.acl"
http_access deny bad_urls

auth_param basic program /usr/lib/squid/basic_ncsa_auth /etc/squid/passwd
auth_param basic children 5
auth_param basic realm Squid Basic Authentication
auth_param basic credentialsttl 2 hours
auth_param basic casesensitive on
auth_param basic realm Squid proxy for HackWare.ru
acl auth_users proxy_auth REQUIRED
http_access allow auth_users
The site-blocking directive moved up is the first to fire. Moreover, this happens even before authorization on the proxy.
Another variant:
http_port 4080
via off

auth_param basic program /usr/lib/squid/basic_ncsa_auth /etc/squid/passwd
auth_param basic children 5
auth_param basic realm Squid Basic Authentication
auth_param basic credentialsttl 2 hours
auth_param basic casesensitive on
auth_param basic realm Squid proxy for HackWare.ru
acl auth_users proxy_auth REQUIRED

acl bad_urls dstdomain "/etc/squid/blacklisted_sites.acl"

http_access allow auth_users !bad_urls
In this case, the rule is triggered if two conditions are met: authentication and the site is not included in the blocked list. An exclamation point means logical NOT. The last option is the best, it is logically more understandable and it performs any actions (blocking the site) only after the user has entered the proxy server login and password.
How to configure Squid to use different IP addresses
Suppose the server has several IP addresses – on the same interface or on different ones – it doesn't matter.
Objective: make Squid use different external IP addresses depending on which port of the proxy server is being accessed.
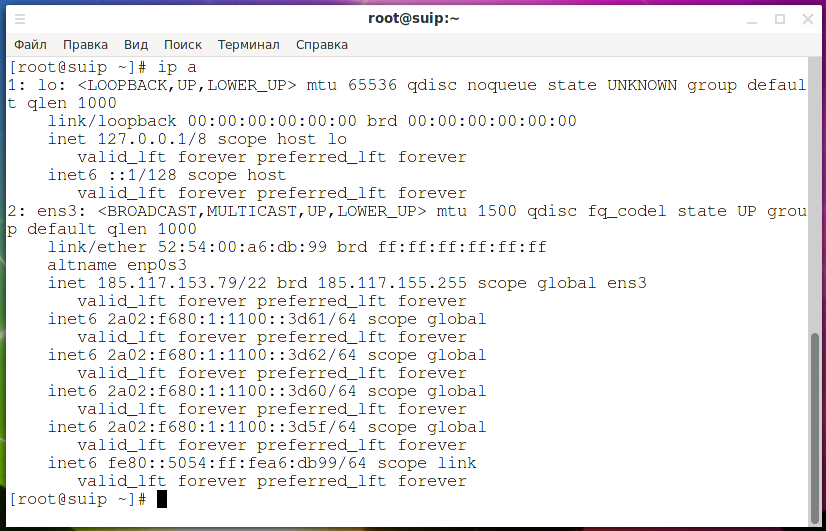
So, as you can see, my test server has 5 IP addresses, 1 IPv4 address and 4 IPv6 addresses:
- 185.117.153.79
- 2a02:f680:1:1100::3d5f
- 2a02:f680:1:1100::3d60
- 2a02:f680:1:1100::3d61
- 2a02:f680:1:1100::3d62
See also:
- Introduction to IPv6 Addresses: How to Use and How to Explore the Network (Part 1)
- Introduction to IPv6 Addresses: How to Use and How to Explore the Network (Part 2)
To solve this problem, the contents of the /etc/squid/squid.conf file are as follows:
# The proxy server will only use local utilities, so only access from localhost is allowed.
# If you want to connect to the proxy server from outside, then add the corresponding IPs to the allowed ones,
# or configure password authentication.
http_access allow localhost
http_access deny all

# To connect to the proxy server, ports 24000-24004 are selected, the following lines enable listening on these ports
# Please note that the proxy server does not listen to external IP addresses, in addition to the port, the IP address of localhost is specified
http_port 127.0.0.1:24000
http_port 127.0.0.1:24001
http_port 127.0.0.1:24002
http_port 127.0.0.1:24003
http_port 127.0.0.1:24004

# For each port, create an acl with the localport type
acl portA localport 24000
acl portB localport 24001
acl portC localport 24002
acl portD localport 24003
acl portE localport 24004

# Map ports and IP addresses
tcp_outgoing_address 2a02:f680:1:1100::3d5f portA
tcp_outgoing_address 2a02:f680:1:1100::3d60 portB
tcp_outgoing_address 2a02:f680:1:1100::3d61 portC
tcp_outgoing_address 2a02:f680:1:1100::3d62 portD
tcp_outgoing_address 185.117.153.79 portE

# We don't need a cache
cache deny all
When accessing the page https://w-e-b.site/ip/, the IP address of the client who made the request is shown. Let's check:
curl https://w-e-b.site/ip/
The result is:
2a02:f680:1:1100::3d61
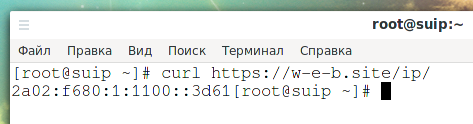
Let's remember this.
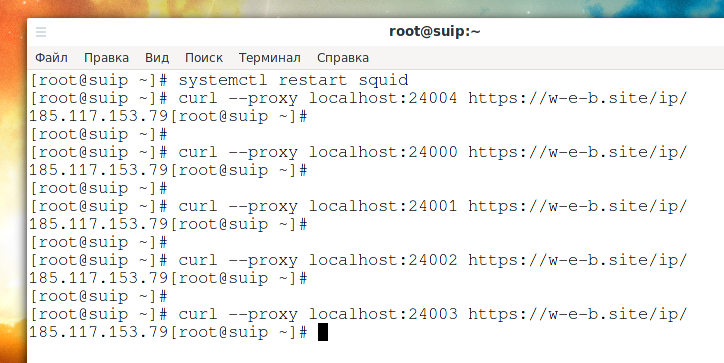
Now let's request the specified page through the proxy server ports from 24000 to 24003:
curl --proxy localhost:24000 https://w-e-b.site/ip/
curl --proxy localhost:24001 https://w-e-b.site/ip/
curl --proxy localhost:24002 https://w-e-b.site/ip/
curl --proxy localhost:24003 https://w-e-b.site/ip/

As you can see, each time a different IPv6 address is displayed – in accordance with which one is bound to a specific port of the proxy server.
What IP address do you think the following command will print?
curl --proxy localhost:24004 https://w-e-b.site/ip/
Let me remind you that IPv4 185.117.153.79 is bound to port 24004. If your answer is “185.117.153.79”, then you are wrong.
Let's check:
curl --proxy localhost:24004 https://w-e-b.site/ip/
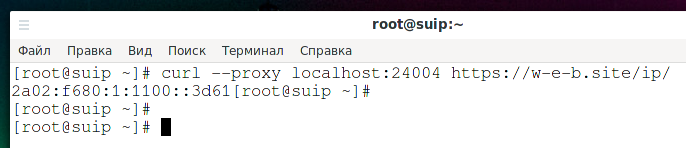
Outputted: 2a02:f680:1:1100::3d6 is the same default IPv6 address.
The reason is that, in fact, the binding does not occur to the IP address as such, but to the network interface on which this IP is configured. By the way, therefore, you can also bind by MAC address. At the same time, Squid works as follows: if there is a technical possibility (the local server and the remote host have IPv6 addresses), then IPv6 is used by default.
The site w-e-b.site has IPv4 and IPv6 addresses, Squid makes DNS lookups trying to get A and AAAA records, and if the remote host has an IPv6 address, then that one is used. To connect to IPv6, the server must also be using IPv6, so one of the available IPv6 is selected, not IPv4 which is actually bound to the port.
Would it be possible to use the IPv4 connection when binding the port to IPv4, even if IPv6 is available? Technically, there is no limit to this, but the authors of Squid did not make such an option. But there is also an option to use IPv4, though not so convenient.
How to make Squid use IPv4 instead of IPv6
Because the IPv6 Internet is as fast or faster than the IPv4 Internet for most networks, Squid prefers to connect to websites over IPv6.
The “dns_v4_first on” option changes the order of preference so that Squid will first bind to dual-stack websites over IPv4. Squid will still do both IPv6 and IPv4 DNS queries before connecting.
A WARNING. This parameter limits the situations in which IPv6 connectivity is used (and tested). This hides network problems that would otherwise have been detected and warned about.
So, to switch to IPv4, add the following option to the config file:
dns_v4_first on
Now the request on port 24004 will print the IPv4 address:
curl --proxy localhost:24004 https://w-e-b.site/ip/
But the fact is that requests to ports 24000-24003 will also display IPv4 addresses, since the remote host uses both of them, and IPv4 is now selected by default.
That is, in essence, this option is a switch between IPv4 and IPv6. This is not very convenient and a little illogical. You need to remember this, because using different IP addresses on the same proxy server, you can get confused about which one is actually used.
Starting with version 5 of Squid, the dns_v4_first option will be removed. Instead of obeying the dns_v4_first setting, the IP family is now largely controlled by the DNS response time: if the AAAA DNS response comes first while Squid is waiting for IP addresses, then Squid will use the first received IPv6 addresses. For previously cached IP addresses, Squid tries IPv6 addresses first. To manage the family of IP addresses used by Squid, administrators must use firewalls, recursive DNS resolver configuration, and/or --disable-ipv6. When planning configuration changes, keep in mind that the upcoming improvements to Happy Eyeballs will facilitate faster TCP connections while reducing the impact of DNS resolution times.
The fifth version implements the “Happy Eyeballs” algorithm, which uses the received IP as soon as it is needed. Firewall rules that deny IPv6 TCP connections remain the preferred configuration method for “disconnecting” IPv6 connections, with a recursive DNS resolver configuration.
How to add, change and remove HTTP headers in Squid
Squid Proxy allows you to arbitrarily change, remove and add HTTP headers to responses and requests.
Important: please note that manipulations with headers are possible ONLY for HTTP connections, in HTTPS traffic everything is transmitted in encrypted form and the proxy server does not have access to the headers.
Directives for handling request headers:
- request_header_access – allows you to remove headers, if the header is removed by this directive, then the request_header_replace entries are also checked, and if a suitable rule for the header is found, then it changes, if not, then it remains as it is (removed).
The following example will remove the From, Referer, and User-Agent headers from all HTTP requests.
request_header_access From deny all
request_header_access Referer deny all
request_header_access User-Agent deny all
The following rules list the HTTP headers to be preserved, the rest will be removed:
request_header_access Authorization allow all
request_header_access Proxy-Authorization allow all
request_header_access Cache-Control allow all
request_header_access Content-Length allow all
request_header_access Content-Type allow all
request_header_access Date allow all
request_header_access Host allow all
request_header_access If-Modified-Since allow all
request_header_access Pragma allow all
request_header_access Accept allow all
request_header_access Accept-Charset allow all
request_header_access Accept-Encoding allow all
request_header_access Accept-Language allow all
request_header_access Connection allow all
request_header_access All deny all
- request_header_replace – replaces headers that were rejected by request_header_access.
Example of substituting User-Agent:
request_header_access User-Agent deny all
request_header_replace User-Agent Nutscrape/1.0 (CP/M; 8-bit)
- request_header_add – Adds HTTP headers to requests.
Example:
request_header_add X-Client-CA "CA=%ssl::>cert_issuer" all
Similar directives for manipulating headers in responses:
- reply_header_access
- reply_header_replace
- reply_header_add
Frequently asked questions about setting up and using Squid. Squid configuration examples
How to configure your web browser (or Windows) to work through a proxy
To configure Windows and Linux, as well as web browsers on these operating systems, see “Configuring programs and operating systems to work through a proxy”.
How to allow access to certain sites by password
Let's look at how to configure only authenticated users to allow access to certain sites. Let's say we want to use a proxy server to restrict access to some sites – but not just for blocking, but with the ability to enter a password and gain access to the site.
We will use proxy server authentication as a password.
The list of sites that can only be accessed by password is located in the /etc/squid/restricted_sites.acl file, then the configuration is as follows:
# Proxy server runs on port 4080, without sending HTTP Via header and without caching
http_port 4080
via off
cache deny all

# Configure authentication
auth_param basic program /usr/lib/squid/basic_ncsa_auth /etc/squid/passwd
auth_param basic children 5
auth_param basic realm Squid Basic Authentication
auth_param basic credentialsttl 2 hours
auth_param basic casesensitive on
auth_param basic realm Squid proxy for HackWare.ru
acl auth_users proxy_auth REQUIRED

# Add a rule with a list of sites restricted to access:
acl restricted_urls dstdomain "/etc/squid/restricted_sites.acl"

# If a user tries to open sites from the restricted_urls rule, an authentication window appears on the server
# Until the proxy password is entered, it is impossible to open restricted sites
http_access allow restricted_urls auth_users

# All other sites are freely accessible without a password
http_access allow all
How to block specific keywords in URLs with Squid
To block the list of keywords that may appear in the URL, first create a file named “blockkeywords.lst”, which will store the keywords from the blacklist.
sudo vim /etc/squid/blockkeywords.lst
Now add the keywords you want to block access to, for example:
facebook
instagram
Gmail
new-life-2021
bablo
vk
Now open the Squid config file and add the following rule – place the “http_access deny” lines (with blocking) above the permission lines:
acl blockkeywordlist url_regex "/etc/squid/blockkeywords.lst"
http_access deny blockkeywordlist
Now save the file and restart squid:
sudo systemctl restart squid
Note, again, there is a difference in the handling of HTTPS and HTTP sites. If the search is performed on a part of the domain name, then these rules will work in any case, but the errors will again be displayed in different ways. URL path search outside the domain name only works for HTTP sites. When using HTTPS, all traffic, including the addresses of the requested pages, is transmitted in encrypted form, so there is no way to filter at all.
Squid configuration for different users
If you prefer to make settings in separate files, then you can add the include directive to the main configuration file (/etc/squid/squid.conf), for example:
include /path/to/included/file/squid.acl.config
As a result, the settings from the specified file will be imported.
Quotes and wildcards are supported, that is, if you add the following directive:
include /etc/squid/conf.d/*
As a result, the settings from all files located in the /etc/squid/conf.d/ directory will be included.
Included elements can be nested up to 16 levels of depth (the limit is set in the source code of the program). This arbitrary limitation prevents recursive include references from causing Squid to enter an infinite loop when trying to load configuration files.
How to launch Squid in foreground
The above shows how to start Squid as a service. But you can run the proxy server as a normal program, without moving into the background. To prevent the process from going into the background, use the -N option:
squid -N
Other options you might find useful on the command line:
       -a port   Specify HTTP port number (default: 3128).
       -d level  Write debugging to stderr also.
       -f file   Use given config-file instead of
                 /etc/squid/squid.conf
How to block all destinations except one
This setting will only allow access to IP address 10.0.0.1:
acl GOOD dst 10.0.0.1
http_access allow GOOD
http_access deny all
You can configure a similar rule for domains using acl types such as dstdomain and url_regex.
How to allow only one address to access a specific URL
In this example, only special_client is allowed access to special_url. Any other client that tries to access special_url is rejected.
acl special_client src 10.1.2.3
acl special_url url_regex ^http://www.squid-cache.org/Doc/FAQ/$
http_access allow special_client special_url
http_access deny special_url
Why Squid recommends blocking some ports
There are port numbers to which it is dangerous to allow Squid to connect. For example, it has been demonstrated that someone can use Squid as an SMTP (email) relay. As I'm sure you know, SMTP relays are one of the ways spammers send their emails. To prevent mail relaying, Squid rejects requests when the URL port number is 25. Other ports should also be blocked as a precaution against other less common attacks.
There are two ways to filter by port number: allow specific ports or deny specific ports. Squid uses the first option by default. This is the default ACL entry in squid.conf:
acl Safe_ports port 80		# http
acl Safe_ports port 21		# ftp
acl Safe_ports port 443		# https
acl Safe_ports port 70		# gopher
acl Safe_ports port 210		# wais
acl Safe_ports port 1025-65535	# unregistered ports
acl Safe_ports port 280		# http-mgmt
acl Safe_ports port 488		# gss-http
acl Safe_ports port 591		# filemaker
acl Safe_ports port 777		# multiling http
http_access deny !Safe_ports
For brevity, it could be written like this:
acl Safe_ports port 80 21 443 70 210 1025-65535 280 488 591 777
http_access deny !Safe_ports
The above configuration rejects requests when the port number of the URL is not listed. The list allows you to connect to standard ports for HTTP, FTP, Gopher, SSL, WAIS, and all unprivileged ports.
Another approach is to deny dangerous ports. The list of dangerous ports should look something like this:
acl Dangerous_ports port 7 9 19 22 23 25 53 109 110 119
http_access deny Dangerous_ports
… and probably many others.
Please refer to the /etc/services file on your system for a list of known ports and protocols.
Since by default only certain ports are allowed in the squid config, if you want to add more, just specify them in the config file as shown:
acl Safe_ports port XXX
Where XXX is the port number you want to allow. Again, it is recommended that you leave a comment next to the acl that will describe what the port will be used for.
You will need to restart squid again for the changes to take effect.
sudo systemctl restart squid
How to see which IP addresses the Squid proxy is listening on
The following command will list the ports and interfaces that Squid processes are listening on:
ss -tulpn | grep squid
How to make Squid proxy listen on local port only
By default, if you specify only a port with the http_port directive, then it will listen on all interfaces, including external ones:
http_port 24000
http_port 24001
http_port 24002
You can explicitly specify the IP address of the interface on which the proxy server should open the port:
http_port IP:PORT
An example, when only local user applications should work with the proxy server:
http_port 127.0.0.1:24000
http_port 127.0.0.1:24001
http_port 127.0.0.1:24002
Why Squid Opens UDP Ports
If you look at what ports the Squid proxy server opens
ss -tulpn | grep squid
then you can see that in addition to the TCP port specified in the Squid configuration, there are also 2 UDP ports.
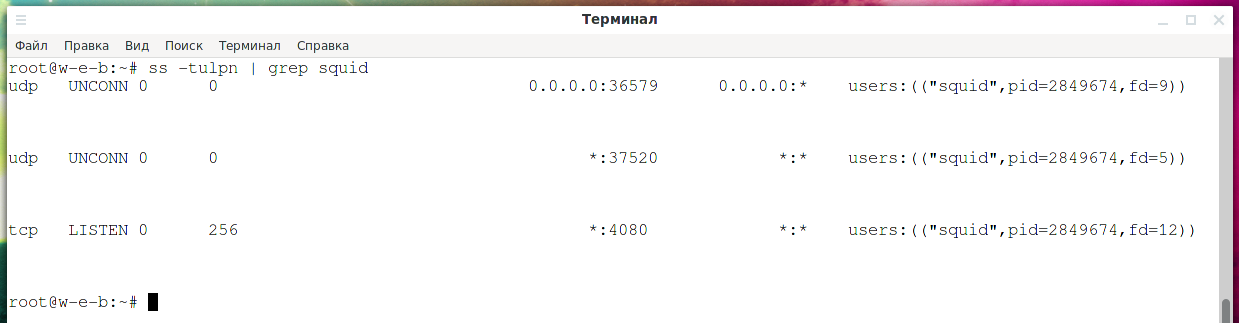
Squid proxy opens 2 random UDP ports while it is running. Moreover, it opens them on all interfaces, including those available for external connection. Why is this done? The official explanation can be read here: http://www.squid-cache.org/mail-archive/squid-users/200009/0750.html. The bottom line is that for its work, Squid makes DNS queries and open UDP ports it needs to receive DNS responses.
How to set up caching in Squid proxy
[TBD]
Does Squid support SOCKS4 or SOCKS5
No, the SOCKS protocol is not supported. The developers write that there are no technical obstacles for this and, in principle, the implementation of SOCKS support should not be difficult, but they do not. Apparently, they are not interested.
Directives from the minimum recommended configuration
This article shows examples of configuring a proxy server from scratch so that existing directives do not lead to unexpected results.
However, some settings, such as the port blocking discussed above, are important. The recommended minimal configuration contains directives that shouldn't be lost:
# Only allow cachemgr access from localhost
http_access allow localhost manager
http_access deny manager

# We strongly recommend the following be uncommented to protect innocent
# web applications running on the proxy server who think the only
# one who can access services on "localhost" is a local user
#http_access deny to_localhost
How to configure Squid proxy to work with multiple users
For example, the task is to organize the work of Squid with several users, each of which received an IP address (the same for all) and a port number (individual for each user) as proxy settings. Also, users have an individual username and password. The server has several external IP (in this case, IPv6) addresses, you need to make sure that each of the users goes to an individual IP address.
Let's say at the input we have 127.0.0.1:1000:test1:pass1, and at the output 2a02:f680:1:1100::3d60.
And at the input 127.0.0.1:1001:test2:pass2 and at the output 2a02:f680:1:1100::3d61.
Solution:
We start by filling in user credentials (see also “How to configure HTTP Digest Authentication in Squid”):
sudo htpasswd -c /etc/squid/passwd test1
sudo htpasswd /etc/squid/passwd test2
In the following config file, you need to replace:
- usernames to names of your choice
- indicate the desired ports
- indicate the desired IPv6 or IPv4 addresses both for listening and as outgoing addresses
- duplicate similar entries for each username (port, IP address)
Content of my /etc/squid/squid.conf file:
# Authentication settings
auth_param basic program /usr/lib64/squid/basic_ncsa_auth /etc/squid/passwd
auth_param basic children 5
auth_param basic credentialsttl 2 hours
auth_param basic casesensitive on
auth_param basic realm Squid proxy for HackWare.ru

Listening ports
http_port 185.117.153.79:1000
http_port 185.117.153.79:1001

# For each port, create an acl with the localport type
acl portA localport 1000
acl portB localport 1001

# Link ports and IP addresses
tcp_outgoing_address 2a02:f680:1:1100::3d60 portA
tcp_outgoing_address 2a02:f680:1:1100::3d61 portB

# For each user, create an acl with the proxy_auth type
acl test1_user proxy_auth test1
acl test2_user proxy_auth test2

# Allow two acl bindings to access:
# user test1 and port 1000
# user test2 and port 1001
http_access allow test1_user portA
http_access allow test2_user portB
Configuring Squid to Work with OpenVPN
You can use a Squid proxy to connect to OpenVPN through it.
Configuring a Squid proxy server to work with OpenVPN does not require any special options. For example, to use Squid as a proxy server to connect to OpenVPN without authentication, it is enough to specify the following lines in the configuration file (replace port 45600 with any other):
http_port 45600
acl portA localport 45600
http_access allow portA
Additionally, you can configure Basic or Digest authentication – OpenVPN supports both.
Remember that in order for the connection to OpenVPN through an HTTP proxy to work, the OpenVPN server must use the TCP protocol.
See also: How to use OpenVPN with TCP protocol
How to edit the Access denied page in Squid? How to insert custom pictures and mail?
The custom Access denied page can only be shown if the user connects via HTTP. For HTTPS connections (which are currently the vast majority), it is impossible to change the displayed page (that is, display the configured Access denied page) due to the very nature of HTTPS, which is precisely designed to ensure that the transmitted data cannot be modified.
That is, you can edit the Access denied page in Squid, but it will only show up on the few occasions when an HTTP connection is made.
For HTTPS connections, a standard web browser page will be displayed with a message like “The proxy server is refusing connections”.
That is, it can be stated that the custom Access denied page in Squid will be used quite rarely and its setting can be attributed rather to outdated functionality.
Squid has page templates with various messages, including denied access, in various languages. For example: /usr/share/squid/errors/en/ERR_ACCESS_DENIED (“ERROR: The requested URL could not be retrieved”).
You can edit this page like a regular HTML file.
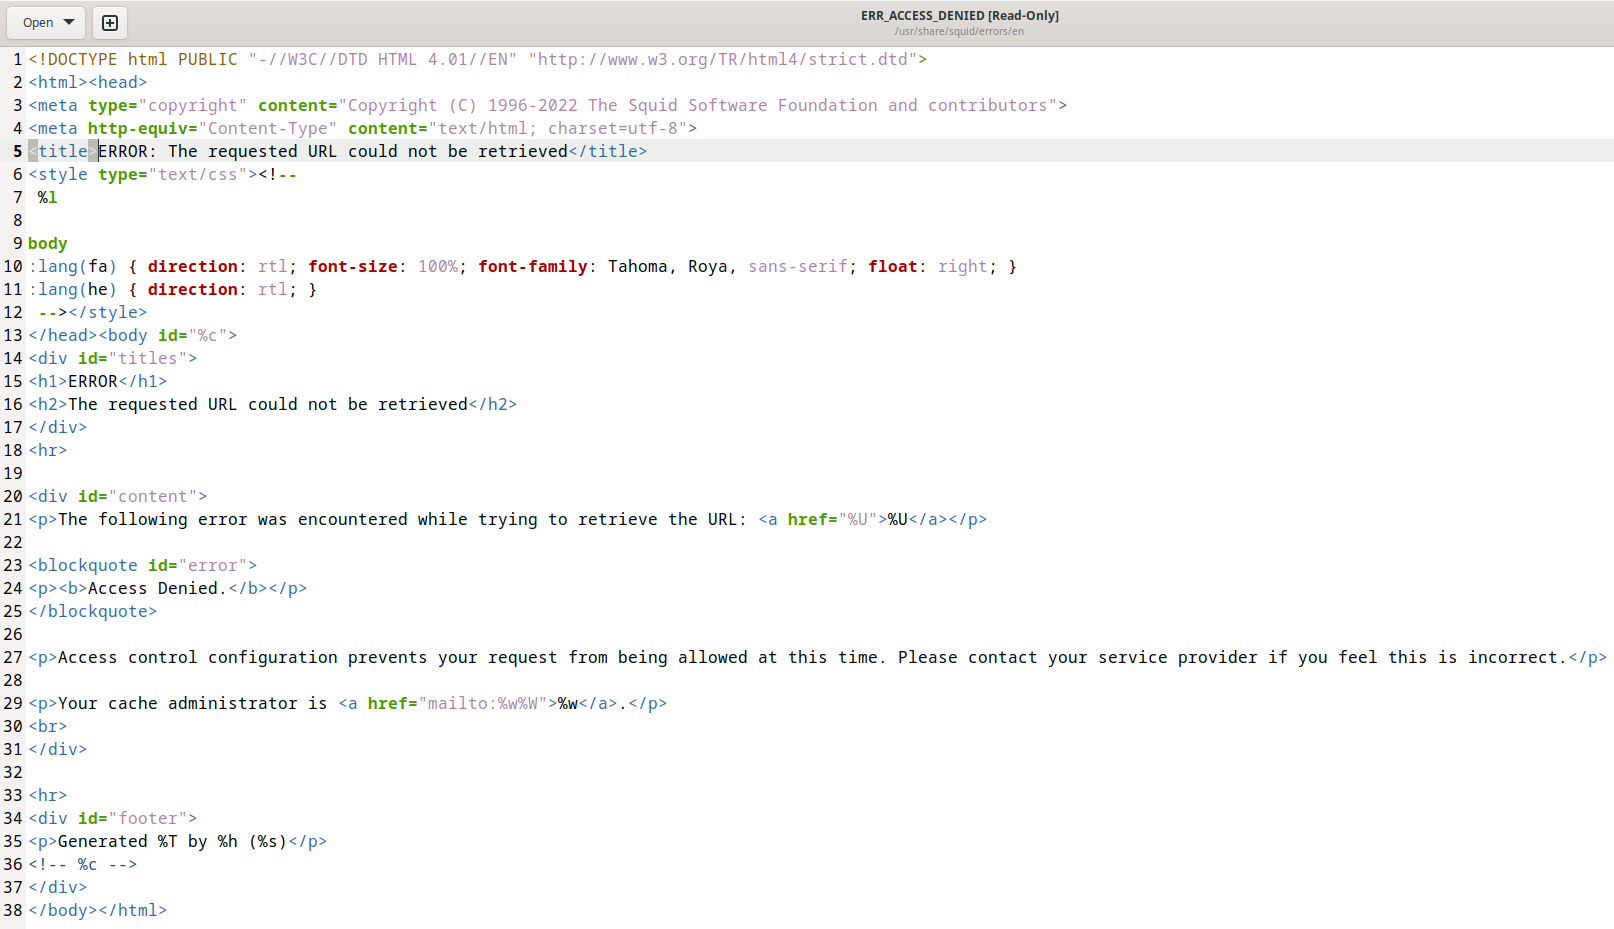
This page uses codes to insert into the template, for example:
- %U
- %c
- %w
- %W
The meaning of these codes, as well as many other codes, can be found on the following page: https://wiki.squid-cache.org/Features/CustomErrors
How to set Squid cache manager e-mail?
If you only want to specify the e-mail address of the Squid cache manager, then you do not need to edit the template files. You can use the following directives:
- cache_mgr is email-address of local cache manager who will receive mail if the cache dies. The default is “webmaster”.
- email_err_data – if enabled, information about the occurred error will be included in the mailto links of the ERR pages (if %W is set) so that the email body contains the data. Syntax is <A HREF="mailto:%w%W">%w</A>. It is already enabled by default, so no further configuration is required.
Possible errors and problems when using a proxy server
Error “The proxy server is refusing connections”
This error occurs if:
- proxy server is disabled
- you are trying to connect to the wrong port
- you are trying to connect to the wrong IP
- the proxy server is configured to reject requests from your IP address
Squid can open websites over HTTP protocol, but cannot open HTTPS
If you are faced with a situation where HTTP sites open normally, but for HTTPS sites the following message is displayed:
The proxy server is refusing connections
then a possible reason may be that you configured your browser or system to work with an HTTP proxy, but did not configure them to work with an HTTPS proxy – these are different types of proxies and they both need to be configured.
By default, Squid acts as both an HTTP proxy and an HTTPS proxy, and clients must configure both.
Error “Authentication helper program /usr/lib64/squid/basic_ncsa_auth: (2) No such file or directory”
If, when configuring a password login, your proxy server does not start and, when checking the status of the service, gives an error:
Authentication helper program /usr/lib64/squid/basic_ncsa_auth: (2) No such file or directory
then you need to check the path to the basic_ncsa_auth.
Perhaps instead of the path /usr/lib64/squid/basic_ncsa_auth you should use /usr/lib/squid/basic_ncsa_auth.
Error “Authentication helper program /usr/lib/squid/basic_ncsa_auth: (2) No such file or directory”
The error is similar to the previous one, but instead of the path /usr/lib/squid/basic_ncsa_auth, try using /usr/lib64/squid/basic_ncsa_auth.
VPS for proxy server
If you want to set up a proxy server on a VPS server, then I can recommend a couple of hostings:
- the first one, very inexpensive (I have been working with him since 2016, I really like everything, this is where SuIP.biz is hosted)
- the second one with the ability to choose a data center from different countries (I have been working with it since 2019, I also like everything very much)
Related articles:
- Errors in Kali Linux ‘W: Failed to fetch’ and ‘W: Some index files failed to download. They have been ignored, or old ones used instead.’ (SOLVED) (63.1%)
- How to connect to OpenVPN via proxy or Tor (60.6%)
- Configuring programs and operating systems to work through a proxy (58.5%)
- How to enable DNS over HTTPS and what it is for (57.7%)
- Error “E: Unable to locate package dnscrypt-proxy” in Kali Linux and Debian (SOLVED) (57.7%)
- IP calculators (RANDOM - 0.9%)