Configuring programs and operating systems to work through a proxy
Table of contents
2.1 How to enable proxy in Windows at the operating system level
2.2 Enabling proxies in web browsers
2.2.1 Google Chrome, Opera, Internet Explorer
3.1 Enabling proxy in Linux at the operating system level
3.2 Enabling proxy in web browsers on Linux
4. Setting up a mobile phone (Android) to use a proxy
5. Configuring the use of proxies by VirtualBox virtual machines
6. Programs are not required to adhere to proxy settings. Proxying with ProxyChains-NG
How to enable proxy
Proxies can be enabled at the application level or at the operating system level.
When you enable a proxy in a certain program, only it will access the Internet through the proxy, and other applications will connect directly.
Proxy support in individual programs is individual for each of them – some applications have proxy settings, and some do not. Even if the application does not have proxy settings, it can use the system-wide network settings.
When proxy is enabled at the operating system level, this does not guarantee that all programs will access the Internet through the proxy – some programs ignore the system proxy settings.
Enabling proxy on Windows
How to enable proxy in Windows at the operating system level
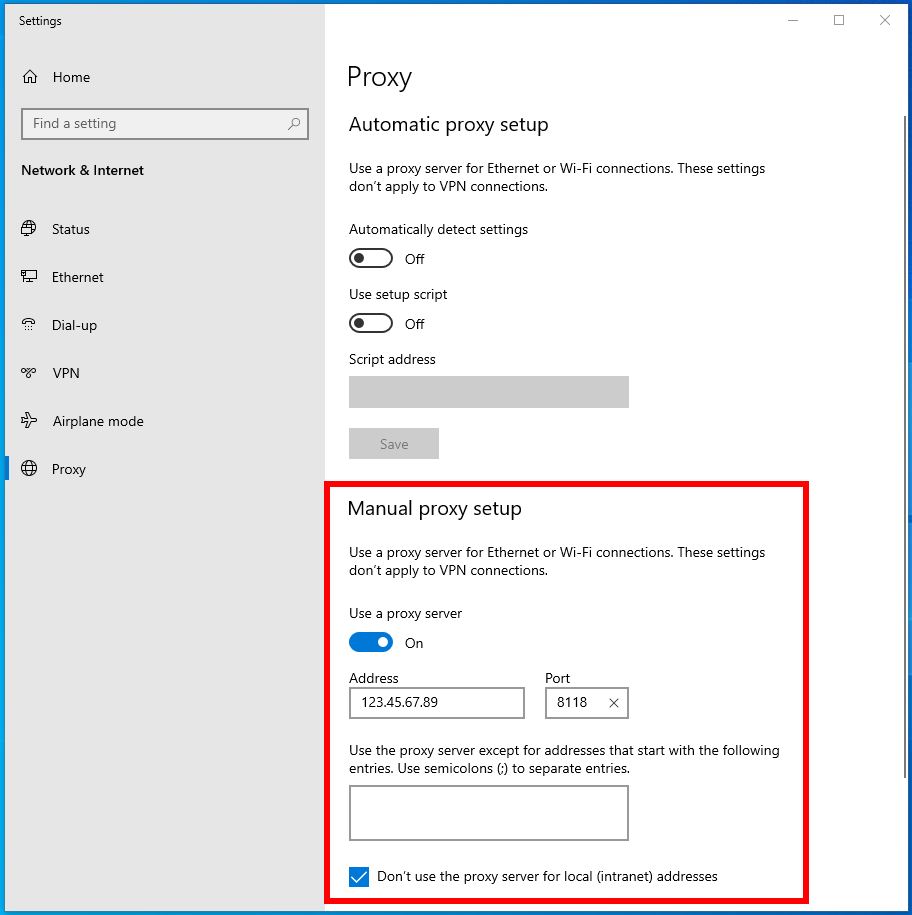
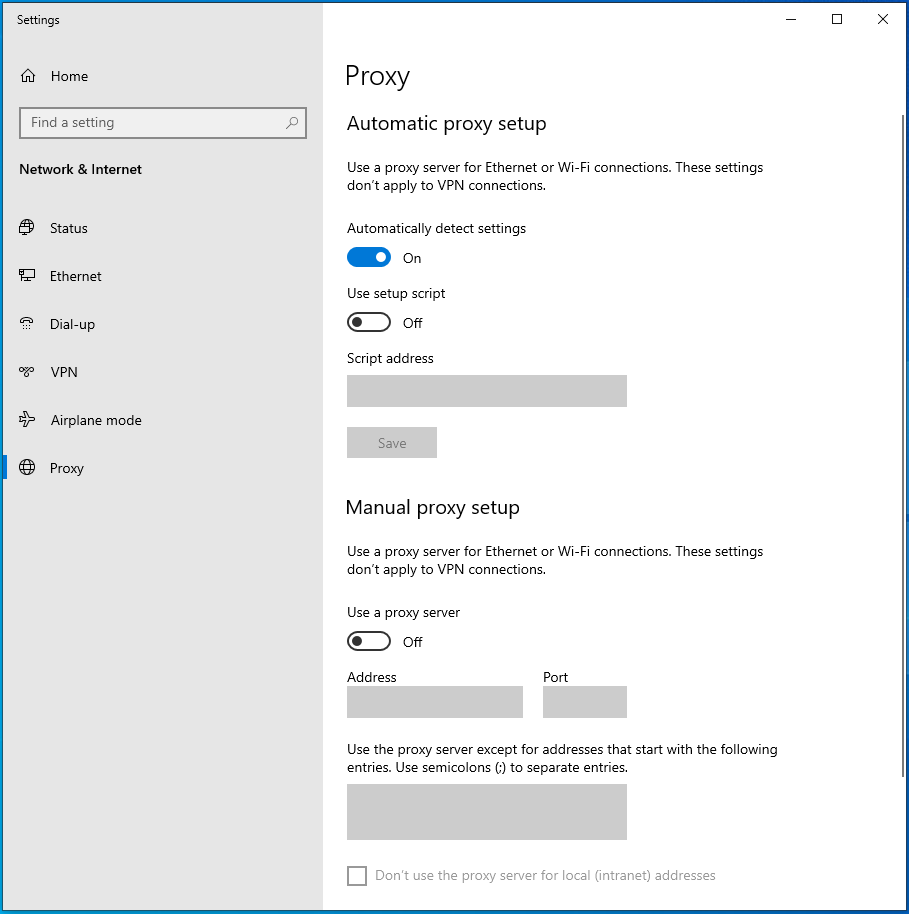
Go to “Settings” application, start writing “proxy” and select “Change manual proxy server settings”:

Enable “Use a proxy server”, enter the IP and port, check the box “Don’t use the proxy server for local (intranet) addresses”:
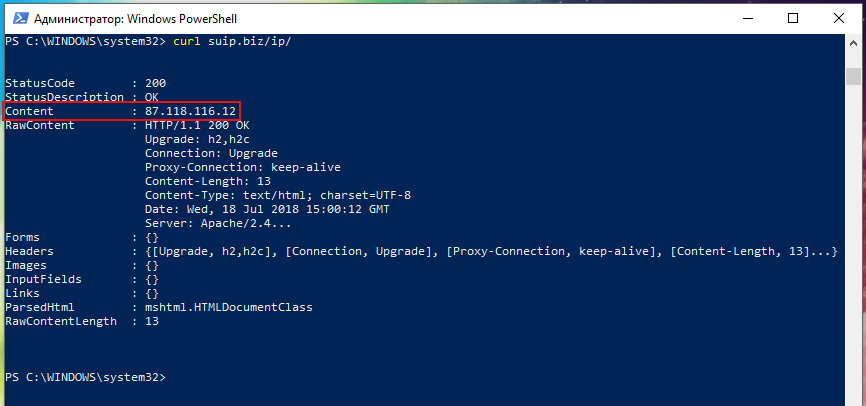
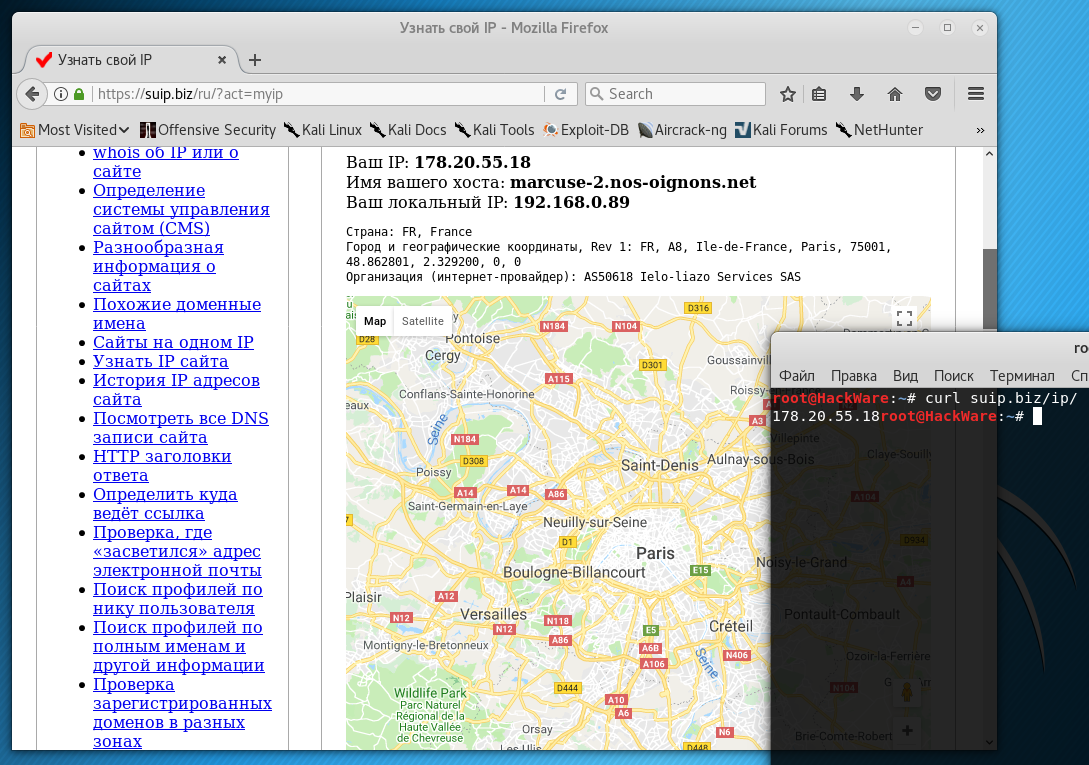
Save your settings. Check in your browser https://suip.biz/?act=myip:

And in other programs, for example, on the Windows command line:
curl https://suip.biz/ip/
Enabling proxies in web browsers
Google Chrome, Opera, Internet Explorer
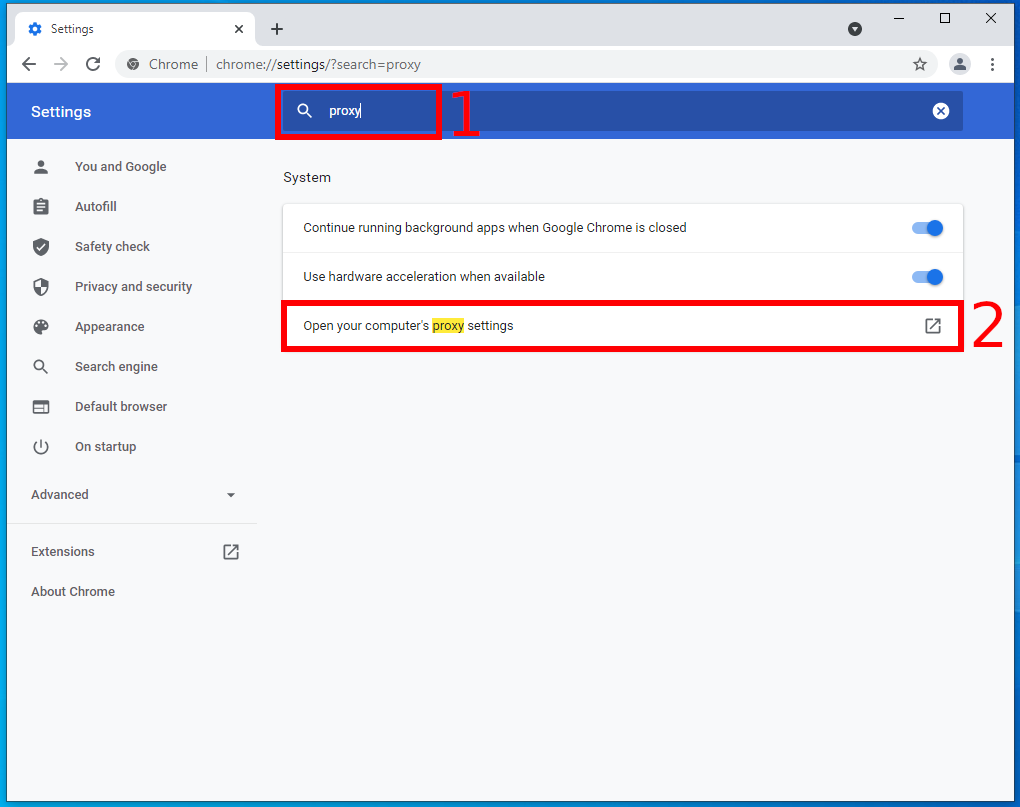
The browsers Google Chrome, Opera and Internet Explorer use the same settings. That is, the changes made will apply immediately to all three browsers. In any of them, go to the Proxy settings.
The already familiar window for setting up a proxy at the system level will open.
Enable “Use a proxy server”, enter the IP and port, check the box “Don’t use the proxy server for local (intranet) addresses”:
When everything is ready, click the "Save" button.
Firefox
To change proxy settings in Firefox, open the settings window, in it go to General (scroll to the very bottom) → Network settings → Settings.

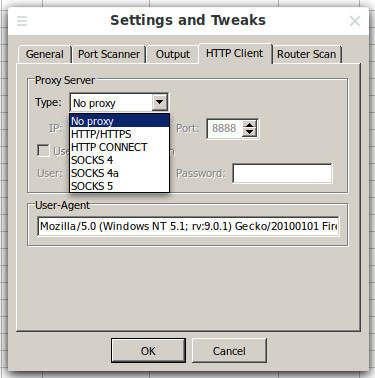
In the window that opens, set the switch to “Manual proxy configuration”. Enter the IP and port of the proxy server of the type you want (HTTP, HTTPS, SOCKS4 or SOCKS5). Click OK to save the settings.

Also note that you can select the “Use system proxy settings” option in order not to configure proxies specifically in Firefox, but to apply system-wide settings along with other browsers and applications.
Enabling proxy on Linux
Enabling proxy in Linux at the operating system level
In Linux, system-level proxy settings are located in the corresponding environment variables. You can put commands to assign values to these variables in one of the scripts that run when Bash starts. Another way is to specify proxy settings in the GUI, usually done in NetworkManager settings. The GUI proxy setting differs in different desktop environments.
Method without a GUI, enter the commands in the console:
export all_proxy="socks://192.168.0.49:9050/"
export http_proxy="http://192.168.0.49:8118/"
export https_proxy="http://192.168.0.49:8118/"
export no_proxy="localhost,127.0.0.1,::1,192.168.1.1,192.168.0.1"
Of course, replace the IP addresses and port numbers with those of your proxy server.
These settings are only saved until a reboot!
To make the settings permanent and work after restarting the computer, add these lines to the /etc/bash.bashrc file (again, replace the IP and port numbers):
export all_proxy="socks://192.168.0.49:9050/"
export http_proxy="http://192.168.0.49:8118/"
export https_proxy="http://192.168.0.49:8118/"
export no_proxy="localhost,127.0.0.1,::1,192.168.1.1,192.168.0.1"
Save the file.
GNOME
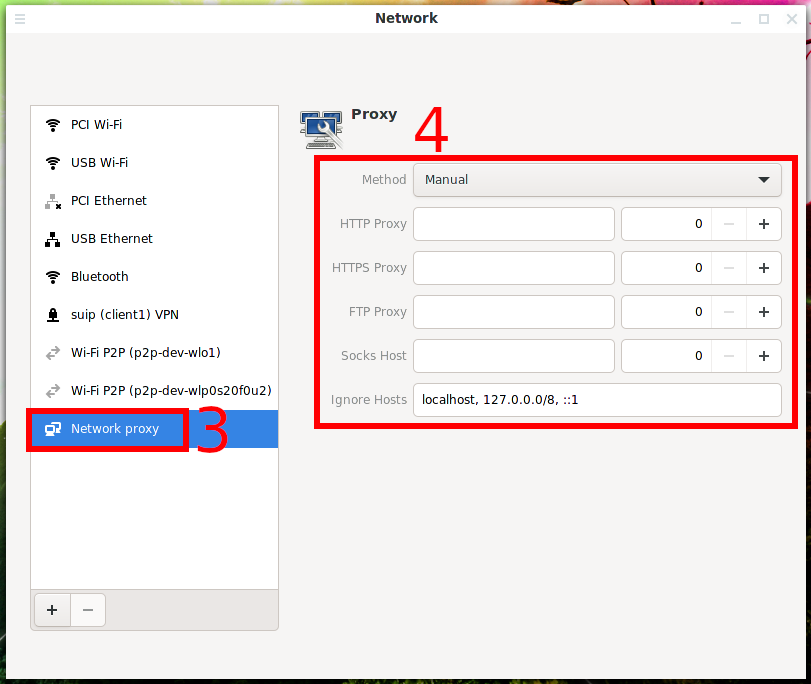
If you are using a graphical interface, then go to Settings → Network. Click the cogwheel where “Network Proxy” is:
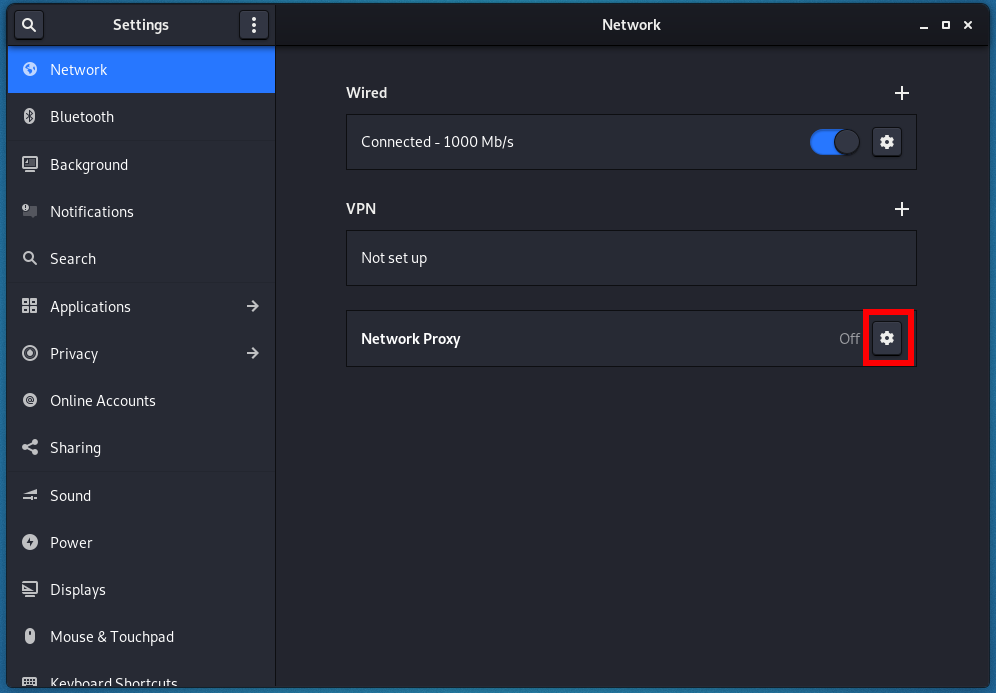
Move the switch to “Manual” and enter your details:

After that, both web browsers and console utilities will use the proxy settings.
But be careful with programs like Nmap, Masscan – they send raw packets, bypassing system calls – in other words, they do not use proxy settings.
Cinnamon
Click on the network connections icon, it can be in the form of a Wi-Fi symbol or as shown in the following screenshot – it depends on whether you are using a wired or wireless connection.
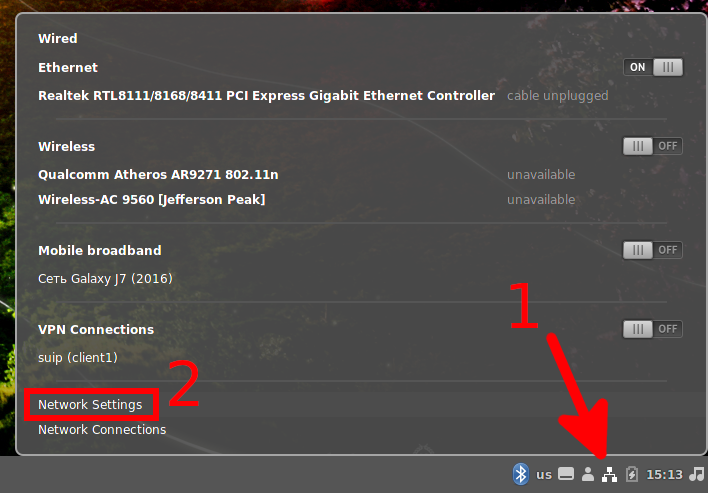
Click “Network Settings”.
Select the “Network proxy” tab and enter the parameters for the different types of proxy proxies.
Xfce
Xfce does not provide proxy settings in the graphical interface, so you can use the universal method described above to set the settings by adding the appropriate commands to one of the files that are automatically executed when Bash starts.
Alternatively, you can use the dconf-editor program. Install it:
sudo apt install dconf-editor
Run:
dconf-editor
To configure HTTP proxy go to / → system → proxy → http
To configure HTTPS proxy go to / → system → proxy → https:
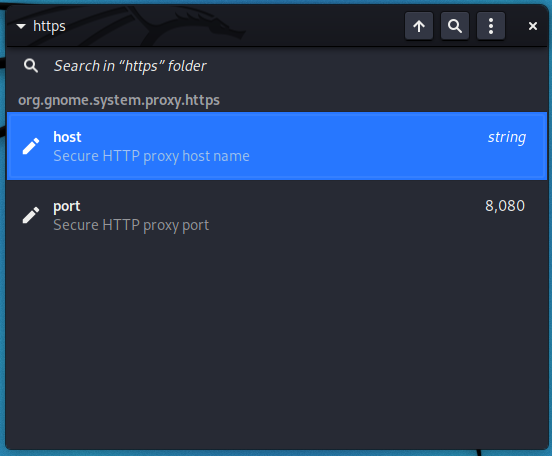
Go to host and port, there scroll to the “Use default value” inscription, disable this slider and then the “Custom value” line will become available for input. Enter the values you want there.

Enabling proxy in web browsers on Linux
Chrome, Chromium
On Linux, Chrome and Chromium use system proxy settings. In order for the web browser to use a proxy, you need to set the settings in one of the ways shown above.
You can also launch web browsers on the command line and use the --proxy-server option to specify the desired proxy parameters, for example:
google-chrome-stable --proxy-server="157.245.118.66:4080"
chromium --proxy-server="157.245.118.66:4080"
Please note that browsers are opened in the current session, this means that if you already have Chrome (Chromium) open without proxy settings and you launch another web browser in the command line with proxy settings, then this new window will also NOT use the proxy. For the proxy settings to be applied, close all browser windows and then run it from the command line.
Firefox
To change proxy settings in Firefox, open the settings window, in it go to General (scroll to the very bottom) → Network settings → Settings.
In the window that opens, set the switch to “Manual proxy configuration”. Enter the IP and port of the proxy server of the type you want (HTTP, HTTPS, SOCKS4 or SOCKS5). Click OK to save the settings.
Also note that you can select the “Use system proxy settings” option in order not to configure proxies specifically in Firefox, but to apply system-wide settings along with other browsers and applications.
Setting up a mobile phone (Android) to use a proxy
Go to the Wi-Fi connection settings. Press and hold the connection that the proxy should use until a pop-up window appears.
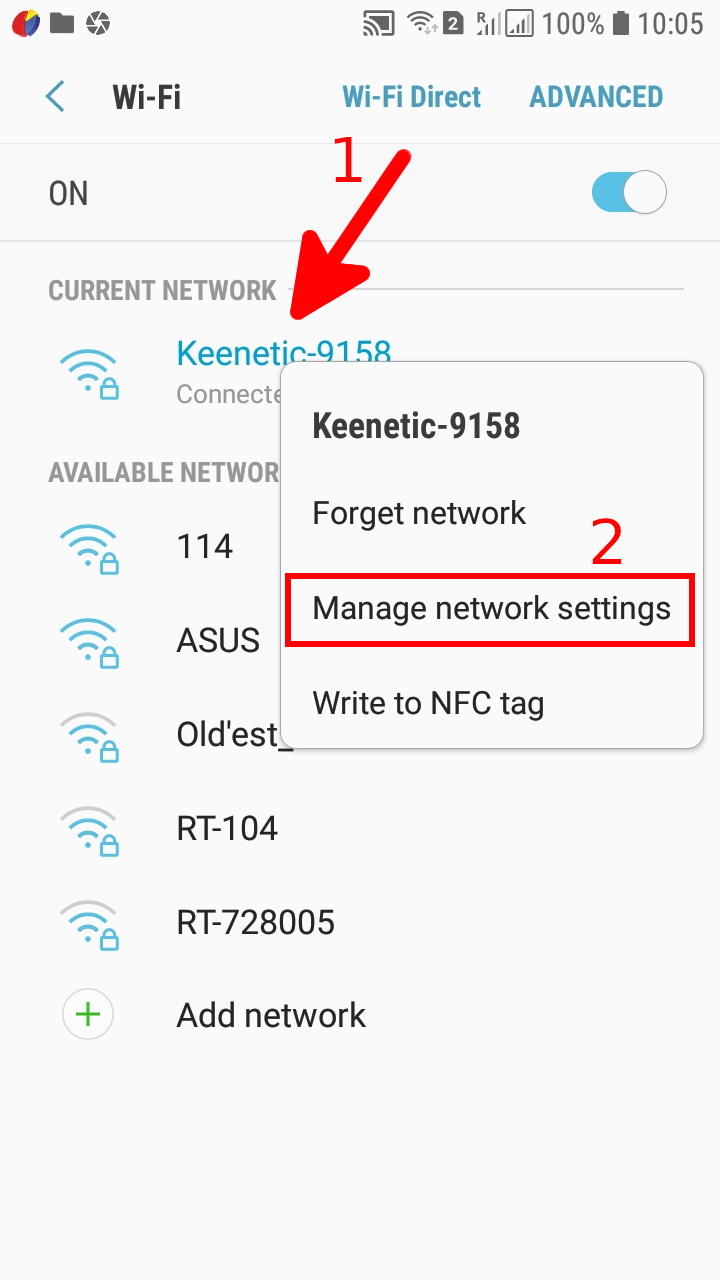
Select “Manage network settings” and click “Show advanced options”:
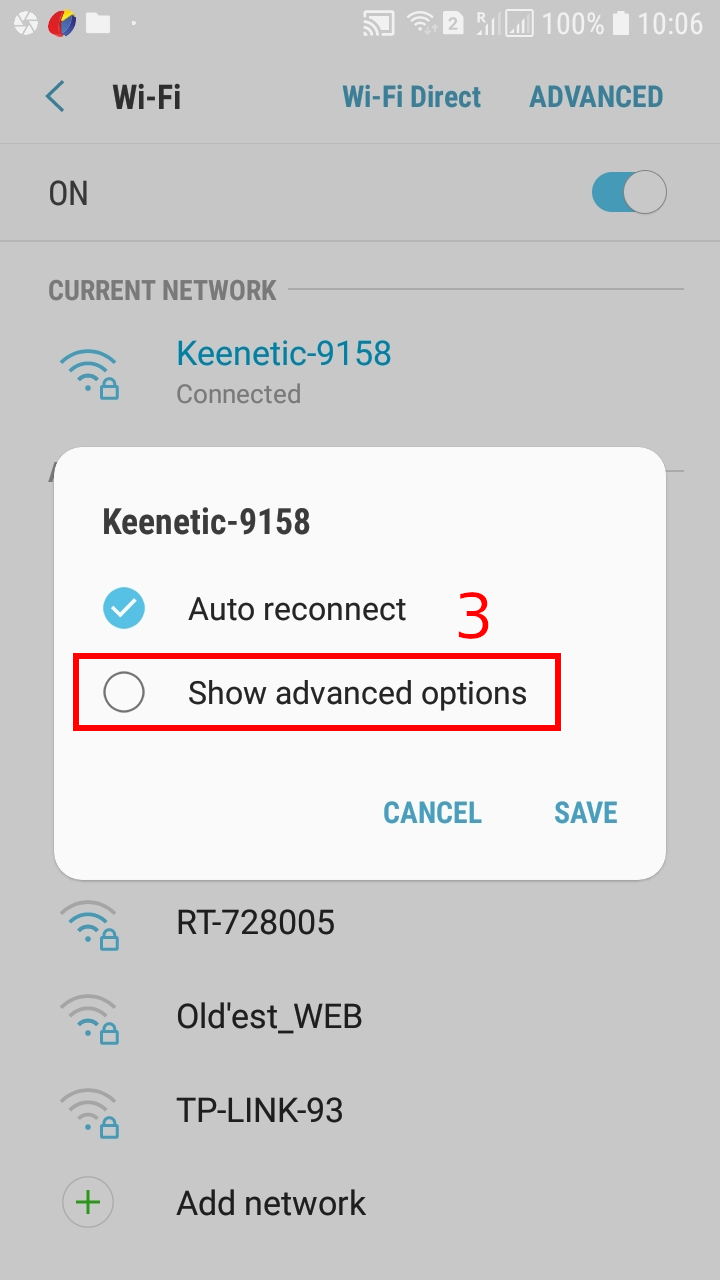
Where “Proxy” put “Manual”:
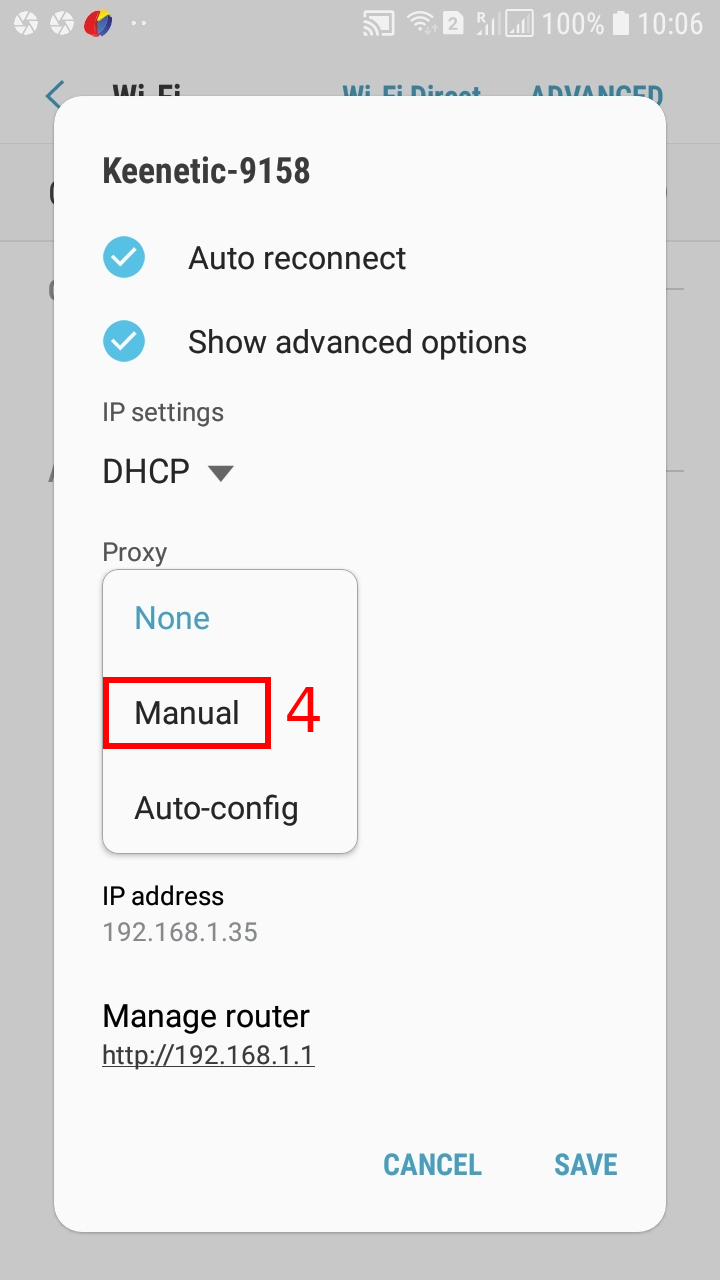
Enter the IP of the computer acting as a proxy and the port:

Click Save.
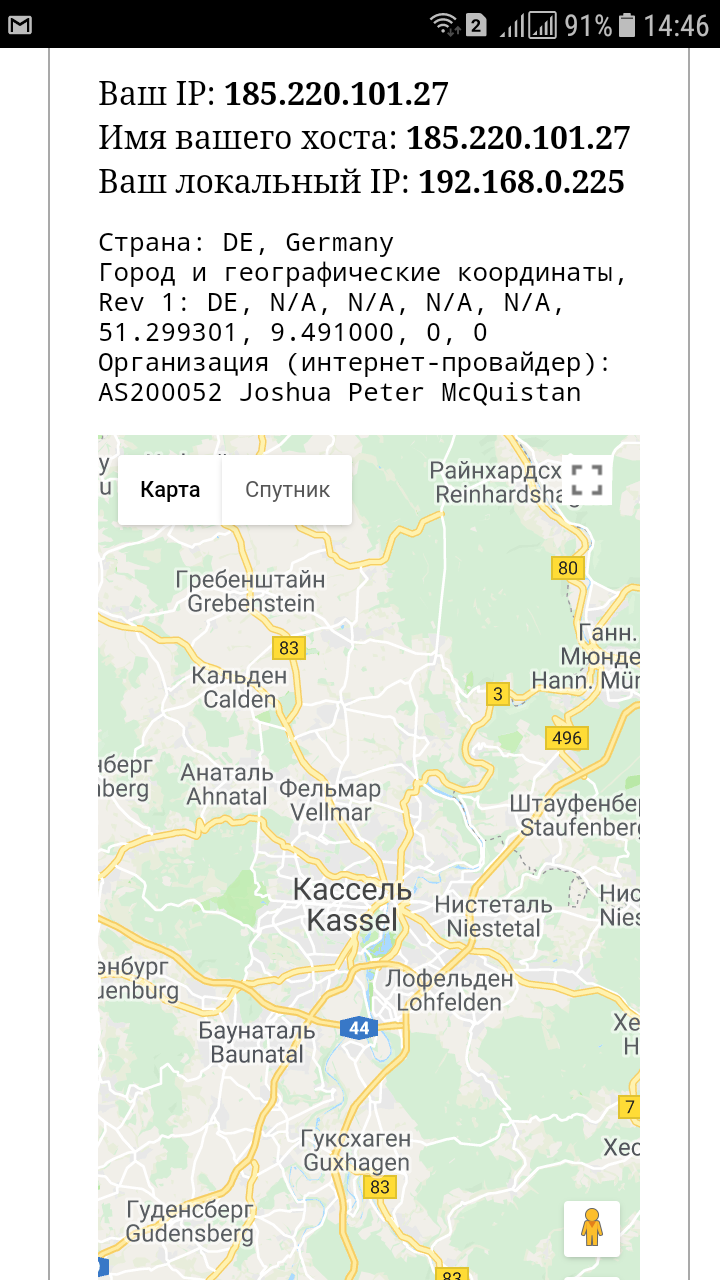
Now check your IP, for example, you can go to the page https://suip.biz/?act=myip in your web browser:
Please note the warning that the proxy is used in the browser and may not be used by other applications. Some applications have their own proxy settings – check them.
Configuring the use of proxies by VirtualBox virtual machines
Be careful with configuring virtual machines! In VirtualBox in the menu item “File” → “Settings” there is a tab “Proxy”. Be aware that this setting only works when VirtualBox checks and downloads updates.
For virtual machines, you need to configure proxies individually within the operating system of each of them.
The system-wide proxy settings of the host machine will not necessarily work for the virtual machine, as it uses its own drivers and virtual network interfaces.
Programs are not required to adhere to proxy settings. Proxying with ProxyChains-NG
As you might have figured out, some programs do not respect system-wide proxy settings and have their own proxy settings – an example is the Firefox web browser. Programs use proxy settings only if this functionality is provided by the developers.
Among the programs there may be some that do not respect the system-wide proxy settings and, at the same time, do not have their own settings. After all, on Linux, the system-wide proxy settings are just the value of an environment variable. By the way, earlier some programs that wanted to follow the system-wide values of the proxy settings read the value of the variable written in lower case, and some in upper case (in Linux these are completely different things!), That is, the proxy settings could be set, the program is trying to get them and follow them, but due to the fact that the environment variables are written in letters of a different case, the program does not find them. It seems that now this problem is not relevant.
Moreover, there are such programs in which you can set your own proxy settings, but the programs do not follow them, for example, due to technical limitations – not all network requests can be transmitted through a proxy, as a result, the program sends such raw requests directly, bypassing the proxy. One of these programs is Nmap, and you can read about it in more detail in the article “Anonymous scanning through Tor with Nmap, sqlmap or WPScan”.
In order for proxies to be able to use even programs whose authors are not provided for, you can run them through the ProxyChains-NG utility. Details can be found on the ProxyChains-NG program card and in the article, which is linked just above.
Related articles:
- How to enable DNS over HTTPS and what it is for (83.1%)
- Examples of using HTTP headers for “hidden” data transfer (65.2%)
- How to create and configure a Squid proxy server (55.7%)
- Errors in Kali Linux ‘W: Failed to fetch’ and ‘W: Some index files failed to download. They have been ignored, or old ones used instead.’ (SOLVED) (55.1%)
- Error “E: Unable to locate package dnscrypt-proxy” in Kali Linux and Debian (SOLVED) (55.1%)
- SMB and Samba Security Audit Tools (RANDOM - 0.7%)