Active Directory comprehensive guide, from installation and configuration to security auditing. Part 4: Install Active Directory Domain Services in Windows Server 2022
Table of contents
1. Introduction to Active Directory (concepts, usage, difference from Workgroup)
2. Install Windows Server 2022 and Windows Server Core 2022
3. Windows Server 2022 and Windows Server Core 2022 configuration tools
4. Install Active Directory Domain Services in Windows Server 2022
4.1 How to install Active Directory Domain Services
4.2 Preparing to enable Active Directory
4.3 How to install Active Directory Domain Services in Server Manager
4.4 How to install Active Directory Domain Services in Windows Admin Center
4.5 How to install Active Directory Domain Services in PowerShell
5. Join computers to Active Directory. Check and unjoin from Active Directory
6. Active Directory configuration tools and snap-ins
7. Understanding the AD infrastructure
8. Group Policies
9. Managing Users, Computers, Groups and Organizational Units in Active Directory
10. Setting up trust and site domains
11. Other services and roles of Active Directory
12. Configuring Samba (Active Directory for Linux)
13. Active Directory security auditing tools
How to install Active Directory Domain Services
So, remember that Active Directory is the collective name for all the protocols and software that this guide is about. An important part of which is Active Directory Domain Services.
“Installing Active Directory” consists of installing and configuring Active Directory Domain Services. Next, we'll promote our Active Directory Domain Services server to a Domain Controller (DC). After that, we’ll join other computers to this domain.
Active Directory Domain Services can be installed on Windows Server. In this tutorial Active Directory Domain Services are installed on Windows Server 2022.
In total, we will consider three different ways to install Active Directory Domain Services using tools such as:
- Server Manager
- Windows Admin Center
- PowerShell
For servers with a graphical desktop, you can choose any of these methods, and for servers without a graphical desktop (Windows Server Core), only the second or third method will work.
I think it's understandable that Active Directory Domain Services needs to be installed only once, using the instructions from only one (any) further section.
Preparing to enable Active Directory
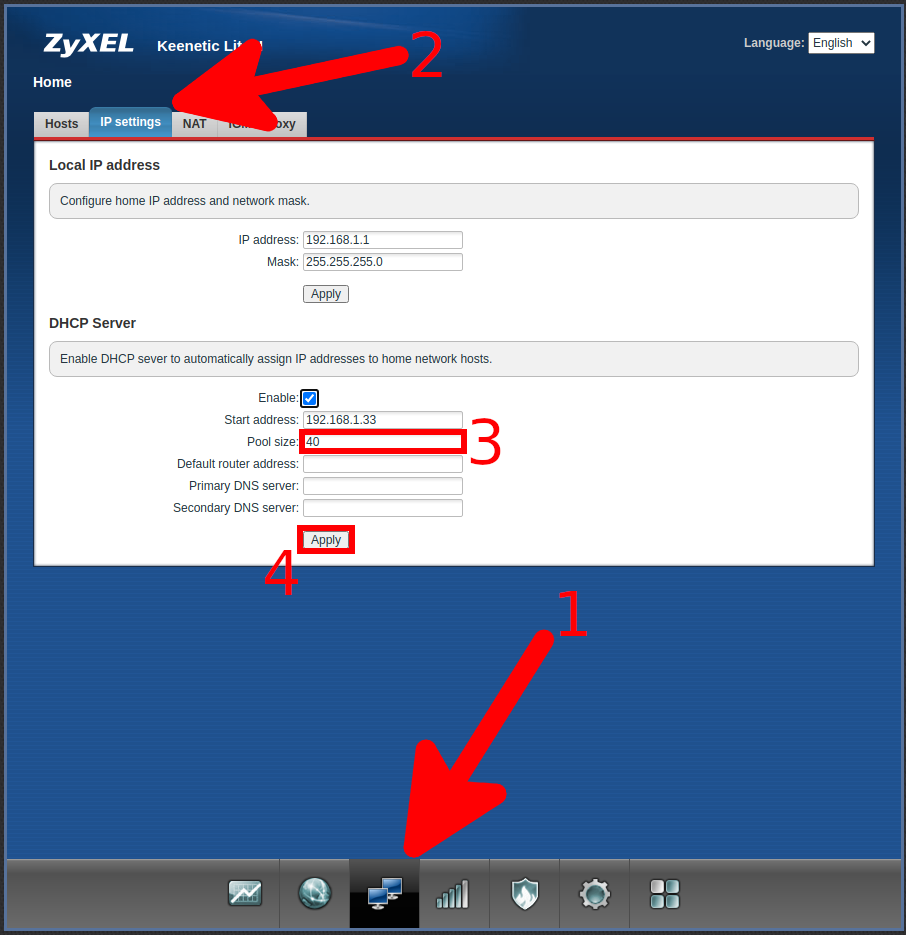
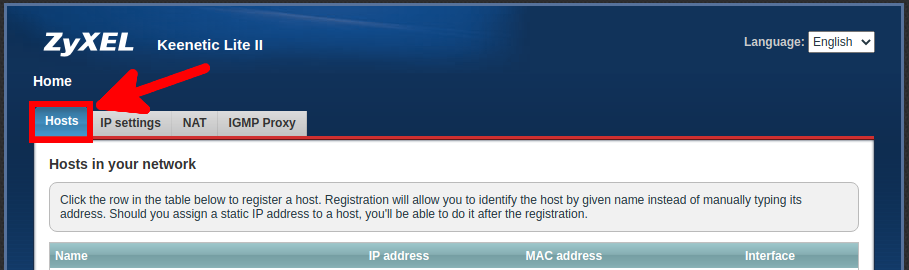
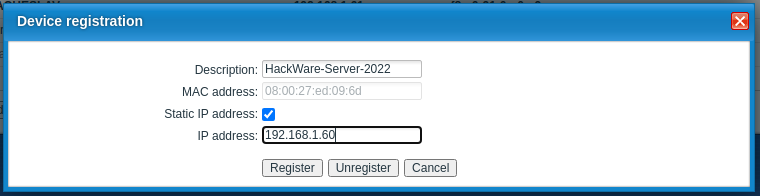
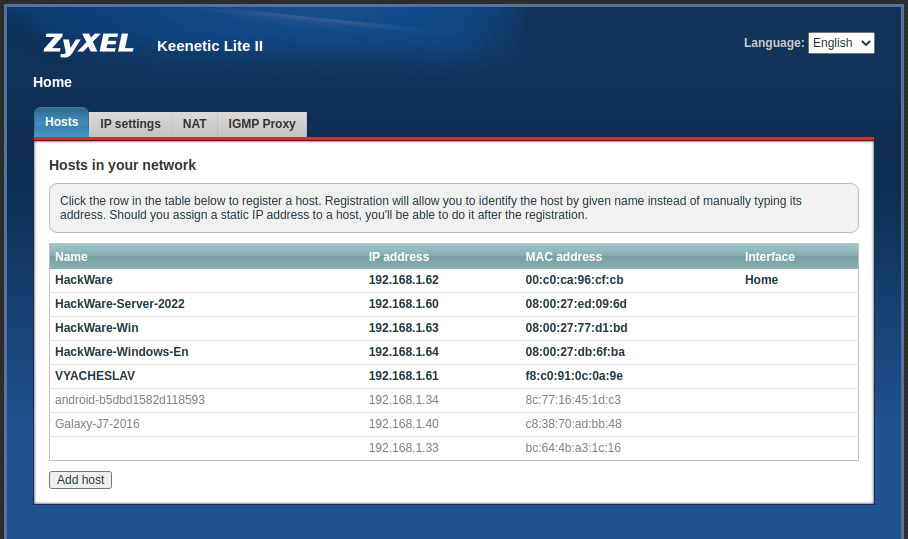
Among the services of Active Directory is the DNS service. Each computer already uses the services of one or another DNS server, but for Active Directory to work, it is necessary to configure the DNS server role, in fact, a DNS server that will provide the resolution of computer names into IP addresses, a third-party DNS server will not work. DNS will be enabled with the installation of Active Directory. For the DNS server to work properly, all computers in Active Directory must have static IP addresses. Therefore, you need to configure your computers and your Windows Server to work with static IPs. All the necessary theory and setup instructions can be found in the article “How to make a web-server on Windows accessible to others” (static IPs are needed for many network services). The previous part showed how to configure static IPs on Windows network interfaces. Below the spoiler is an example of assigning static IPs on a router.
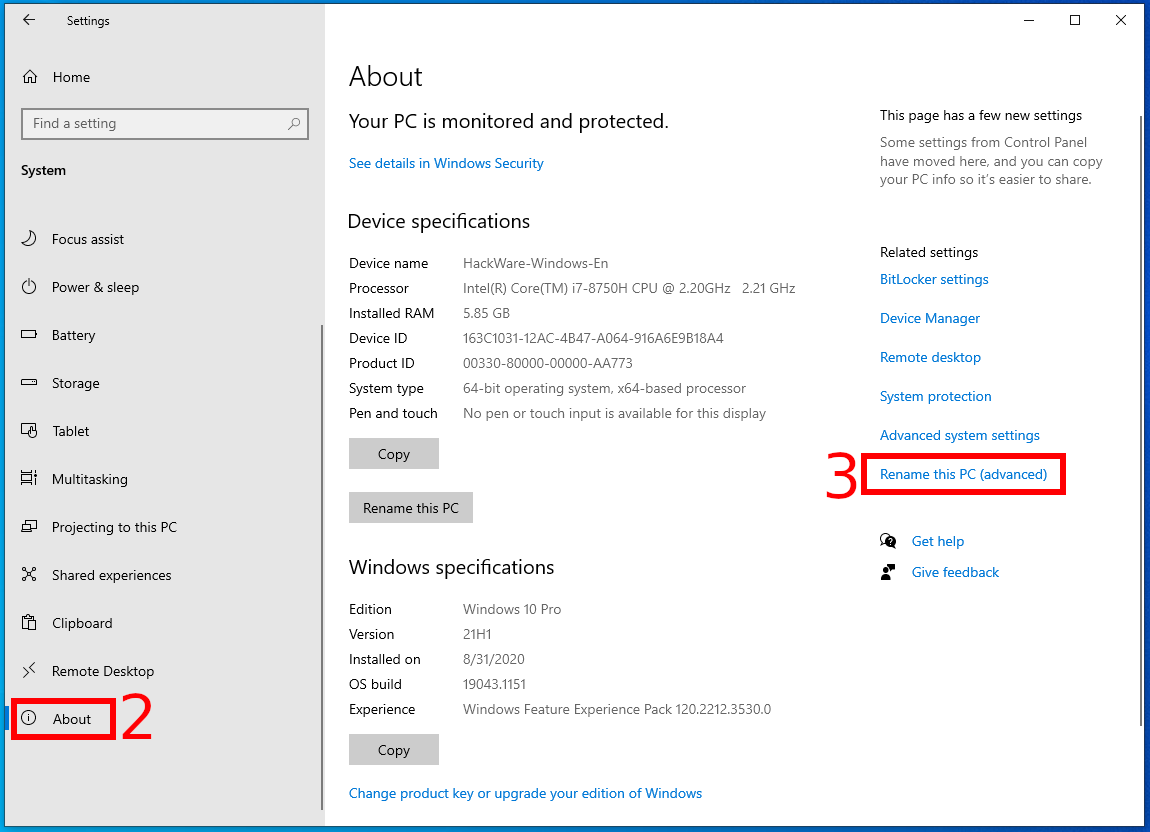
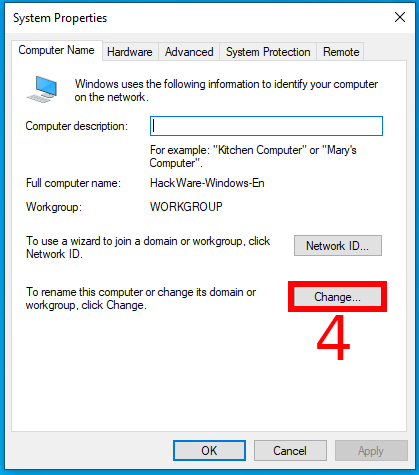
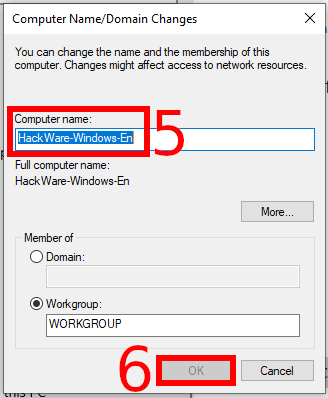
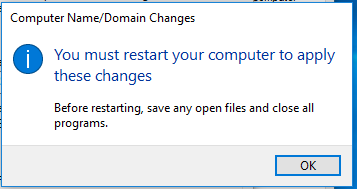
The second thing to watch out for is the computer names. All Windows computers have names that are automatically generated and are not descriptive, such as WIN-M30RTOJQTFM. Therefore, it is recommended that you use the tools discussed in the previous part or the instruction "Windows Computer name: how to change and use" and assign names to your computers that describe their functions or otherwise help you understand which computer we are talking about.


How to install Active Directory Domain Services in Server Manager
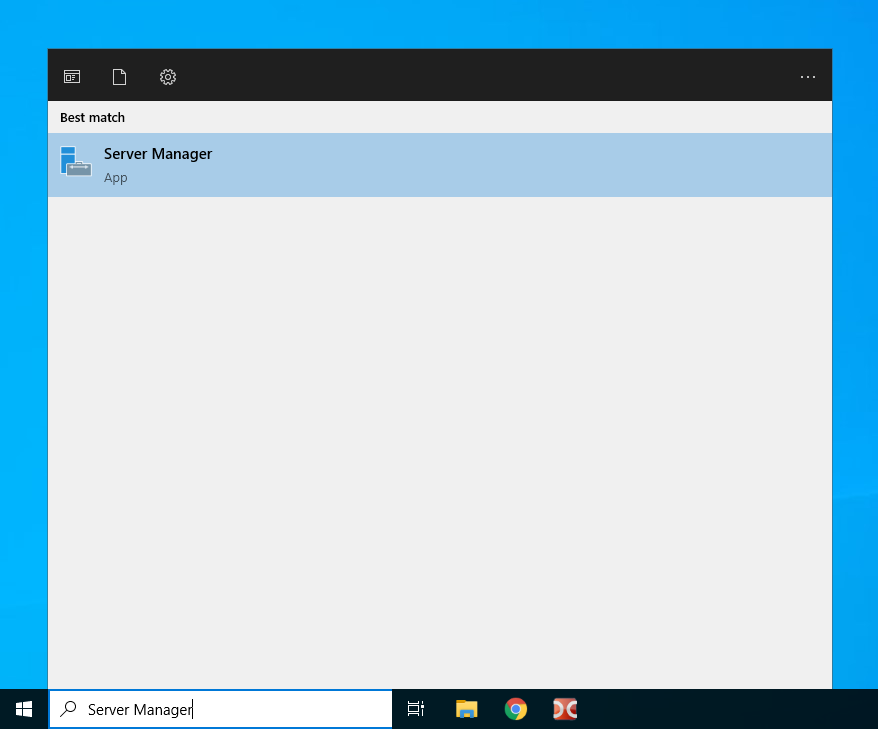
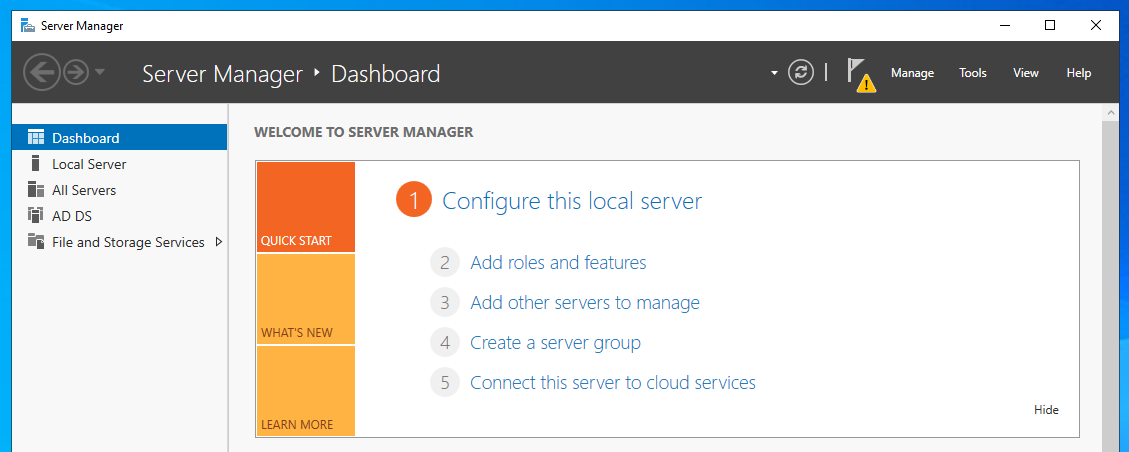
Press the “Windows” key on your keyboard and type “Server Manager” to search for the application, open it.
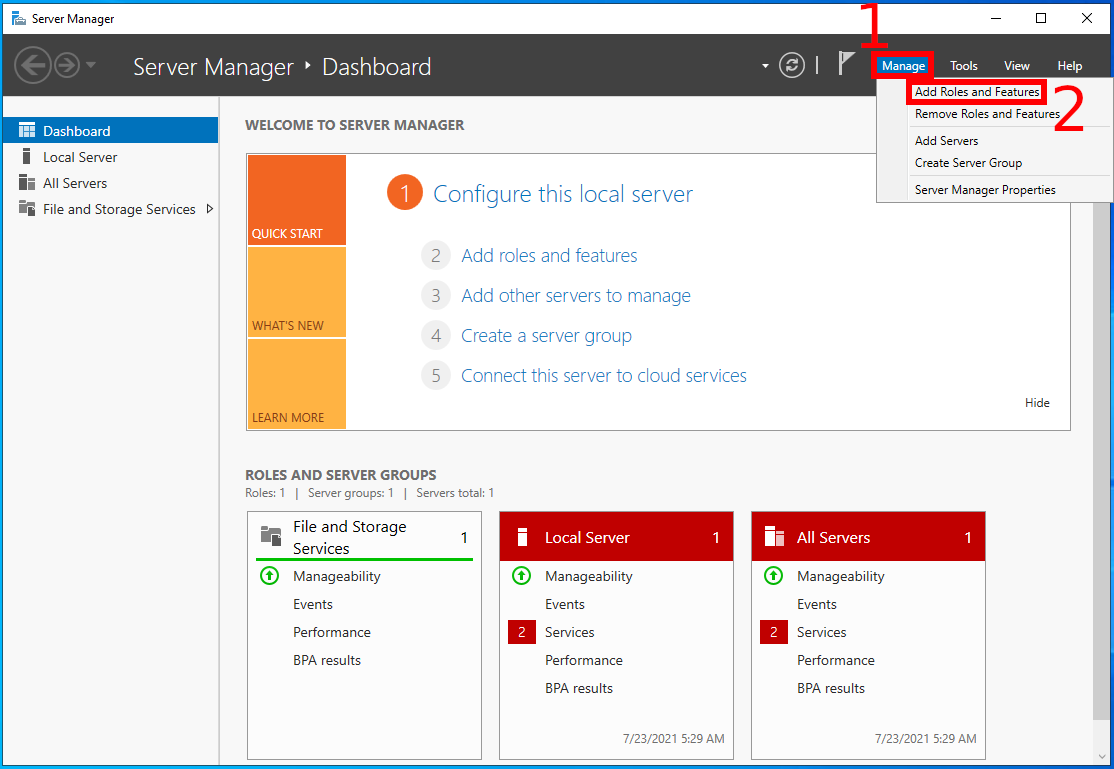
Click “Manage” in the Server Manager window and select “Add Roles and Features”.
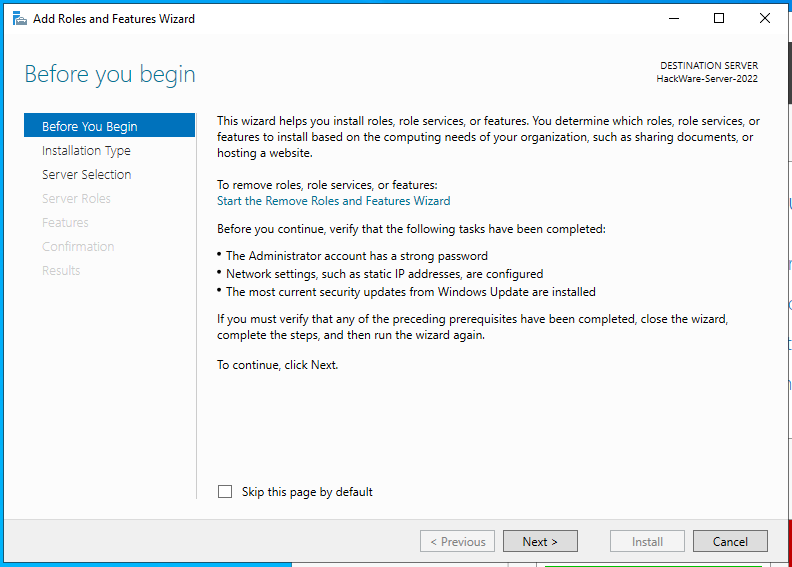
This will open the Add Roles and Features Wizard, which will lead us to the part where we install Active Directory Domain Services. Click “Next”.
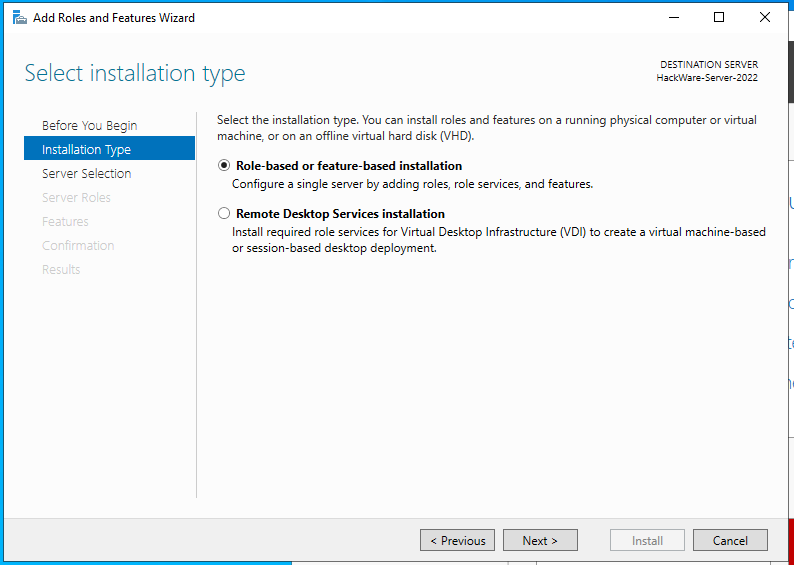
In the “Installation Type” leave the “Role-based or feature-based installation” radio button selected and click “Next”.
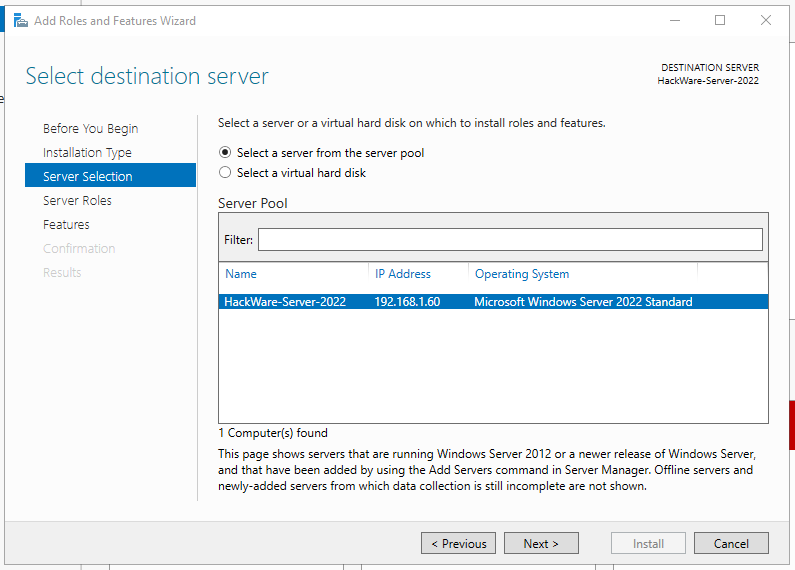
In this step, titled “Select destination server”, select the server on which you want to install AD DS and click “Next”. I am going to select my local server.
The previous step will take you to the next page. Here you will see many options with a square checkbox opposite them. As you may have guessed, we will choose “Active Directory Domain Services”.

As soon as you choose this option, a new window appears. In it, just click the “Add Features” button and click “Next”.

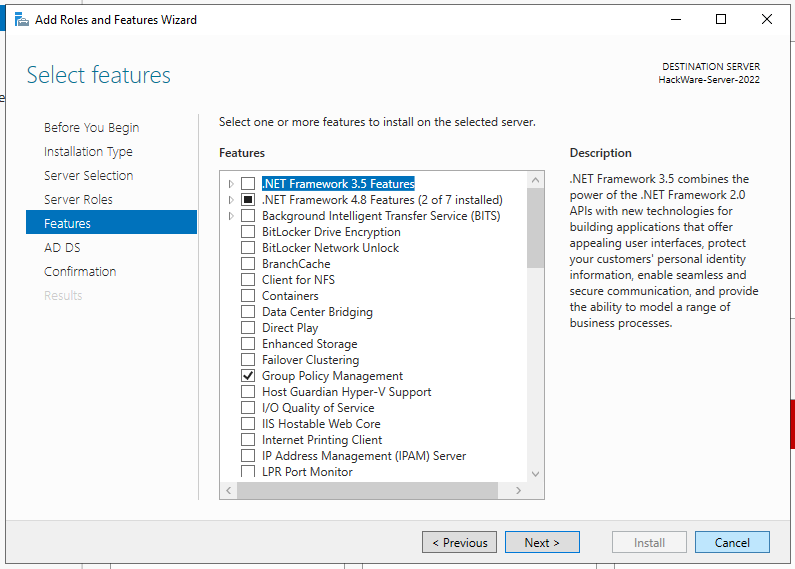
On the next page titled “Select features”, simply click “Next” to proceed with the AD DS installation.
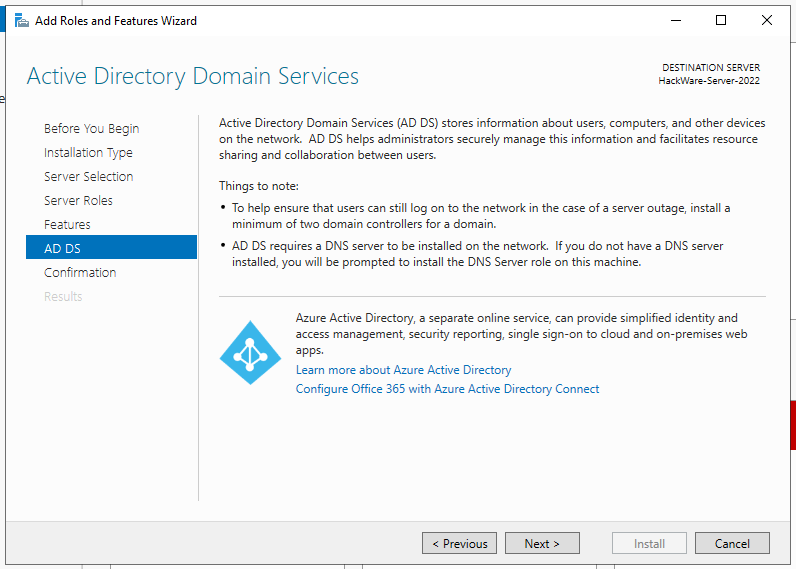
As shown below, you will be presented with the next page titled “Active Directory Domain Services”. Click “Next” here. Please note that we are reminded to install a DNS server, if the server is not already installed, this will be done during the deployment of Active Directory Domain Services. For it, we performed such preparatory steps as setting up static IP addresses and informative computer names.
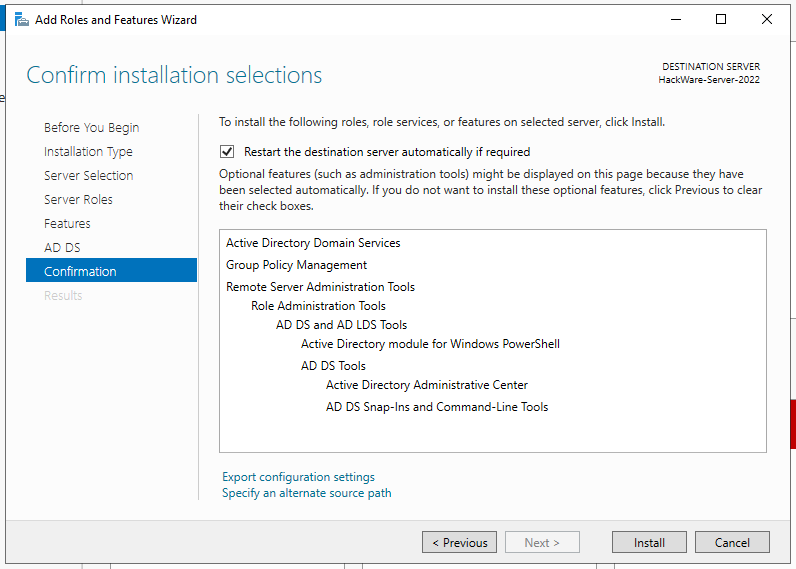
The next page is dedicated to confirming what you need to install. If you are sure of what you have chosen, click “Install”. You can select an option that will restart the server when needed. Click the “Install” button.
You can close the wizard window.

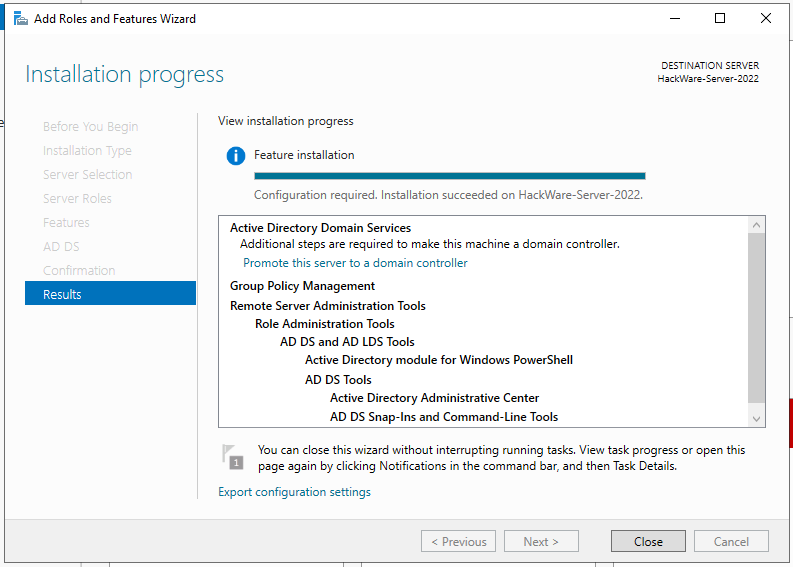
After you have completed the installation of Active Directory Domain Services, the last step is to promote your server to Domain Controller. Go to Server Manager where you will notice a yellow exclamation mark next to the “Manage” tab as shown below. Click on it
and select “Promote this server to a domain controller”.

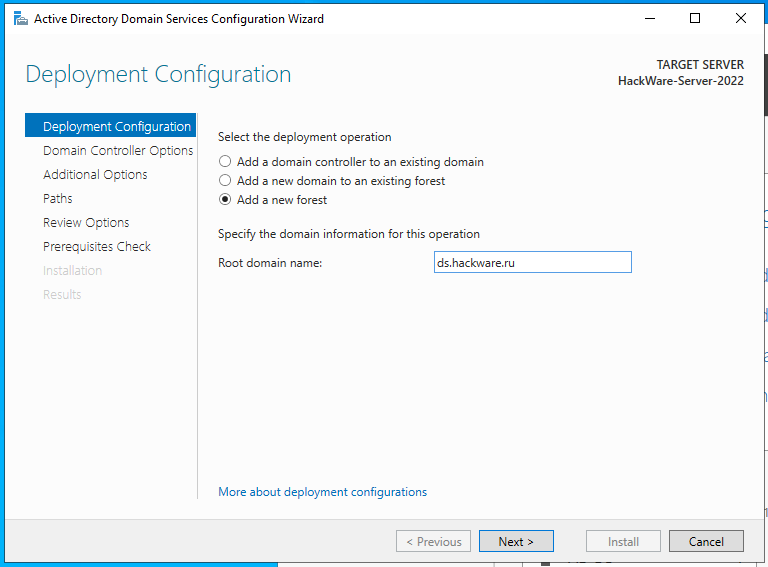
A new window will appear titled Active Directory Domain Services Configuration Wizard, as shown below. We're going to “Add a new Forest” , but if you want to do something different in this step, you can choose other options. Add your organization's root domain name. Please note that the name cannot consist of one word, the name must have a suffix separated by a period. Also, the name can have a prefix separated by a period. When setting up a domain name in a real production environment, you need to be very careful with your choice of name. For example, you should be careful when choosing a name with a non-existent suffix, for example, hackware.loc, or hackware.comp, since the number of first-level domains is rapidly increasing and your chosen suffix may one day become real, which in the future will lead to problems with access to the domain. Click “Next” after making your choice.
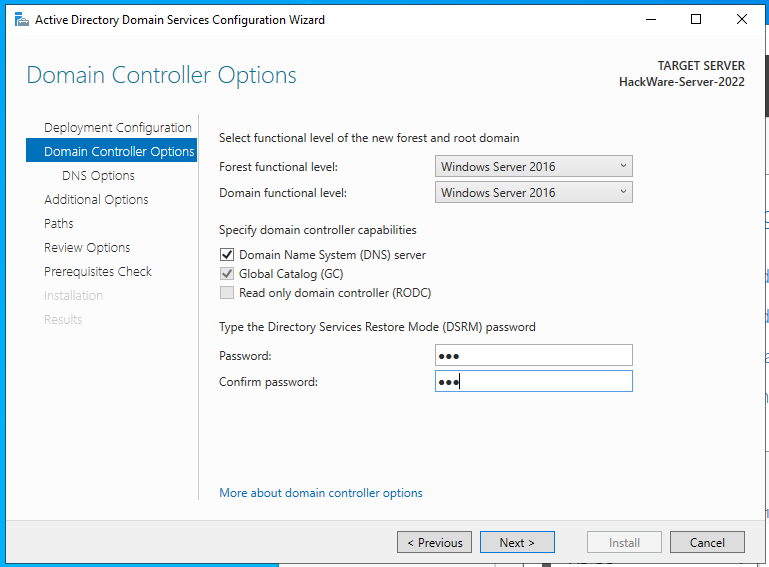
In the Domain Controller options, leave the default check boxes and enter your password. Then click “Next”.
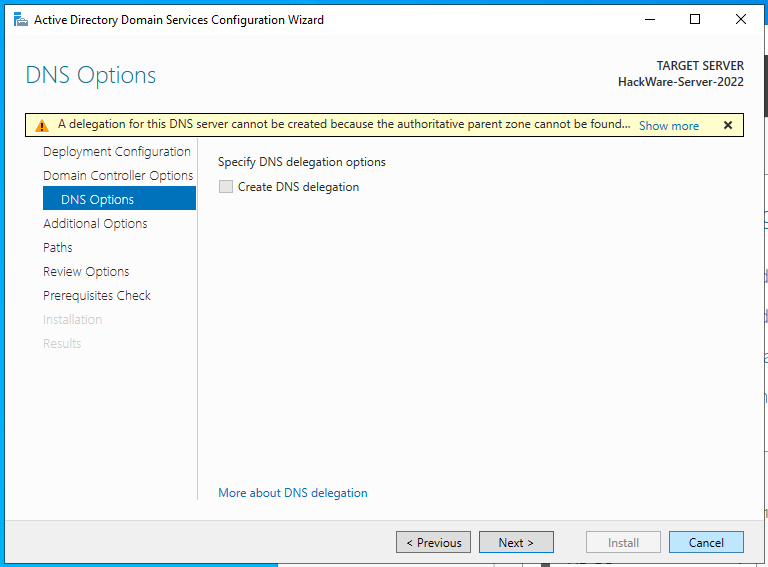
On the next DNS Options page, you will probably see an error at the top with the words “A delegation for this DNS server cannot be created because the authoritative parent zone nameserver cannot be found”. Ignore this and click “Next”.
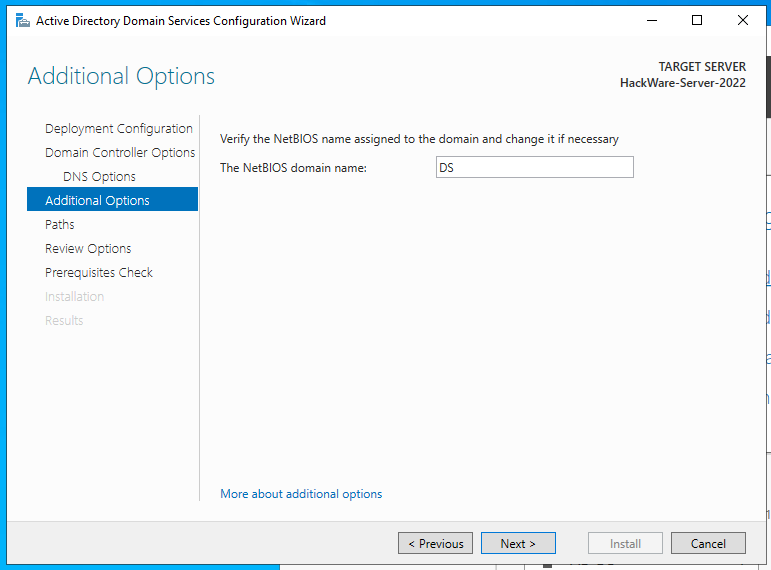
On the next page, leave the default NetBIOS domain name or you can change it to anything less than 15 characters. Then click “Next”.
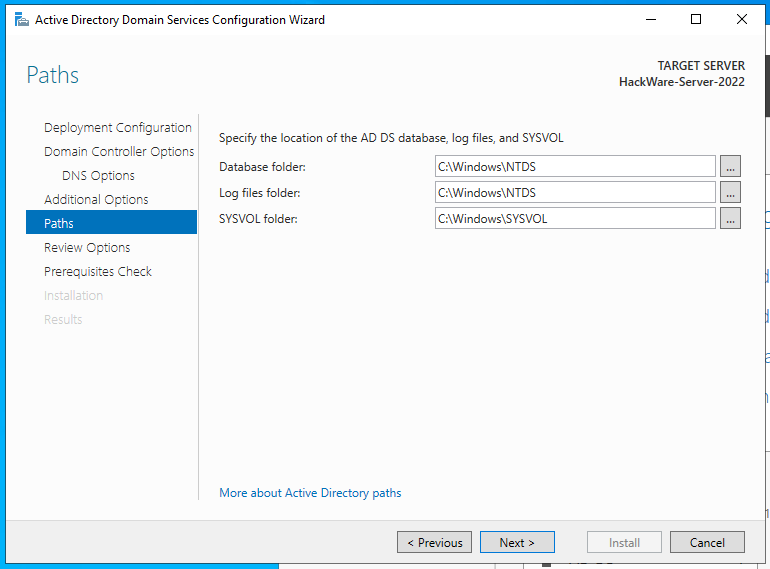
Leave the default paths and click “Next” as shown below.
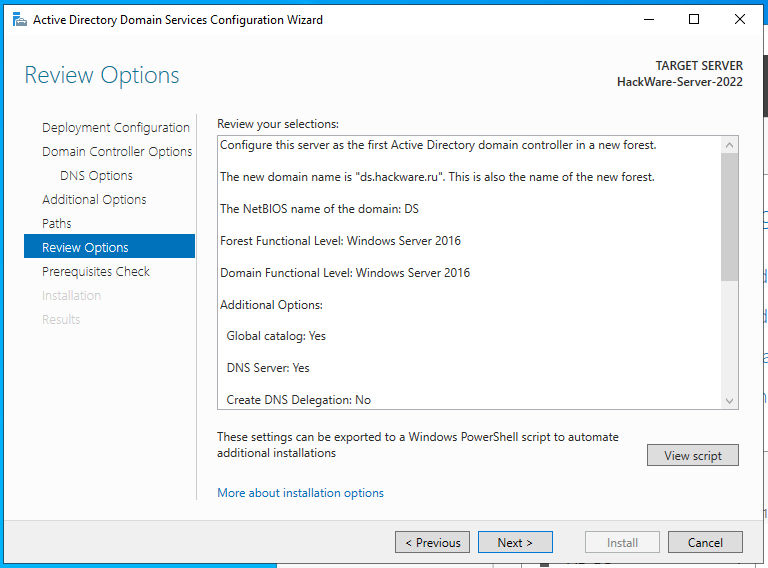
At this point, the server allows you to view the settings that will be applied. If you made your choice correctly, click “Next”.
In this step, the prerequisites will be verified before installing Active Directory Domain Services. If you find any errors here, review them and fix anything in the previous steps. If everything is OK, click “Install”.

After that, the server will reboot and you will be able to log into the domain with the credentials you set:
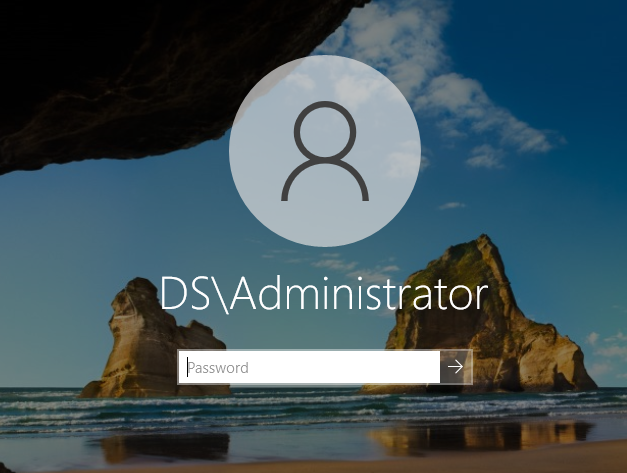
The promotion of the server to the domain controller is complete.
You can use the Active Directory Administrative Center or the Active Directory Users and Computers snap-in to manage users, groups, and other Active Directory objects. The next part will be devoted to this.
How to install Active Directory Domain Services in Windows Admin Center
In Windows Admin Center, it is very convenient to install the Active Directory Domain Services and DNS server roles, for this you need to make just a few clicks. But, as already mentioned, Windows Admin Center is not yet a full-fledged replacement for other tools, so when the time comes to Promote this server to a domain controller, you will need to do this using Server Manager tools, or in PowerShell.
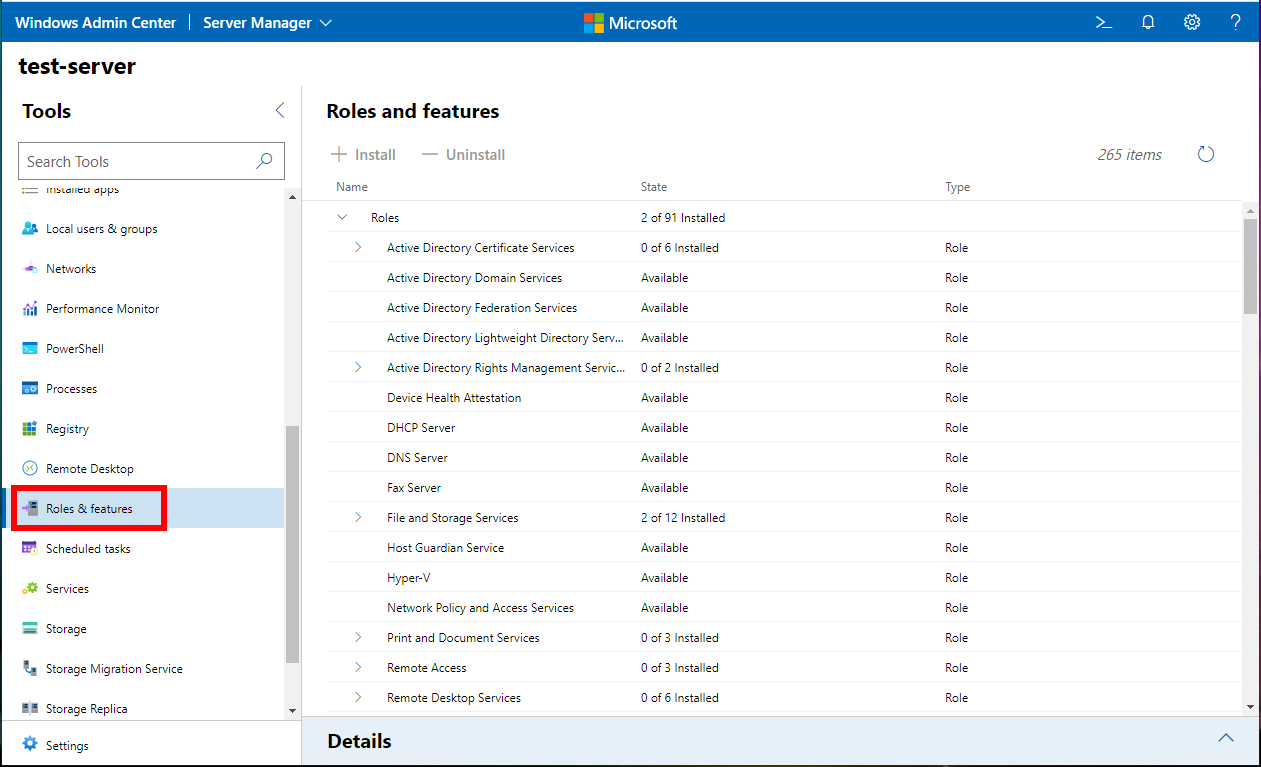
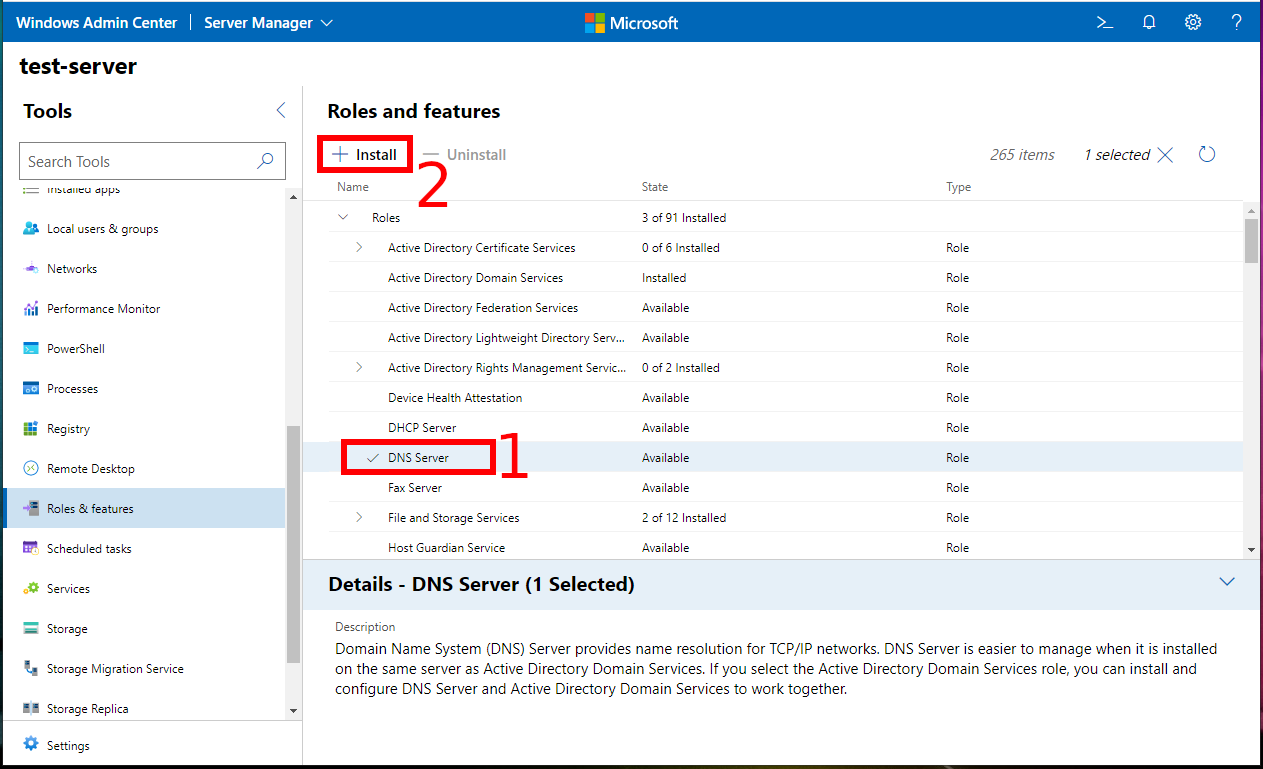
Connect to your server in Windows Admin Center and go to the “Roles & Features” tab.
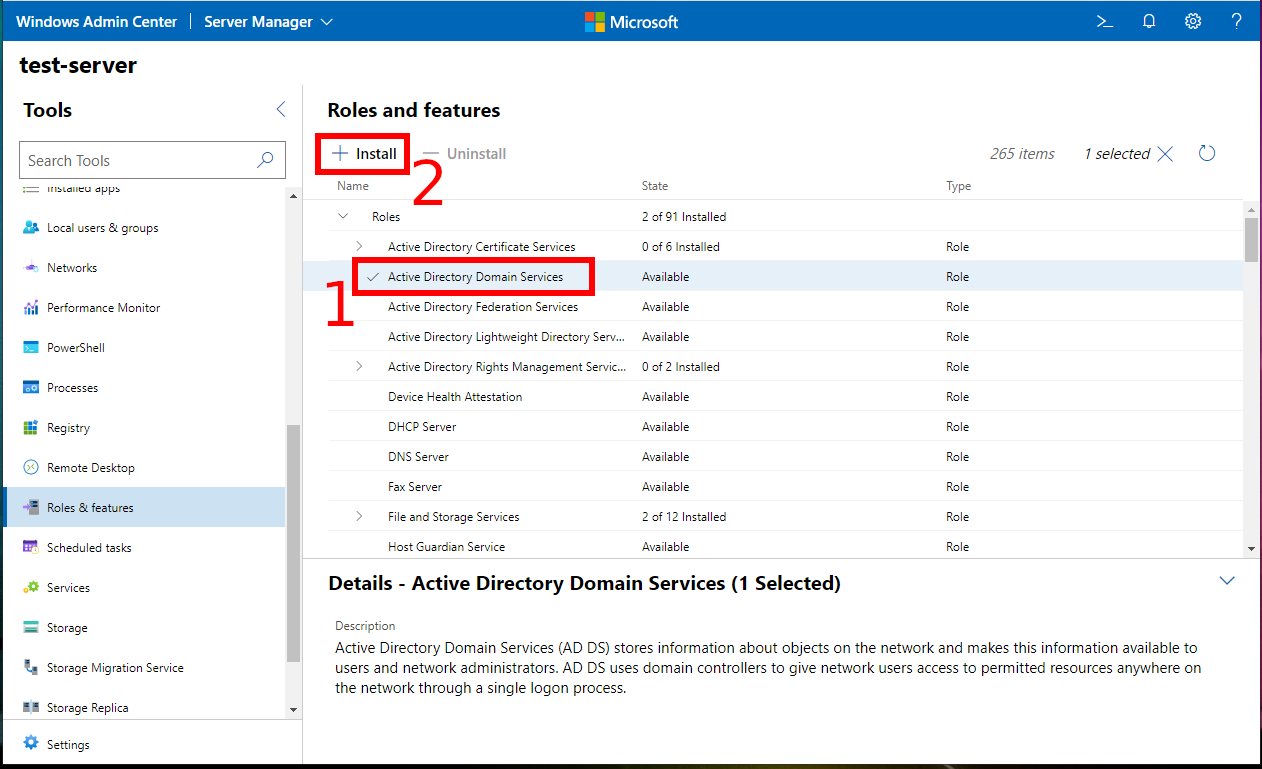
Check the box next to “Active Directory Domain Services” and click the “Install” button.
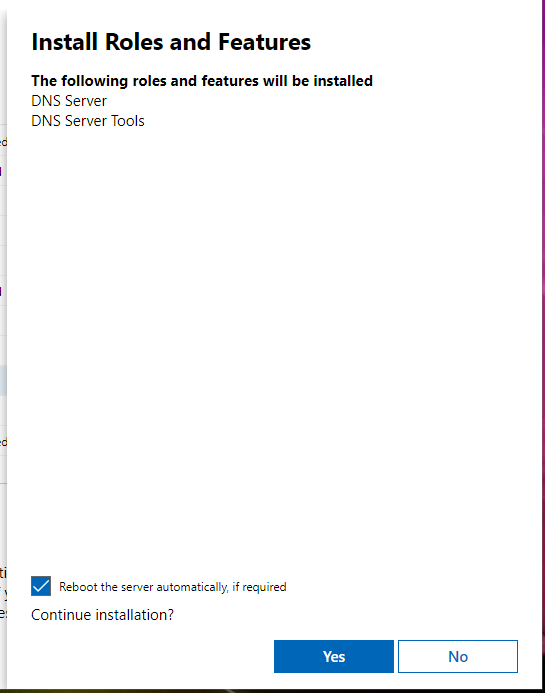
You will be shown a list of installed components and their dependencies, click “Yes” to continue.

You can watch the installation process in the notifications section.

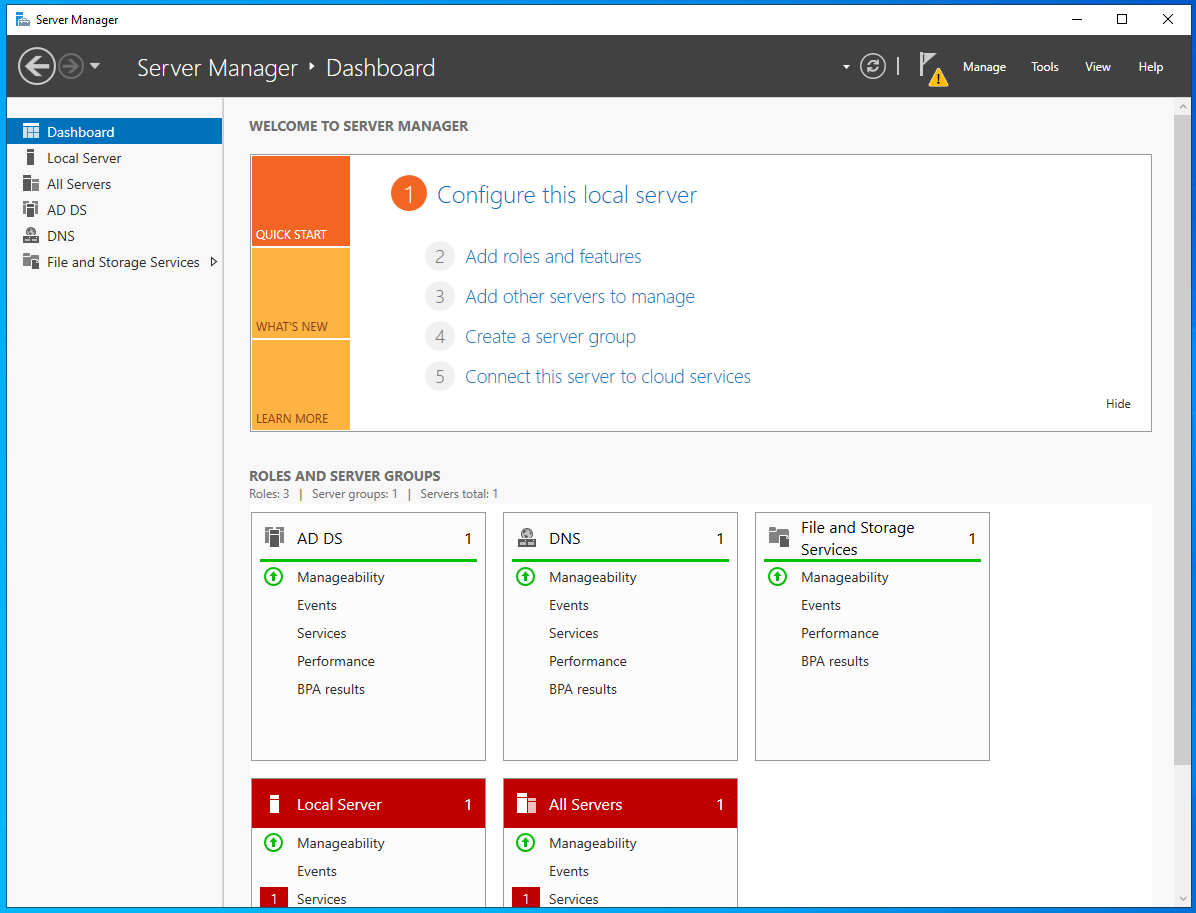
Let’s move to the server for which we are installing Active Directory Domain Services. Visually, nothing has changed there, we press the button “Refresh „Dashboard“”.
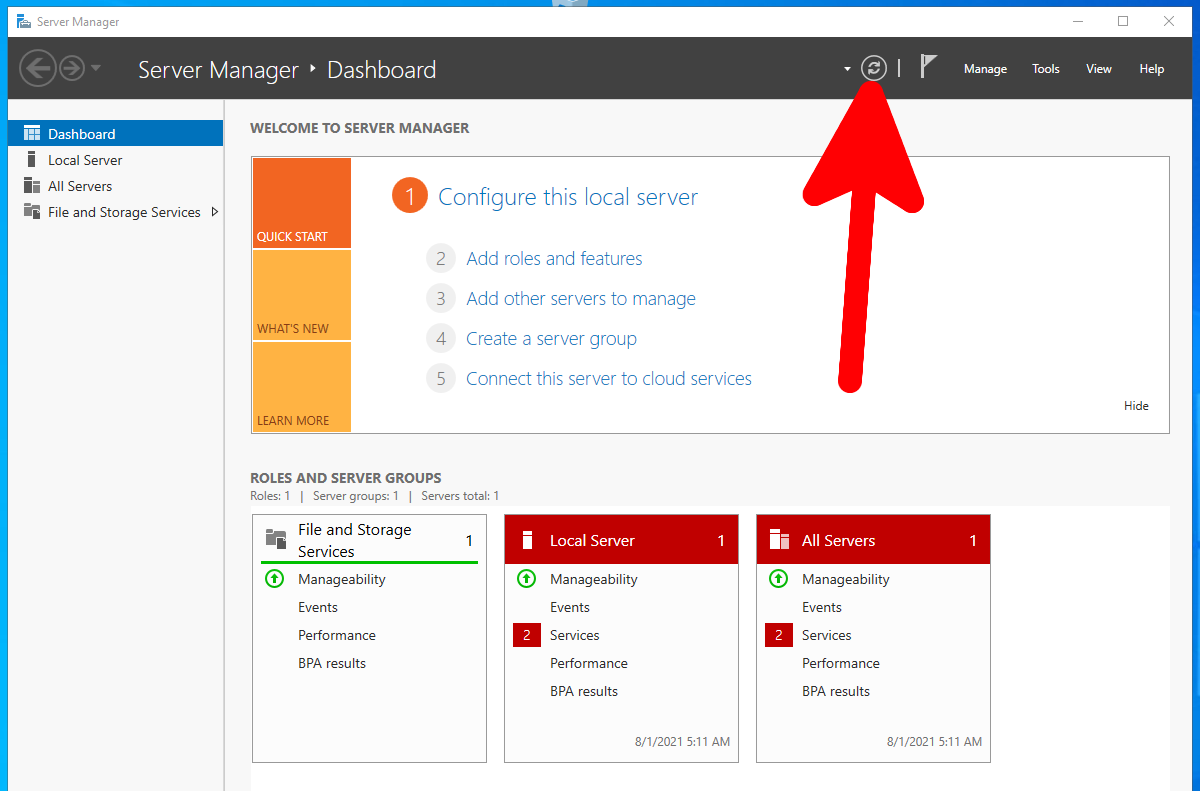
As you can see, there is now information about a working AD DS.

On the server itself, in Server Manager, you can start “Promote this server to a domain controller”, but I don't know how to do this remotely on a computer from Windows Admin Center.

Go to the Windows Admin Center computer again in order to install the “DNS Server” role. In fact, “Active Directory Domain Services”, “DNS Server” and any other roles and features could be installed in one go, just by selecting a few checkboxes.
Everything repeats – we are shown a list of dependencies.
We are watching the installation process.

Now in the server manager we can verify that the DNS server is working.
Here, in Windows Admin Center, you can also remove roles and features.
If you decide to do this in PowerShell (you can connect through the appropriate tab in Windows Admin Center), then in order to promote the server role to the domain controller level, we run the command:
Install-ADDSForest -DomainName "dc.hackware.ru" -CreateDnsDelegation:$false -DatabasePath "C:\Windows\NTDS" -DomainMode "7" -DomainNetbiosName "DC" -ForestMode "7" -InstallDns:$true -LogPath "C:\Windows\NTDS" -NoRebootOnCompletion:$True -SysvolPath "C:\Windows\SYSVOL" -Force:$true
Pay attention to the options:
- -DomainName "dc.hackware.ru"
- -DomainNetbiosName "DC"
They set the domain controller name and NetBIOS name. Replace them with your own values.
See also: NetBIOS: what it is, how it works and how to use in information security
At the command prompt, provide and confirm the password for DSRM (Directory Service Restore Mode) and press Enter.
How to install Active Directory Domain Services in PowerShell
You can install Active Directory Domain Services using PowerShell either by entering commands directly into the server console, or by connecting to it remotely. This is possible using PowerShell remoting tools.
PowerShell remoting is enabled on Windows servers. In my tests, I did not need to configure anything further, although the information is contradictory: in the documentation you can find information that PowerShell remoting is enabled only on Windows Server Core and that Private (not Public) network connection it is usually necessary.
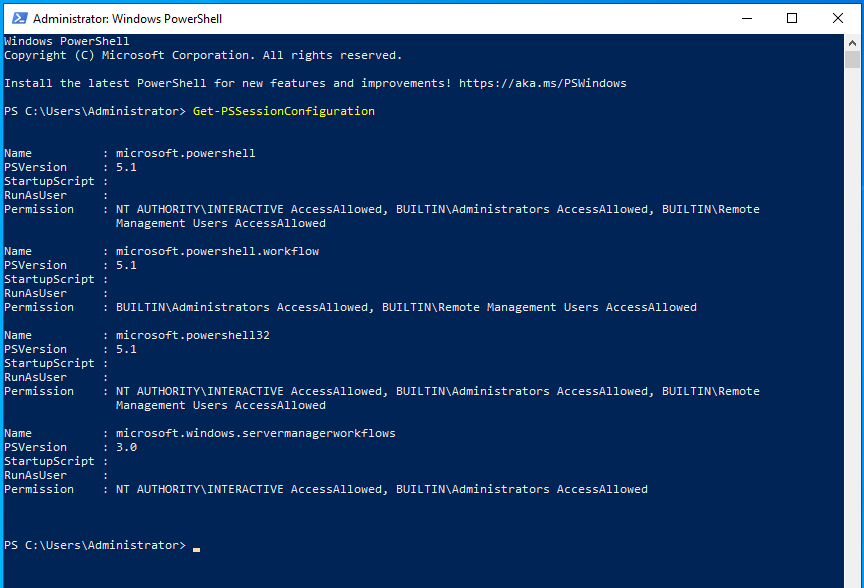
However, in my tests, no additional configuration was required – the connection went fine, without the need to use Enable-PSRemoting, Set-NetConnectionProfile, winrm quickconfig and add the computer to the trusted ones. If you have any problems connecting to a remote server, then write about it in the comments. You can also check the current settings on the server with the command:
Get-PSSessionConfiguration
All of the following steps apply to Windows Server with a graphical desktop and Windows Server Core.
We connect to the server using a command like this:
Enter-PSSession -ComputerName SERVER_NAME -Credential SERVER_NAME\Administrator
For example, the server name is TEST-SERVER, then the command is as follows:
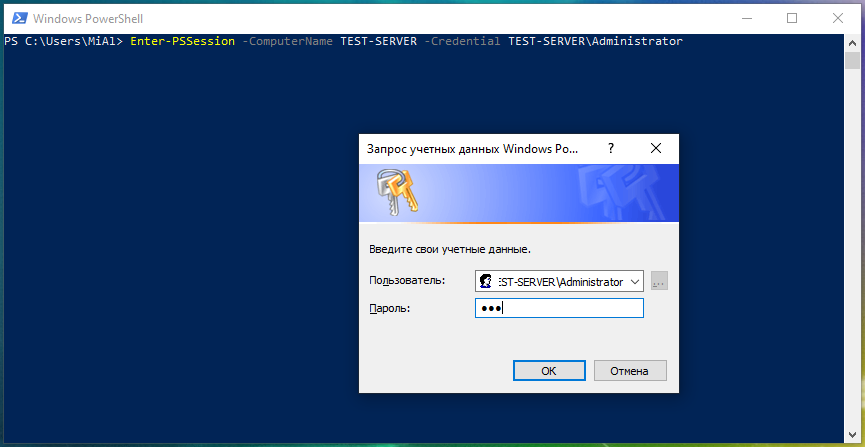
Enter-PSSession -ComputerName TEST-SERVER -Credential TEST-SERVER\Administrator
If you are using PowerShell 5, the following window will be displayed for entering the password for the administrator account of the remote computer:
If you are using the latest versions of PowerShell, the password is entered directly into the command prompt.
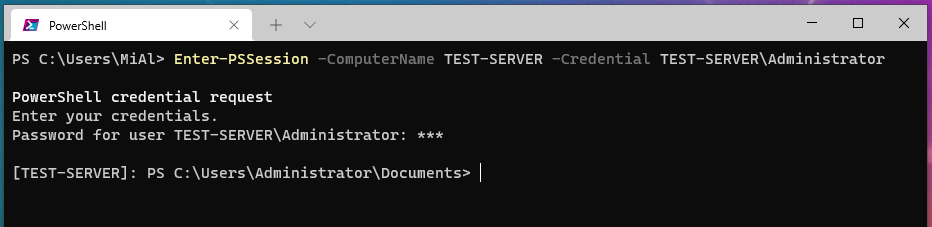
Note that the command line prompt has changed. It was
PS C:\Users\MiAl>
became
[TEST-SERVER]: PS C:\Users\Administrator\Documents>
If you are a Linux user, Enter-PSSession is like SSH. That is, now we are in the command line of the remote computer and all the commands that are run will be executed on the remote server, and not on the local system.
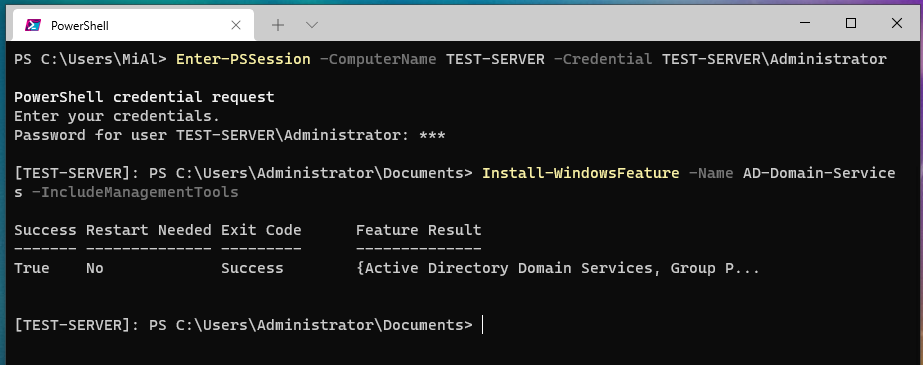
Now you can start installing the Active Directory Domain Services role.
Install-WindowsFeature -Name AD-Domain-Services -IncludeManagementTools
The installation of the selected role and the components required for it has begun.
In order to promote the role of the server to the level of a domain controller, run the command:
Install-ADDSForest -DomainName "dc.hackware.ru" -CreateDnsDelegation:$false -DatabasePath "C:\Windows\NTDS" -DomainMode "7" -DomainNetbiosName "DC" -ForestMode "7" -InstallDns:$true -LogPath "C:\Windows\NTDS" -NoRebootOnCompletion:$True -SysvolPath "C:\Windows\SYSVOL" -Force:$true
Pay attention to the options:
- -DomainName "dc.hackware.ru"
- -DomainNetbiosName "DC"
They set the domain controller name and NetBIOS name. Replace them with your own values.
See also: NetBIOS: what it is, how it works and how to use in information security
At the command prompt, enter the password for DSRM (Directory Service Restore Mode), here called SafeModeAdministratorPassword, and press Enter.
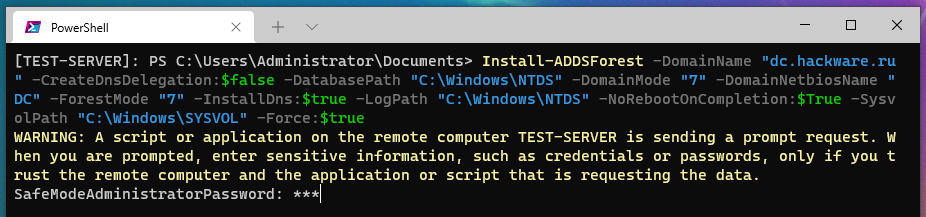
We confirm the password and press “Enter”.
The process of promoting the server to the domain controller has begun.
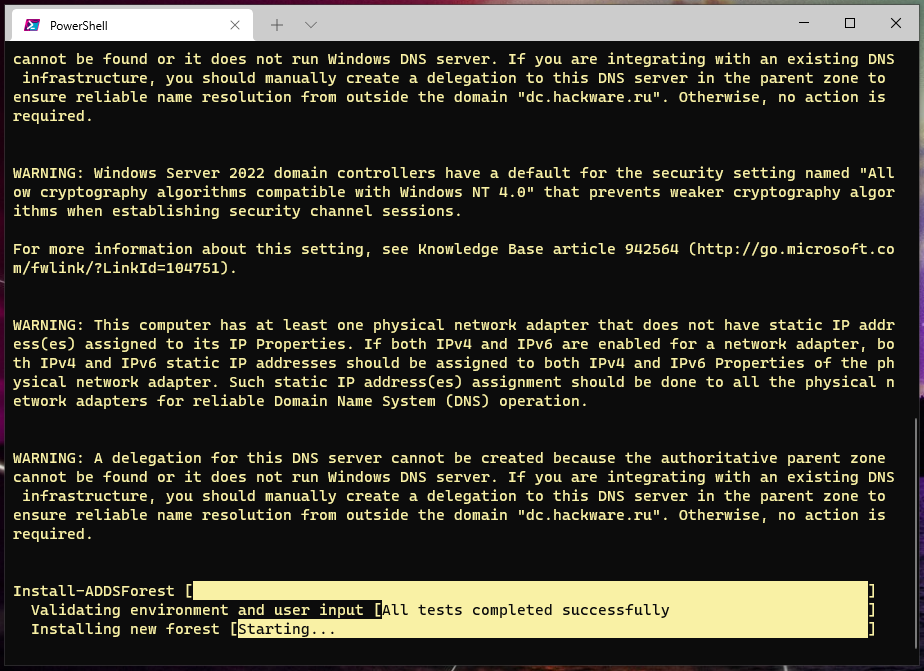
The promotion of the server to the domain controller is complete.

Restart your computer:
Restart-Computer -Force
Let's connect to the remote computer again to check if the installation was successful. Note that the previous command we used to successfully connect to the server no longer works because although I marked the username as “SERVER_NAME\Administrator” it is actually “WORKGROUP\Administrator”. WORKGROUP is the same as SERVER_NAME, so I didn't confuse you ahead of time.
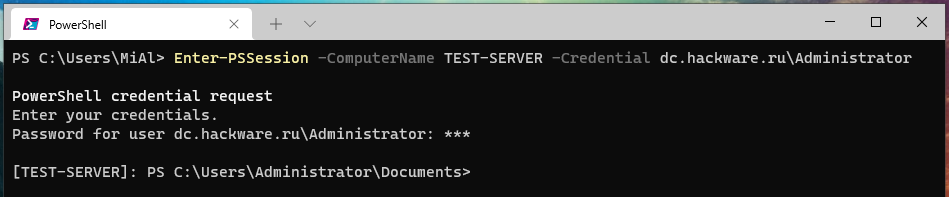
But now the server is not part of a workgroup, but part of a domain, so the command to connect should look like this:
Enter-PSSession -ComputerName SERVER_NAME -Credential DOMAIN\Administrator
For example:
Enter-PSSession -ComputerName TEST-SERVER -Credential dc.hackware.ru\Administrator
The connection to the server has been established.
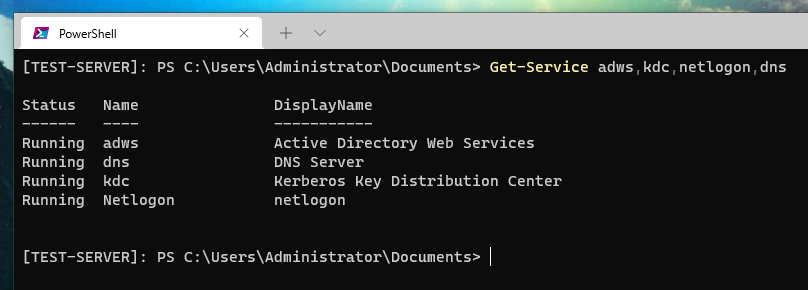
Using the following command, let’s check the status of the services required for the domain controller to work:
Get-Service adws,kdc,netlogon,dns
The services required for the domain controller are running.
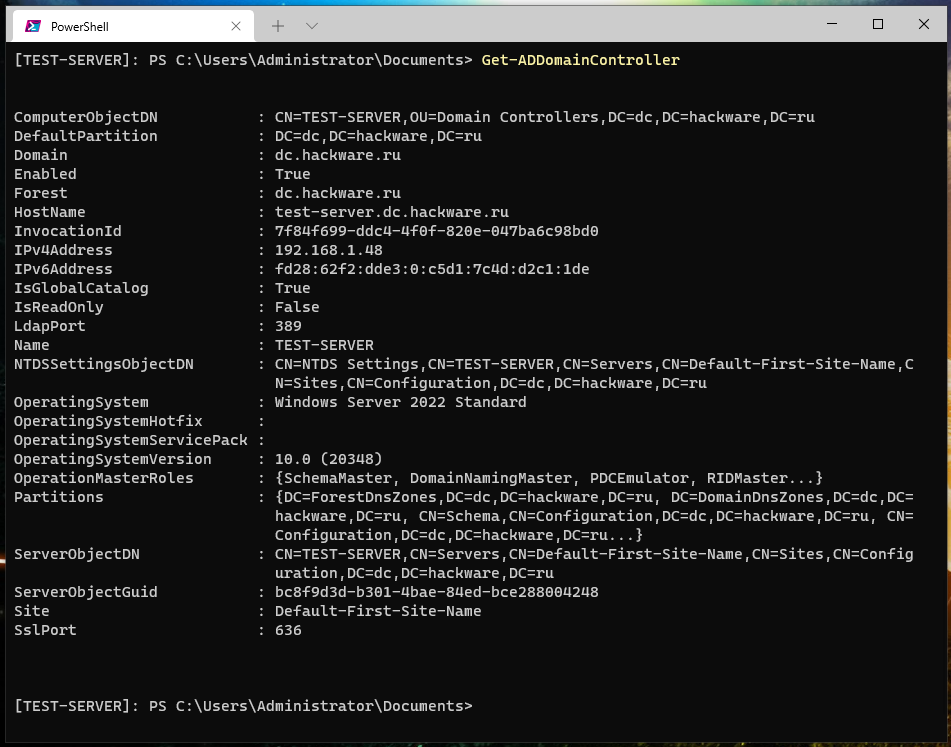
To view detailed information about the configuration of a domain controller, you can run the command:
Get-ADDomainController
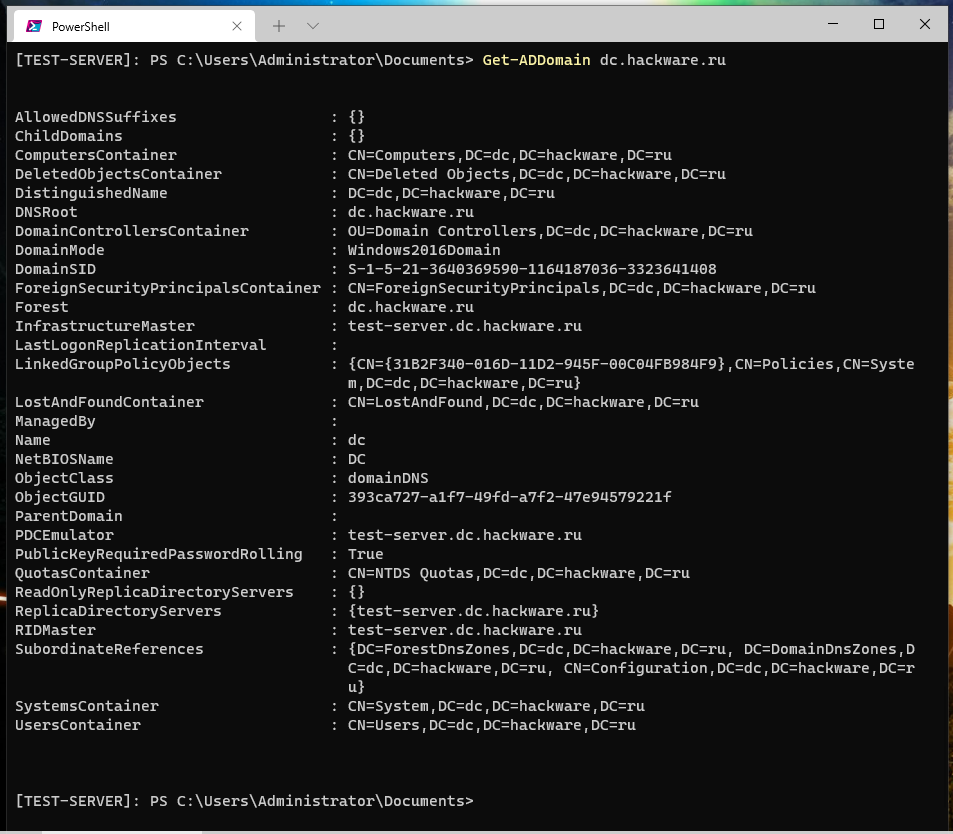
To view detailed information about the Active Directory domain, you can run the command:
Get-ADDomain dc.hackware.ru
To view detailed information about the Active Directory forest, you can run the command:
Get-ADForest dc.hackware.ru

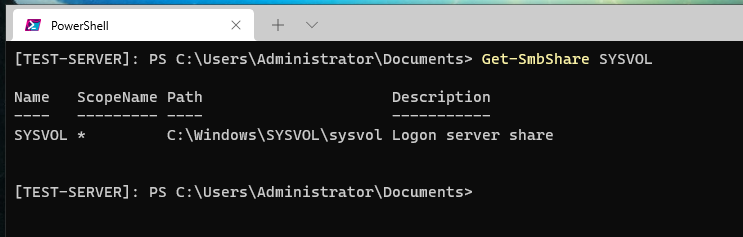
To check the availability of the SYSVOL shared folder, you can run the command:
Get-SmbShare SYSVOL
The shared folder “SYSVOL” is available. It is used to provide clients with Group Policy settings and logon and logon scripts.
We return to the workstation (disable the remote PowerShell session):
exit
Related articles:
- Active Directory comprehensive guide, from installation and configuration to security auditing. Part 1: Introduction to Active Directory (concepts, usage, difference from Workgroup) (100%)
- Active Directory comprehensive guide, from installation and configuration to security auditing. Part 3: Windows Server 2022 and Windows Server Core 2022 configuration tools (70.2%)
- Active Directory comprehensive guide, from installation and configuration to security auditing. Part 5: Join computers to Active Directory. Check and unjoin from Active Directory (70.2%)
- Active Directory comprehensive guide, from installation and configuration to security auditing. Part 6: Active Directory configuration tools and snap-ins (70.2%)
- Active Directory comprehensive guide, from installation and configuration to security auditing. Part 2: Install Windows Server 2022 and Windows Server Core 2022 (59.3%)
- Best Kali Linux tools in WSL (Windows Subsystem for Linux) (Part 1) (RANDOM - 50%)