Comprehensive step by step guide to install Arch Linux
Table of contents
1. Features of the Arch Linux installation
2. Creating an Arch Linux bootable flash drive
7. Installing the Base Arch Linux
9. Installing the Xorg Server and Video Drivers
10. Installing the Cinnamon Desktop Environment
11. Installing the basic software
12. Installing BlackArch Tools
13. How to install Hashcat in Arch Linux
14. Enabling the multilib repository
15. How to install Wine in Arch Linux
17. How to restore Arch Linux if it does not boot
April 2023 Update: Instructions have been rechecked and corrected.
See also: Script for installing BlackArch in a VirtualBox
Features of the Arch Linux installation
To install Arch Linux, you need an Internet connection. Arch Linux and its many derivatives (for example, BlackArch) have a network installation. This means that you can not install the system without an Internet connection. That is, you start the OS from a bootable USB flash drive, but in the process of installing the packages are not copied from the disk, but are downloaded from the network. The consequence of this is that immediately after installation we have the up-to-date system.
There are more simple ways to get an Arch Linux-based distribution. For example, Manjaro has a convenient graphical installer and even supports offline installation.
BlackArch also has a script to help you install.
I will install the most pure Arch Linux, as a desktop environment, I will install Cinnamon, and I will also add BlackArch repositories (this repository is perfectly compatible with Arch Linux). It turns out a kind of analog Kali Linux, but it looks friendly like Linux Mint.
Creating an Arch Linux bootable flash drive
Arch Linux is a Rolling distribution, that is, there are no versions as such, but once a month Live-images come out, which represent a snapshot of the system at the time of creation. Download the latest version at this link: https://www.archlinux.org/download/
This is the official site, Arch itself is free, just like AUR and BlackArch repositories.
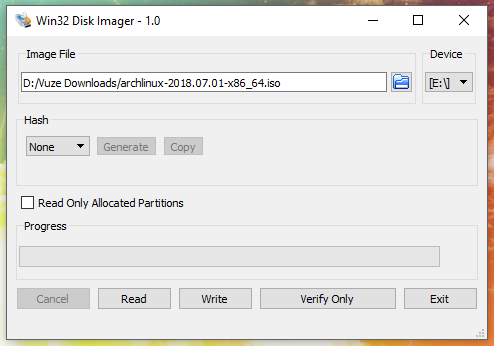
In Windows, the bootable USB flash drive can be created using Win32 Disk Imager.
In Linux, you can use dd utility to create a bootable flash drive.
Installing Arch Linux
It is necessary to boot from a flash drive. To do this, when you start the computer many times press Esc (or Delete button on some systems), then select the USB flash drive to boot:

Either go to the BIOS and there you select the USB flash drive as primary boot media.
Note: In your BIOS settings Secure boot and Fast boot have to be disabled.
Choose the first option:

And… welcome to Arch Linux!
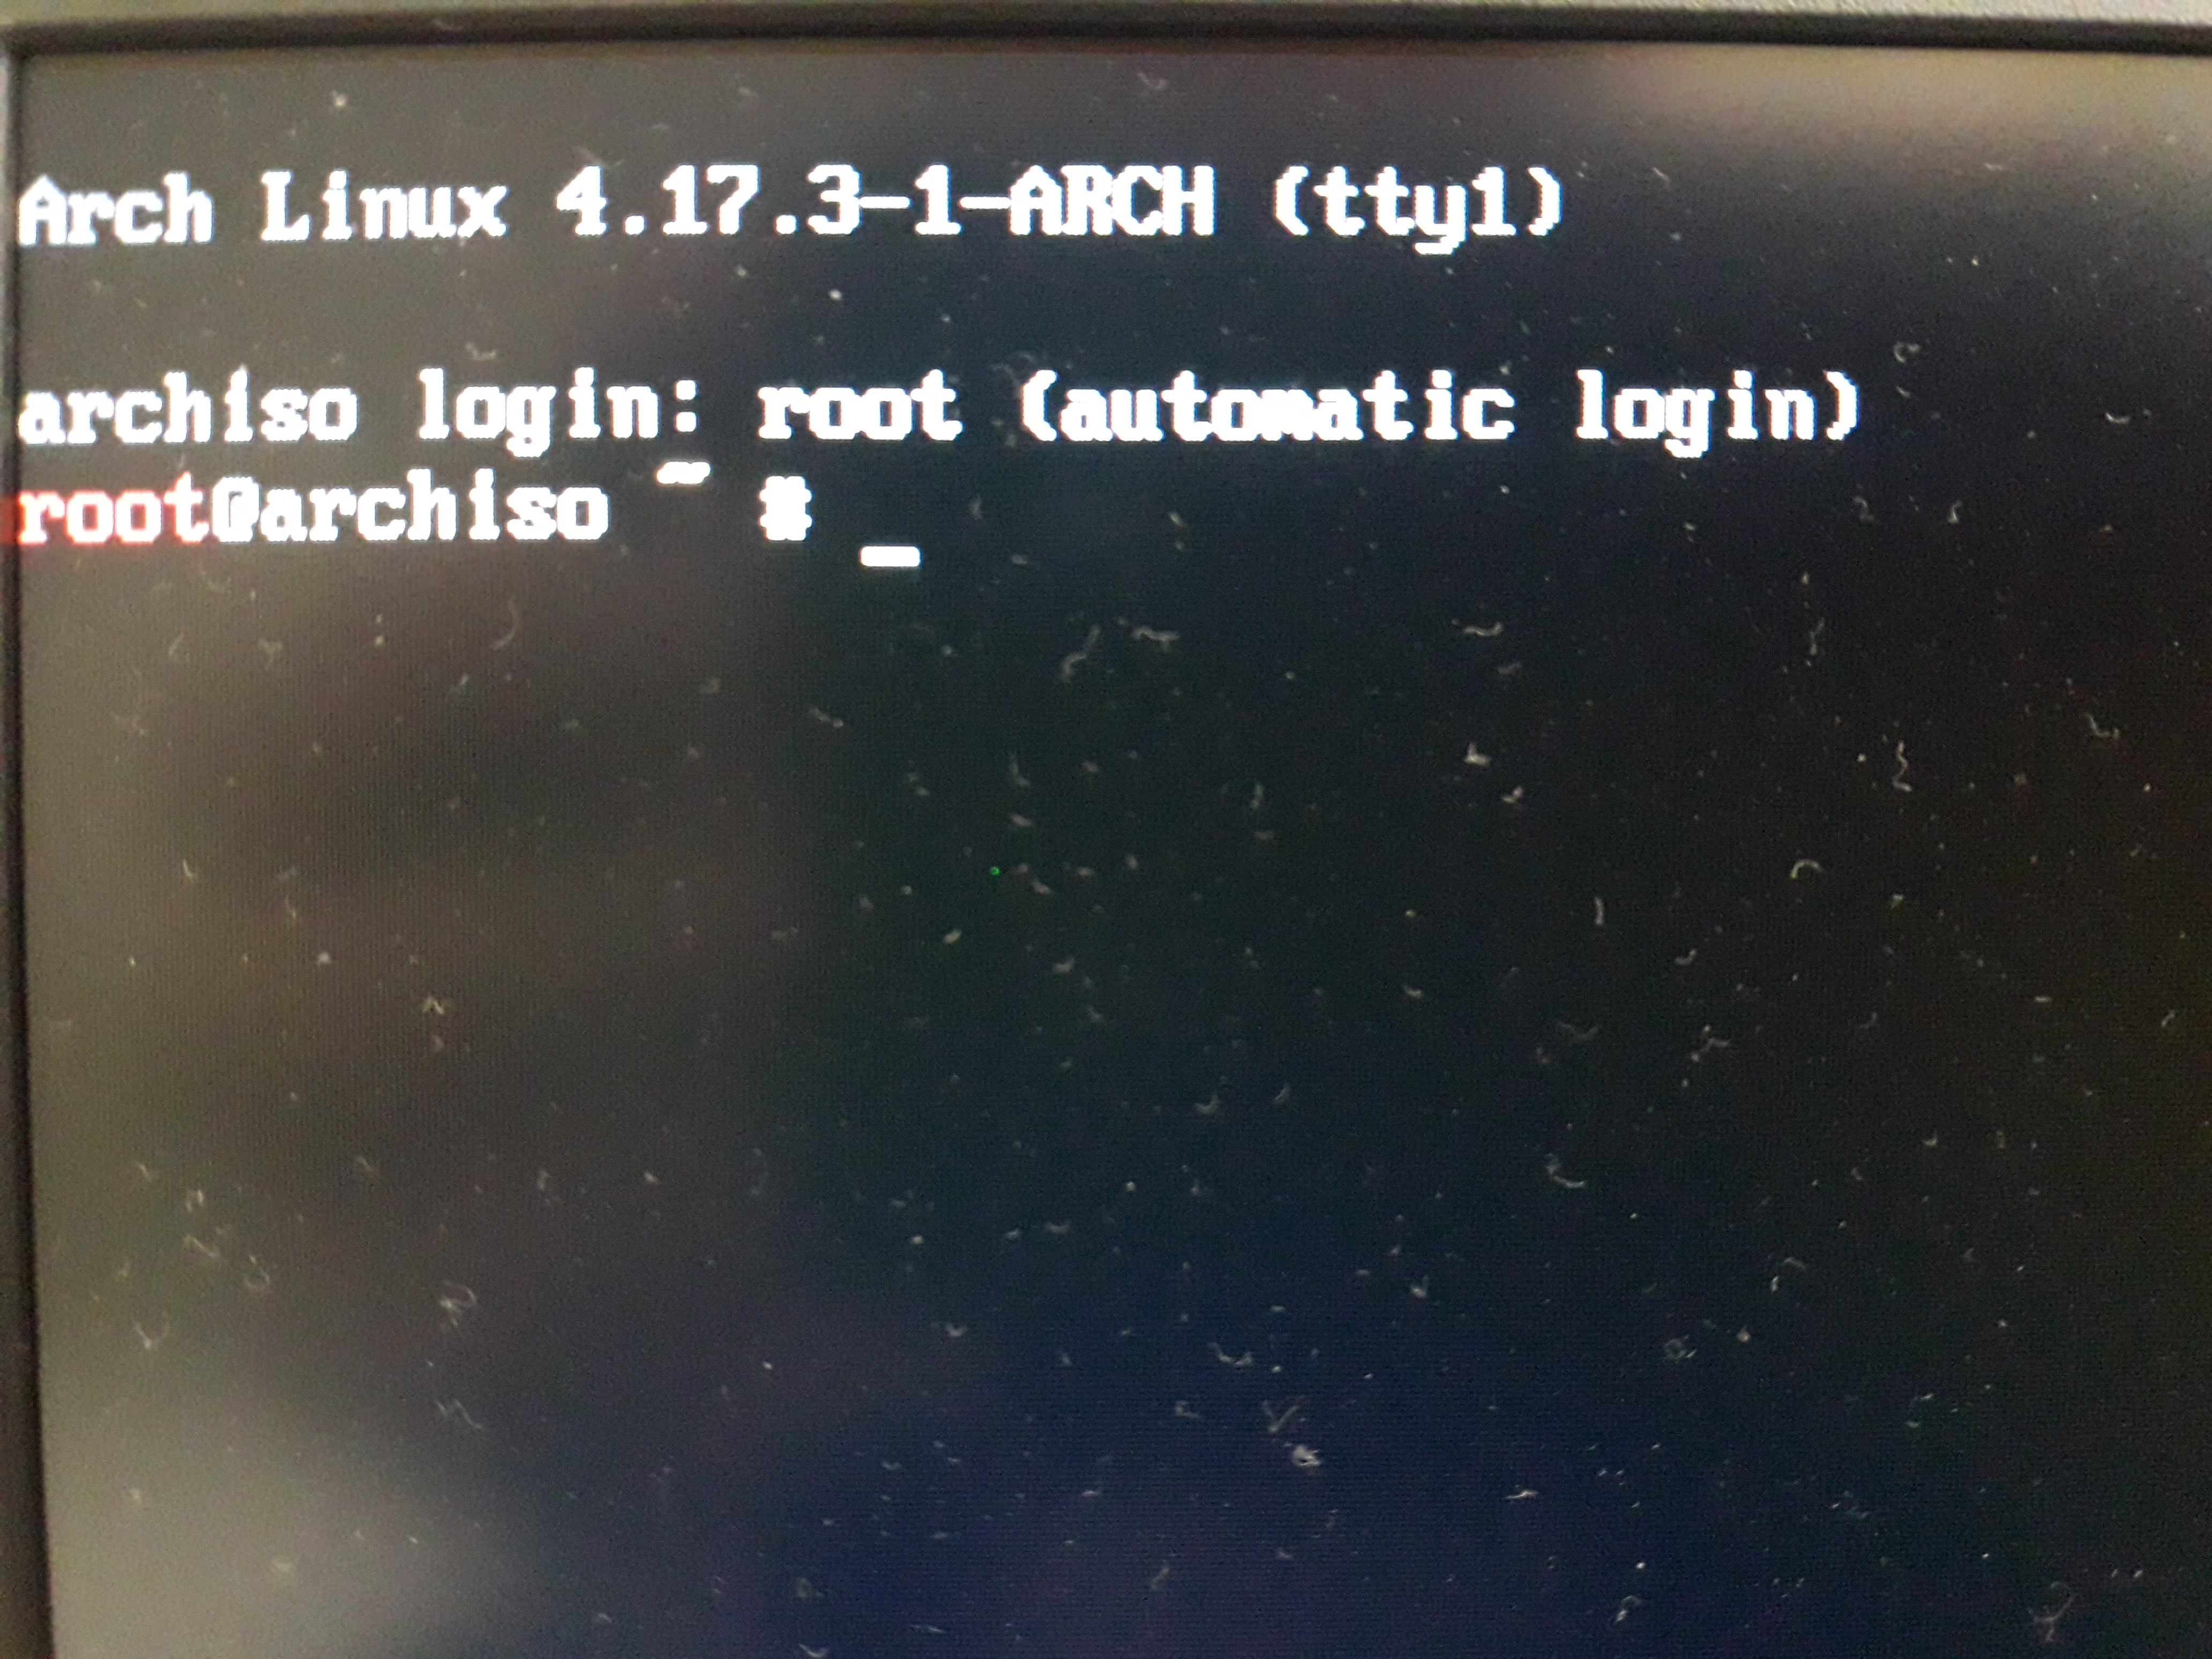
Arch Linux is distribution with a minimal set of programs without a graphical interface - just like Debian minimal.
Internet connection
It is necessary to configure the Internet, because everything else is meaningless, if there is no internet connection.
If your computer has a wired internet connection, then everything is simple enough - Arch itself will try to configure the Internet connection and get an IP address if the router supports DHCP.
In either case, check the network connection by ping:
ping ya.ru
If this service is disabled on the router, then you need manually to configure your network interface. An example of how to do this:
Configuring Static IP for Arch Linux Installation
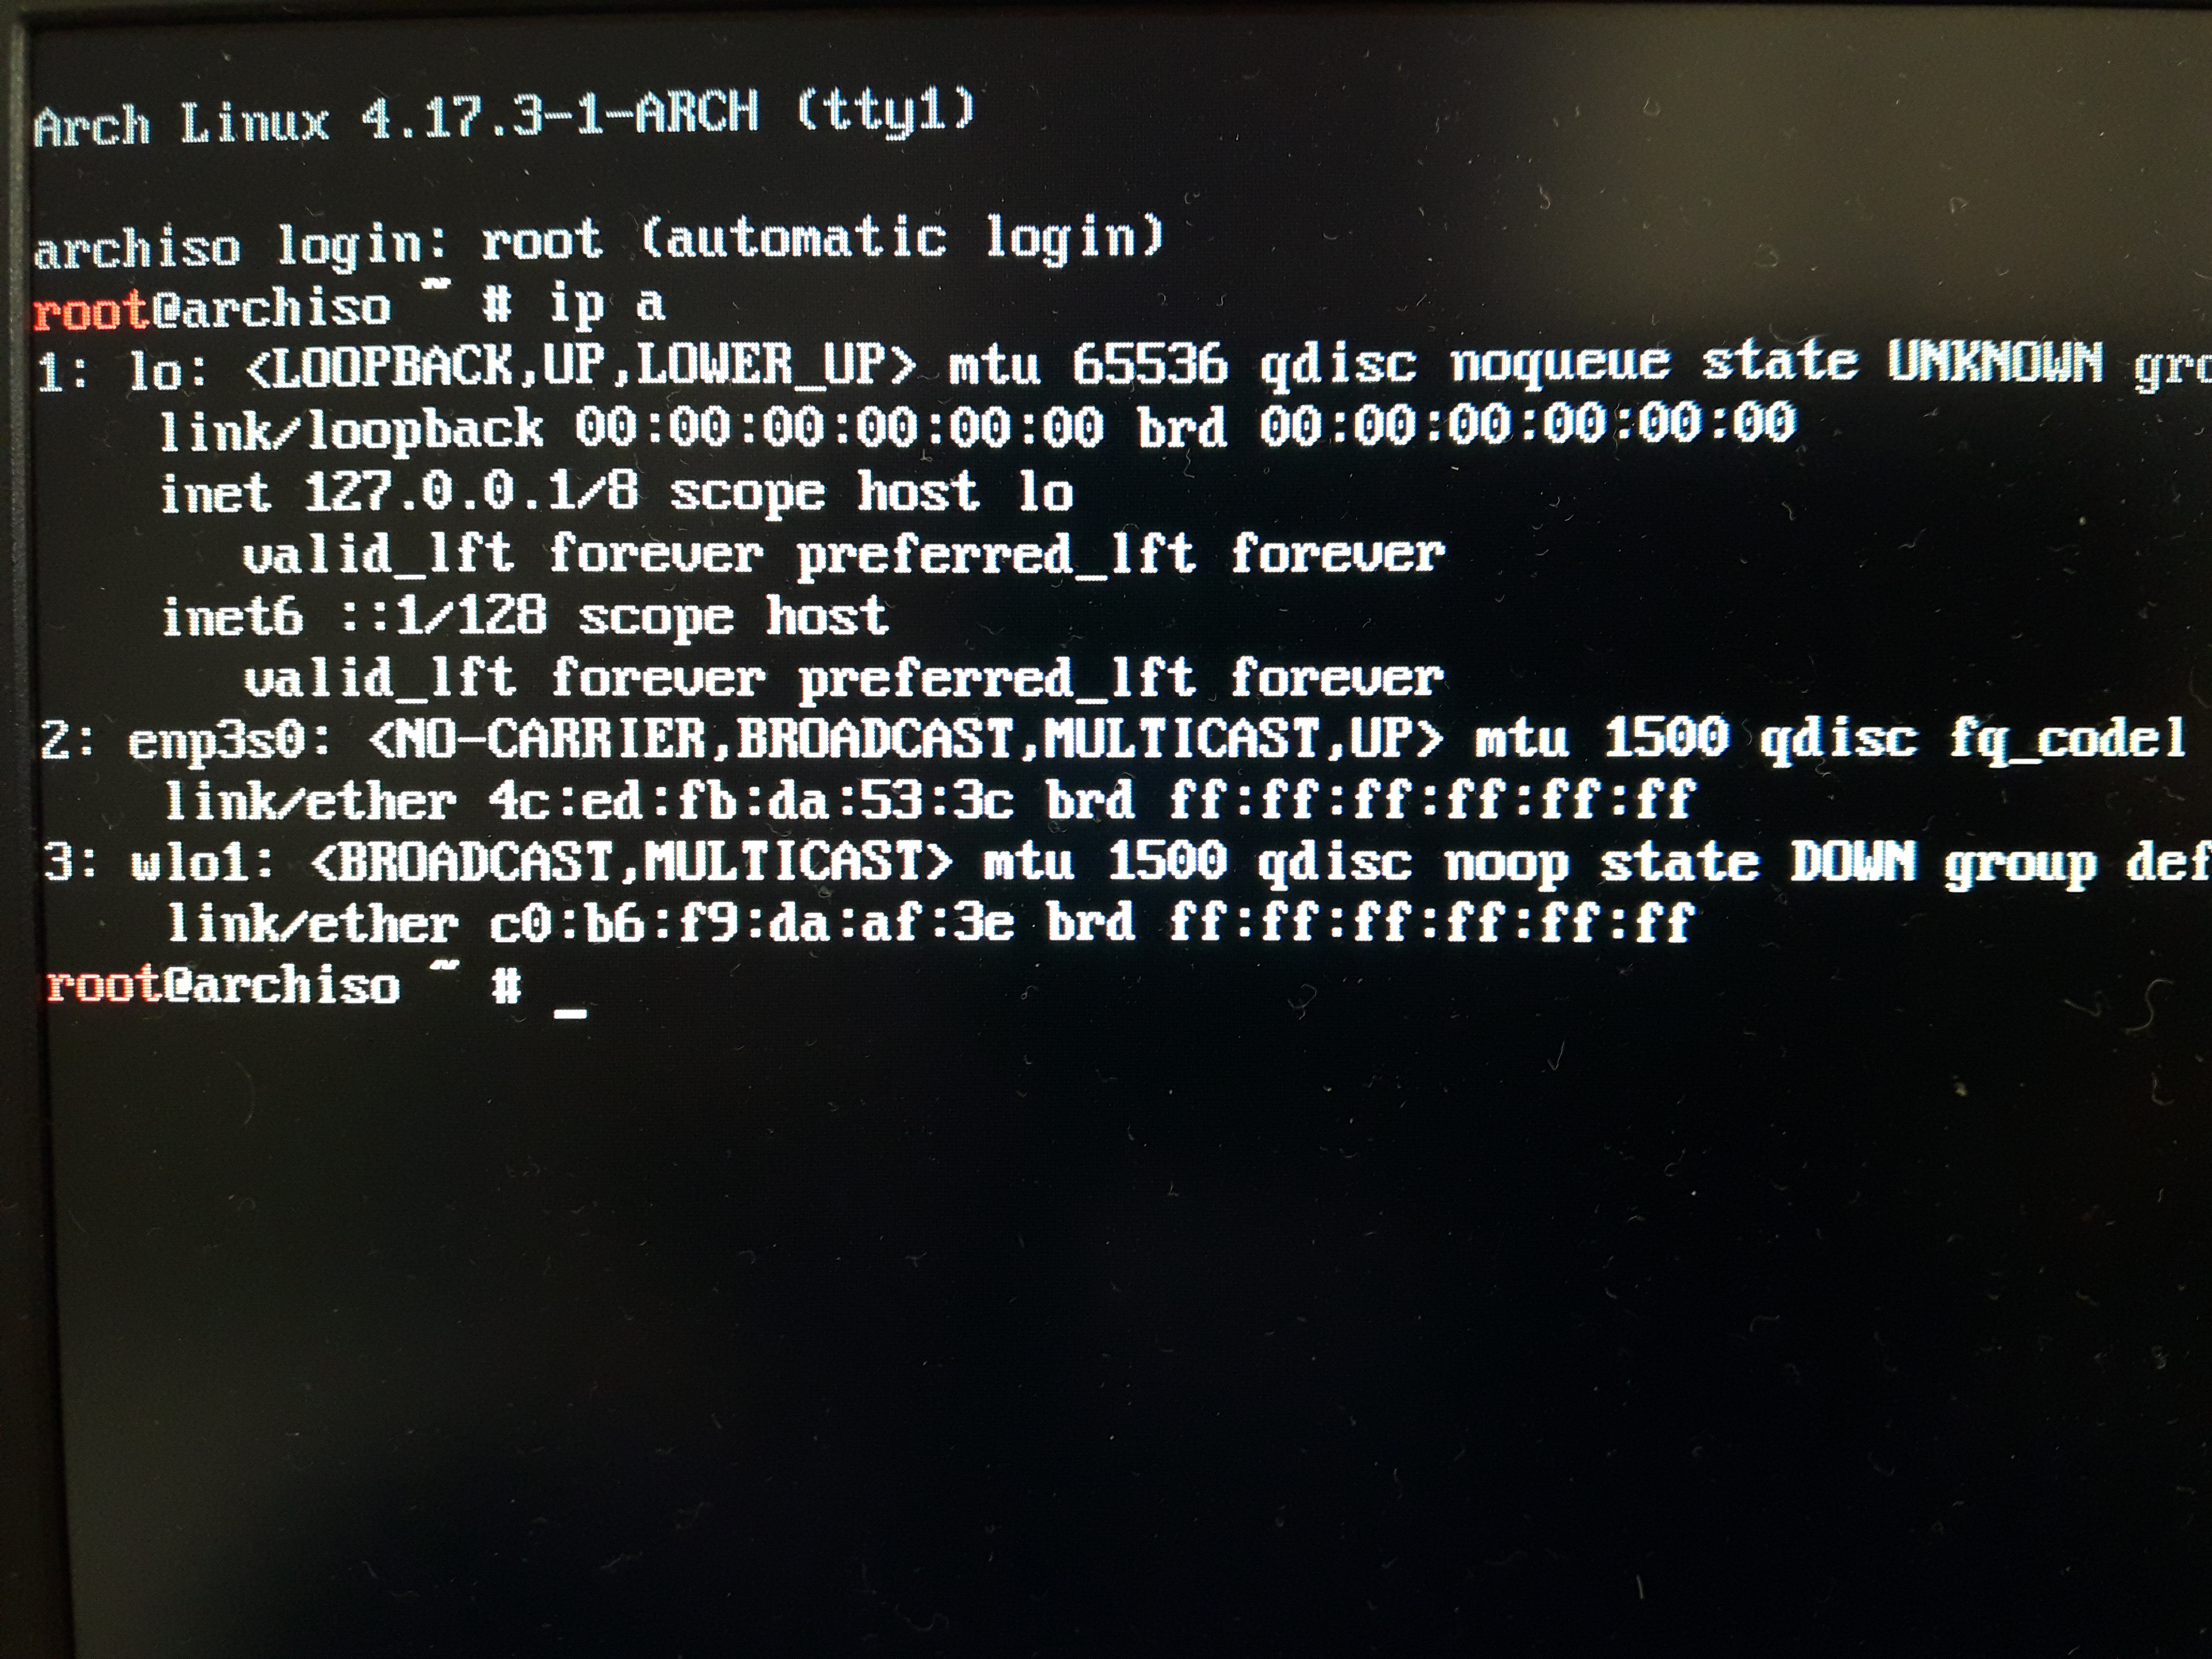
First we find out the name of the network interface:
ip a
After that, the assignment of the static IP is done by the following command (itself IP, subnet mask and the name of the network interface, replace with your own):
ip a add 192.168.1.101/255.255.255.0 dev ens3
You can shorten it a little:
ip a add 192.168.1.101/24 dev ens3
Nevertheless, at this stage you will not have an Internet connection yet. We need to register the default gateway (replace the gateway address with your own gateway):
ip route add default via 192.168.1.254
And … still at this stage there will be no Internet. It is necessary to set a DNS server.
To do this, open the file
vim /etc/resolv.conf
and add the line:
nameserver 8.8.8.8
Configuring wireless conntcion for Arch Linux Installation
Let's say I do not have a wired connection, so I'll show you how to connect to Wi-Fi on the command line.
We begin by looking at the name of the wireless network interface:
ip a
You can also use the command:
iw dev
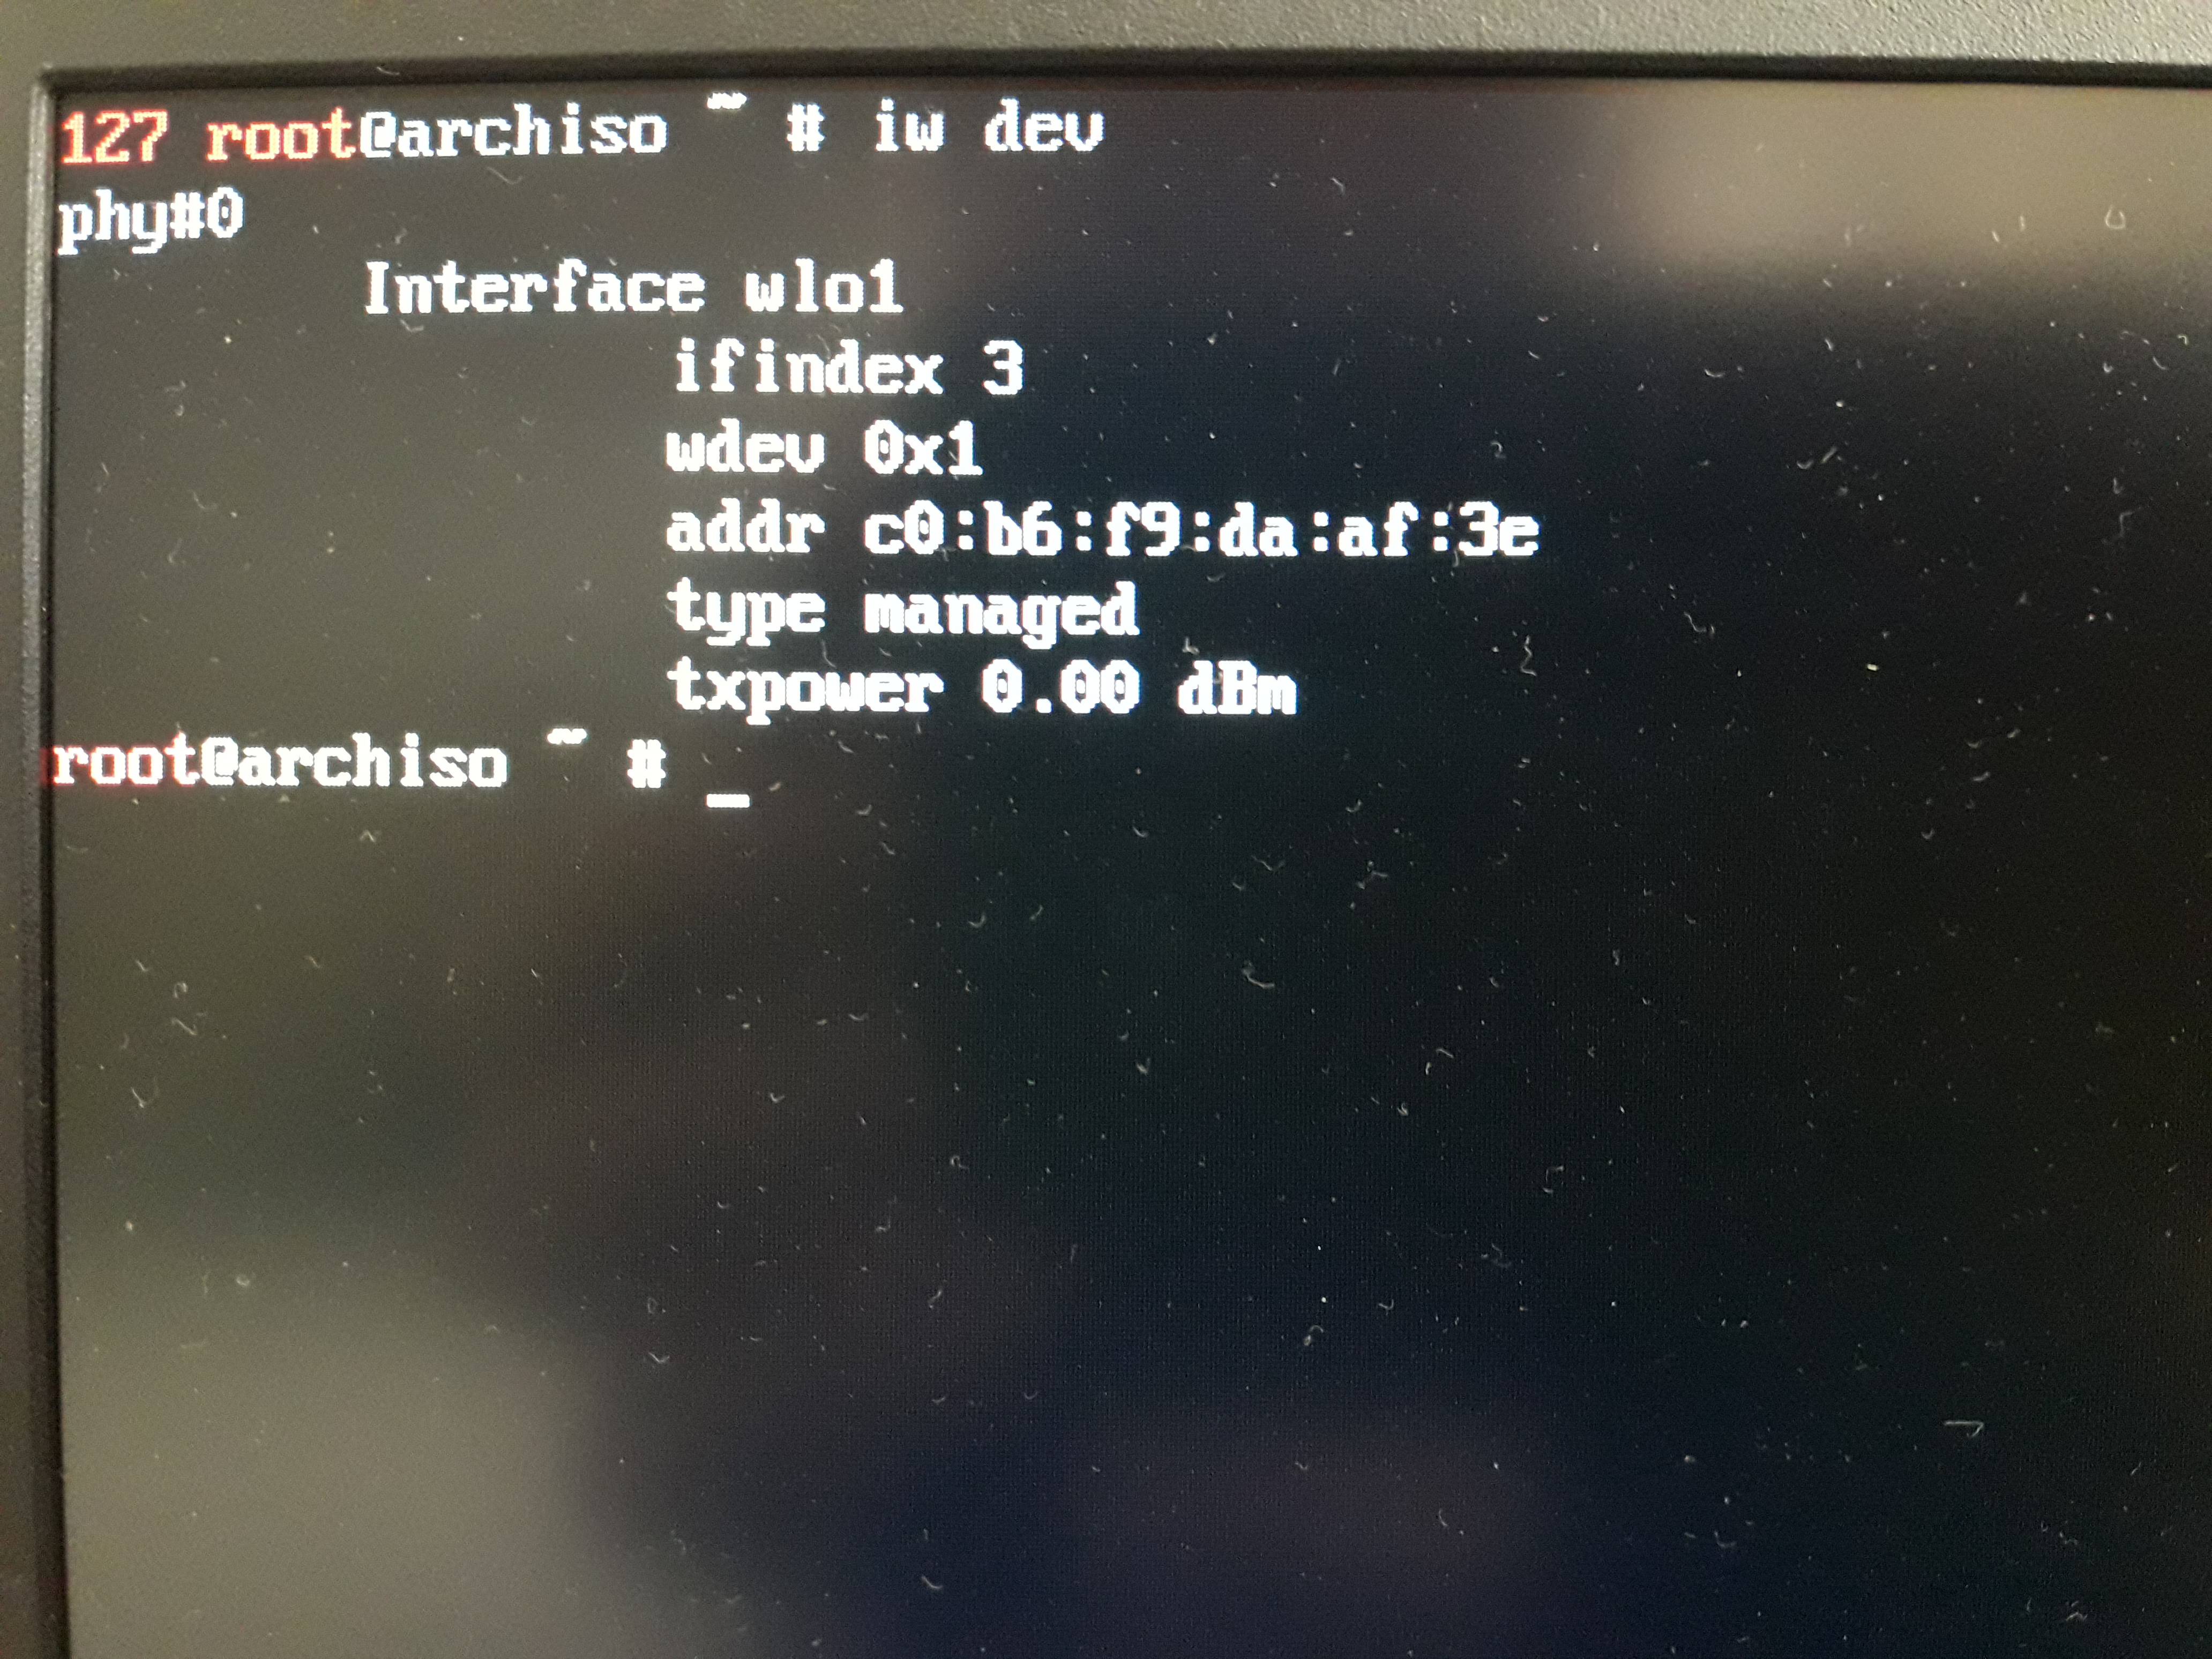
It's seen that the name of my wireless interface is wlo1. Before connecting to any Wi-Fi network, we need to find out which access points are available in the range. To do this, we will scan the Wi-Fi network at the command line.
Since no NetworkManager yet, you need to start by activating the network interface:
ip link set wlo1 up
Instead of wlo1 here and in all subsequent commands, insert the name of your wireless adapter.
Scan networks:
iw dev wlo1 scan | grep SSID
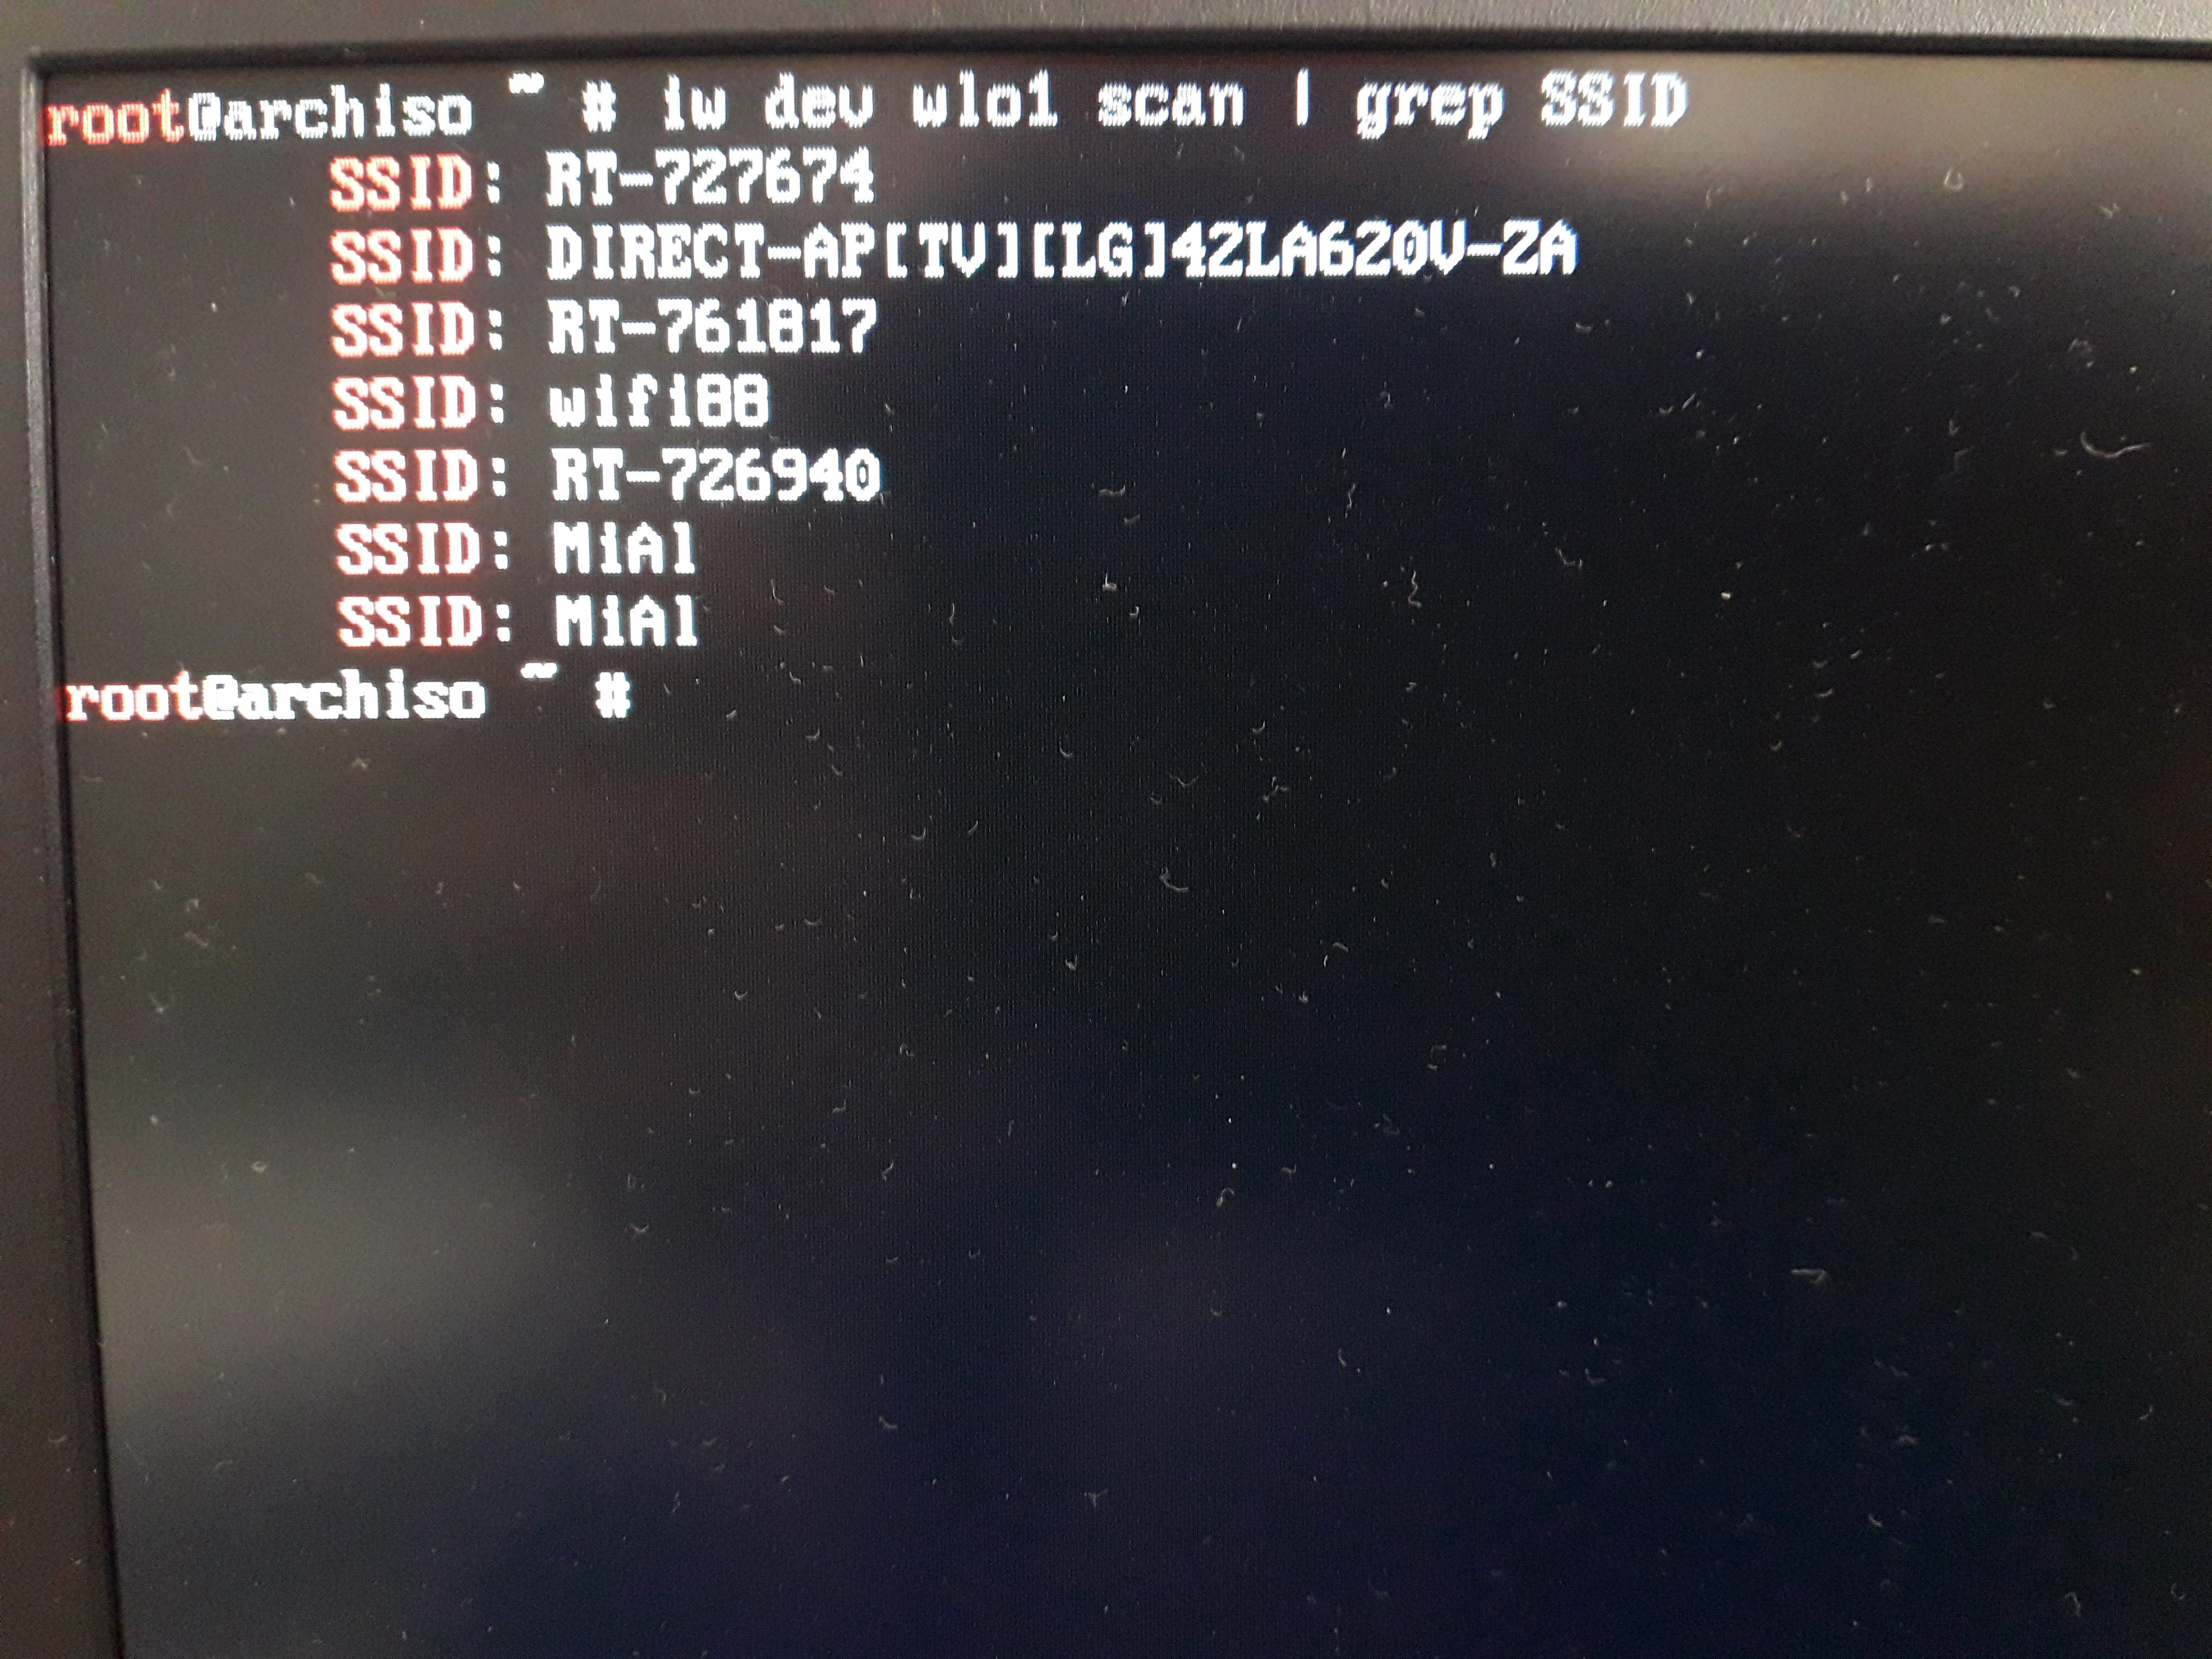
As a result of this command, the names of the wireless networks will be displayed. I have two networks with the same name MiAl because the router operates on two frequencies (2.4 and 5 GHz) and both networks are called the same.
We need to generate a configuration file. This is done by the command:
wpa_passphrase AP_name password > configuration_file
For example, for AP MiAl password wifi_password_here and the configuration file I want to call wpa_MiAl.conf, then the command looks like this:
wpa_passphrase MiAl wifi_password_here > wpa_MiAl.conf
We connect to the access point:
wpa_supplicant -B -i wlo1 -c wpa_MiAl.conf
In the previous command, specify your wireless interface (wlo1) and your configuration file (instead of wpa_MiAl.conf).
To obtain automatic DHCP settings (assigned IP address, gateway IP address and DNS server IP addresses) run the command:
dhclient wlo1
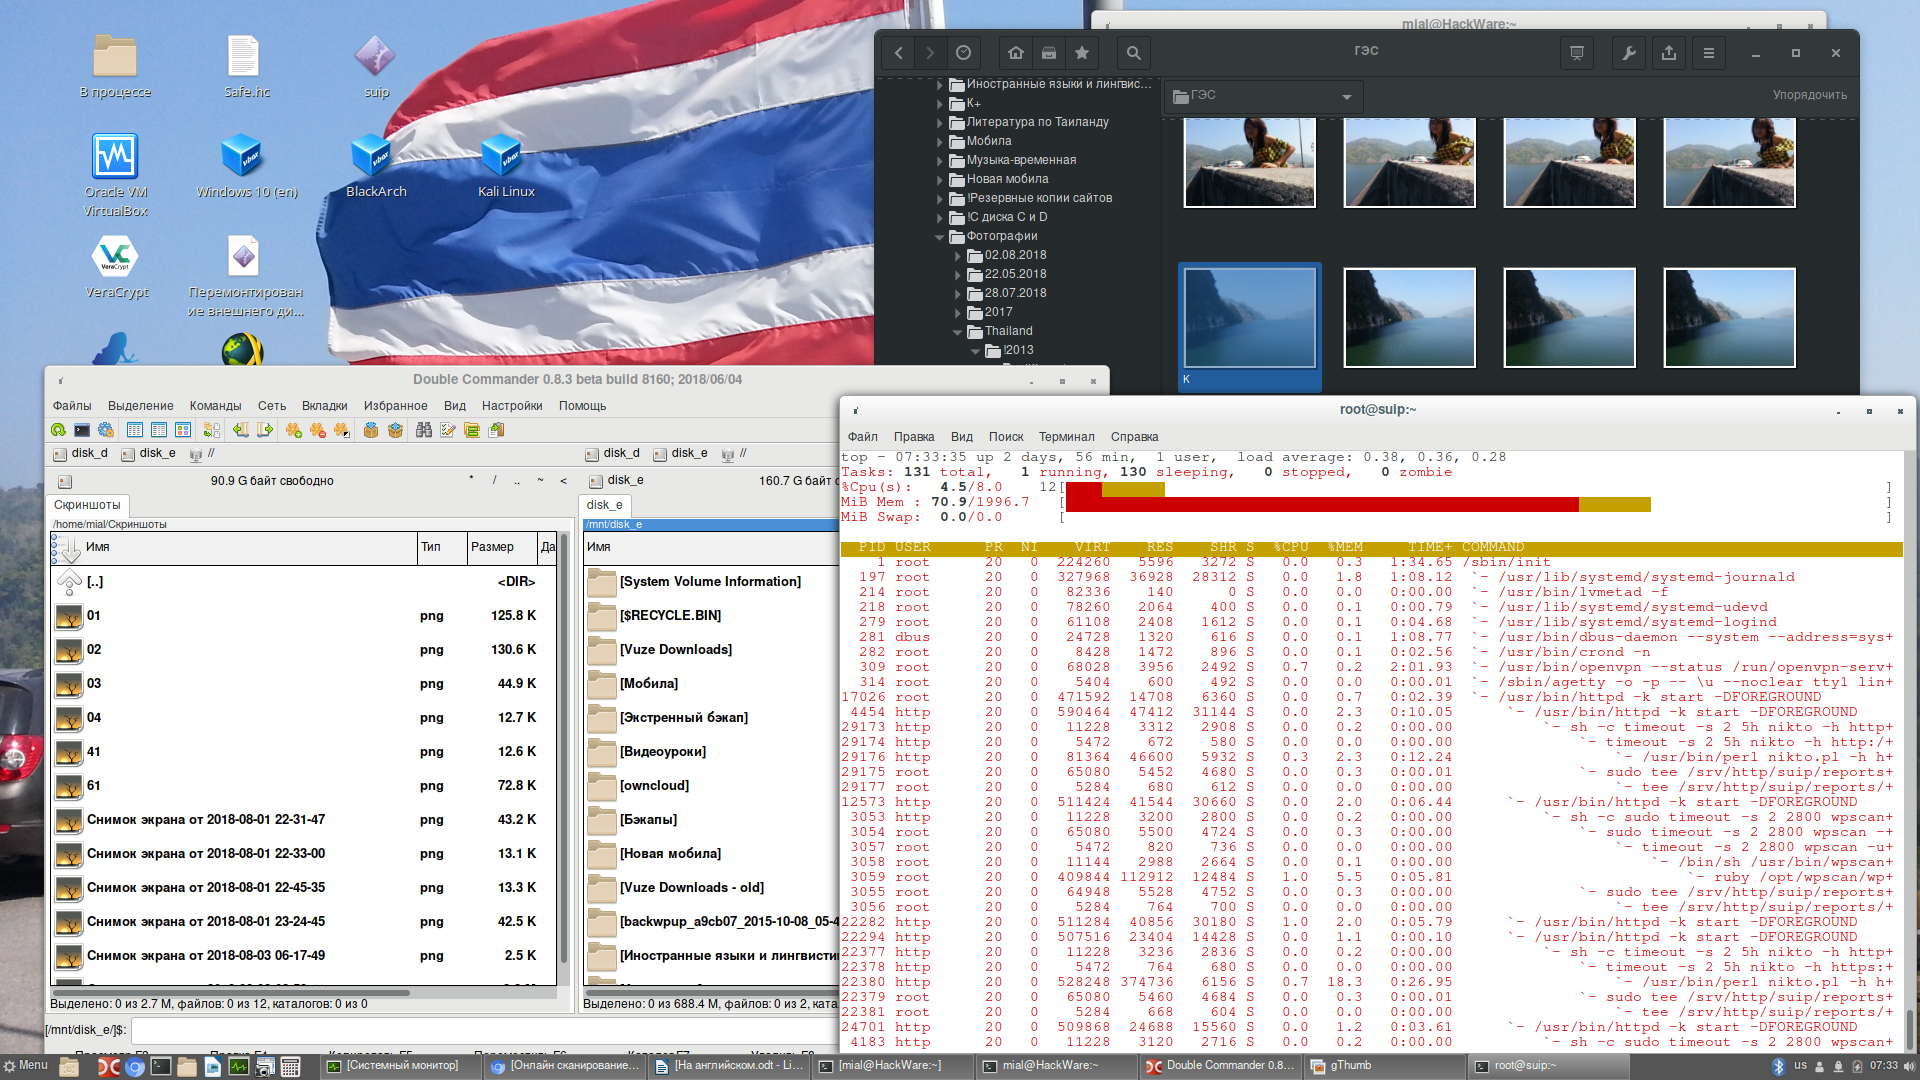
Disk Cleanup
For details on why it is necessary to clean the USB flash drive at all and alternative ways to achieve this, see the article “How to recover USB drive/flash drive after flashing an ISO image or installing OS”.
If you mess up something when marking partitions of your disk, you can accidentally delete important data.
We look at the available disks:
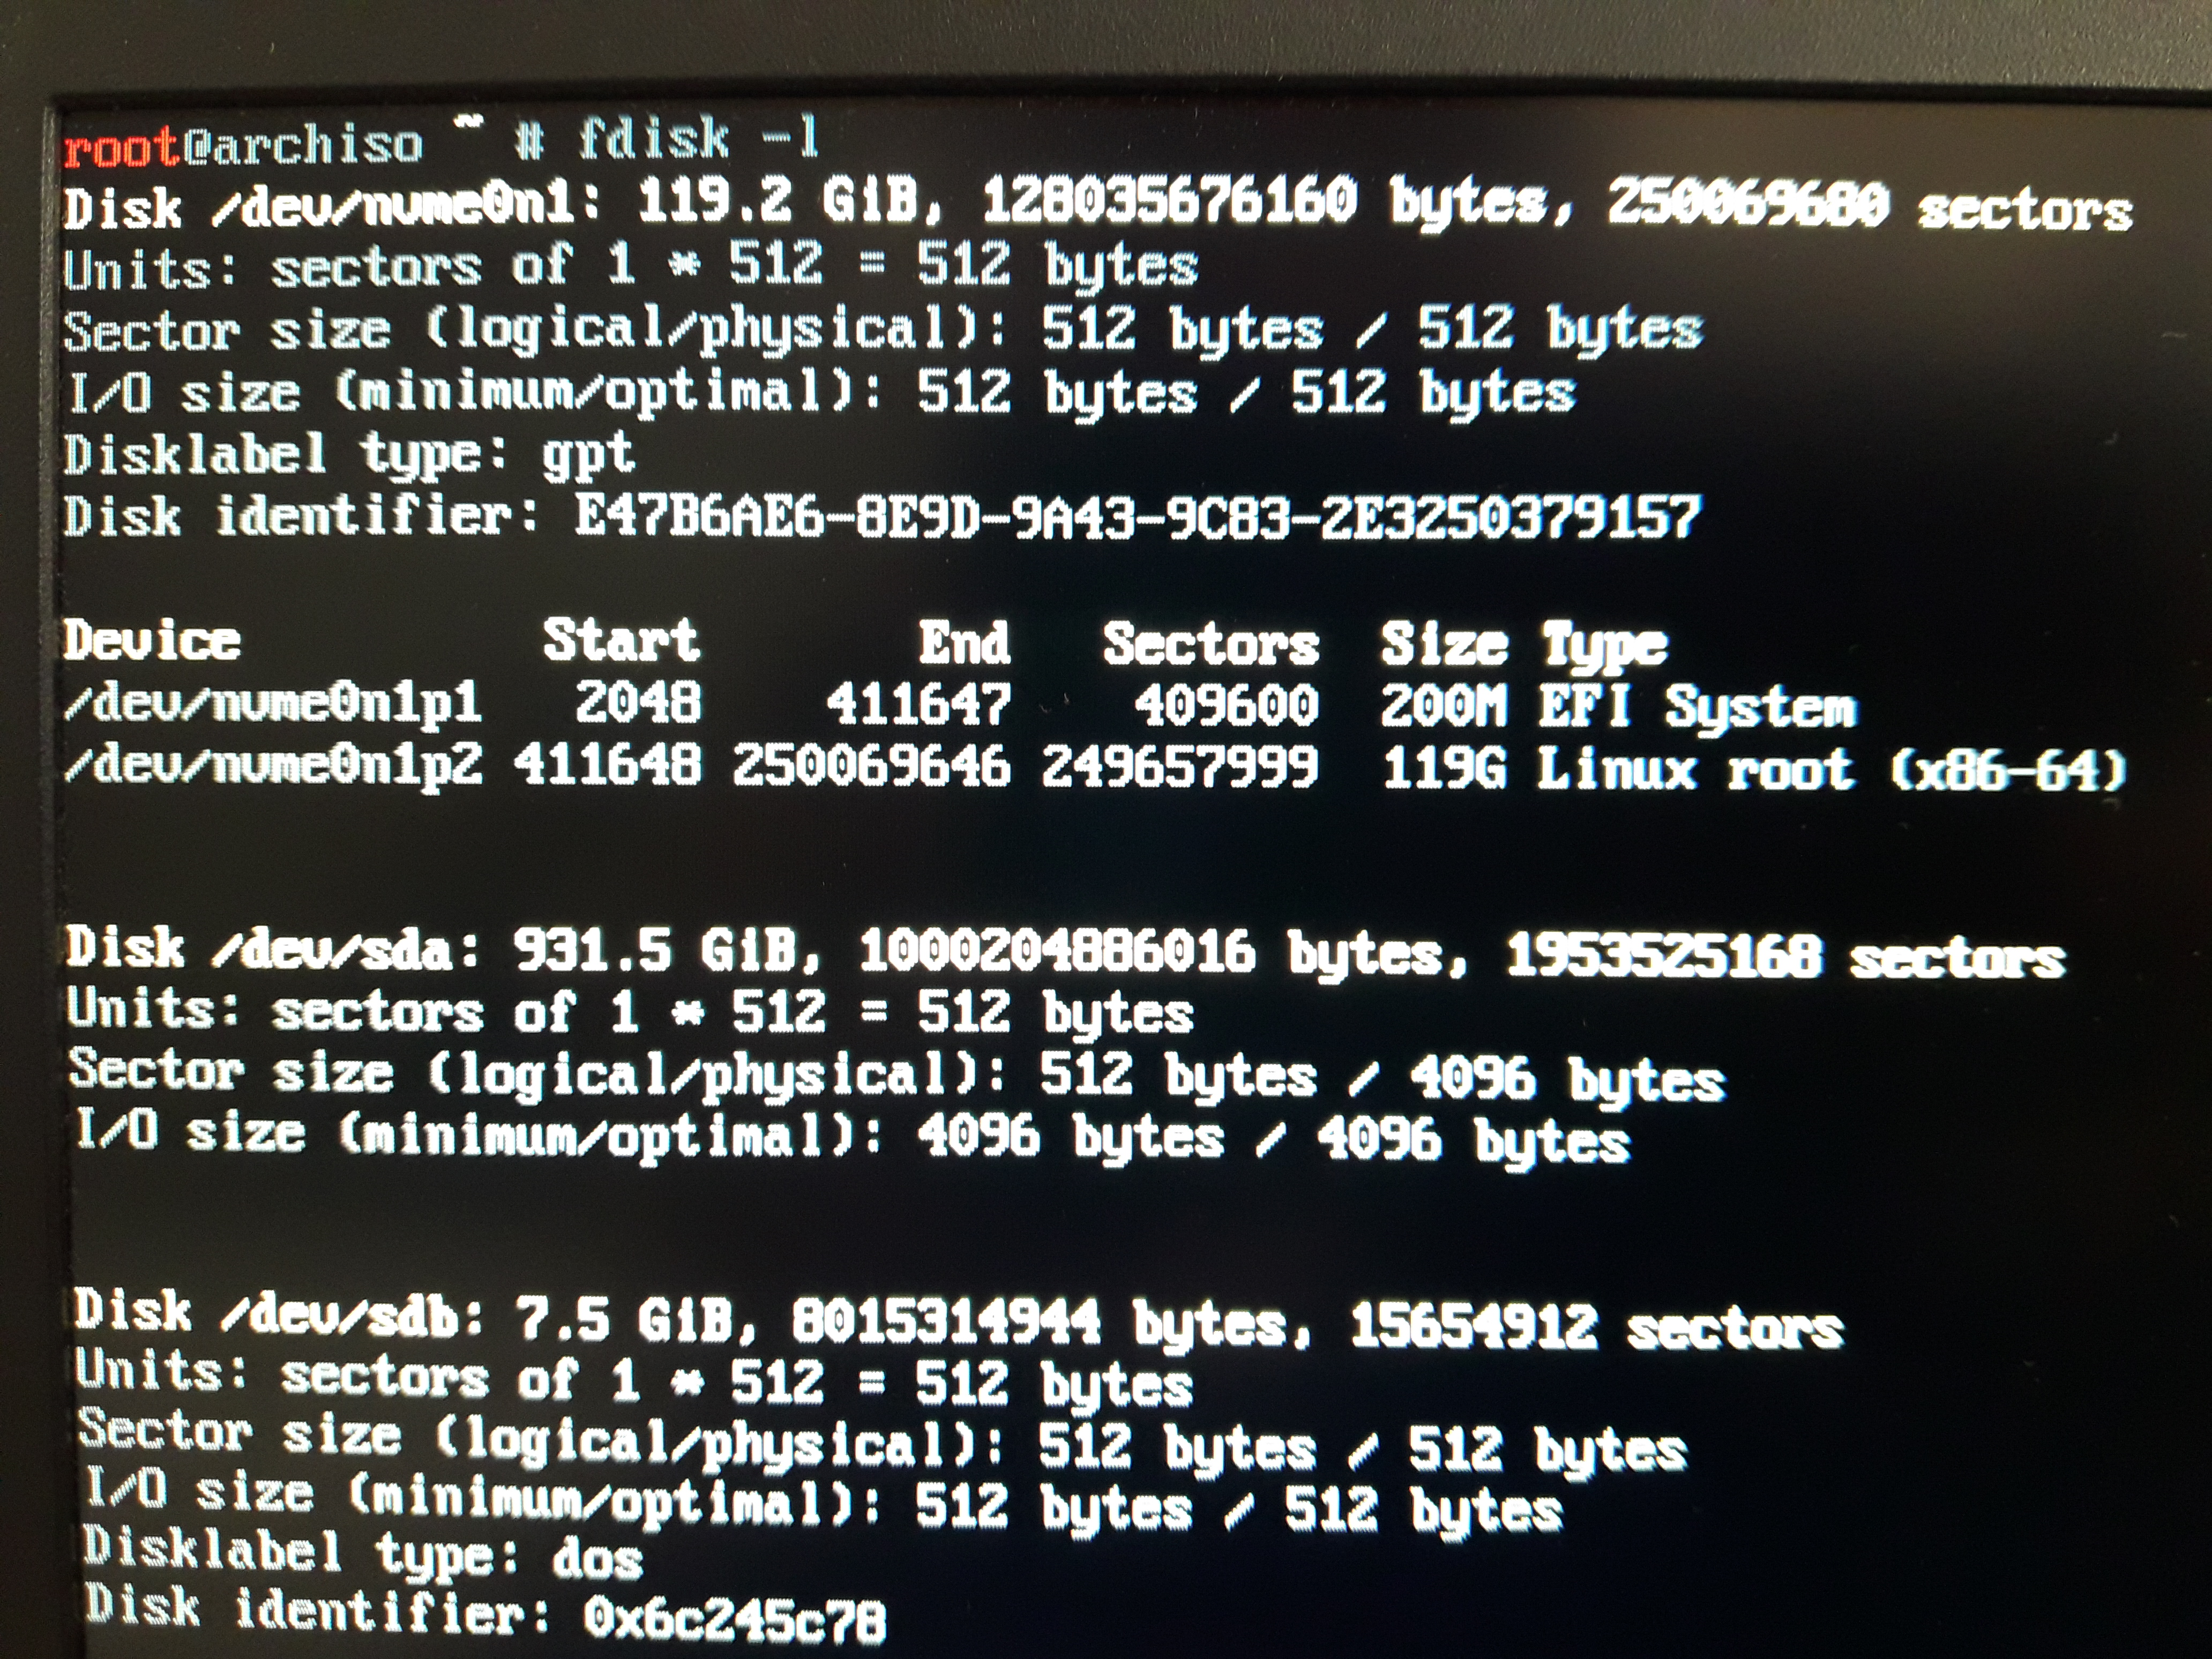
fdisk -l
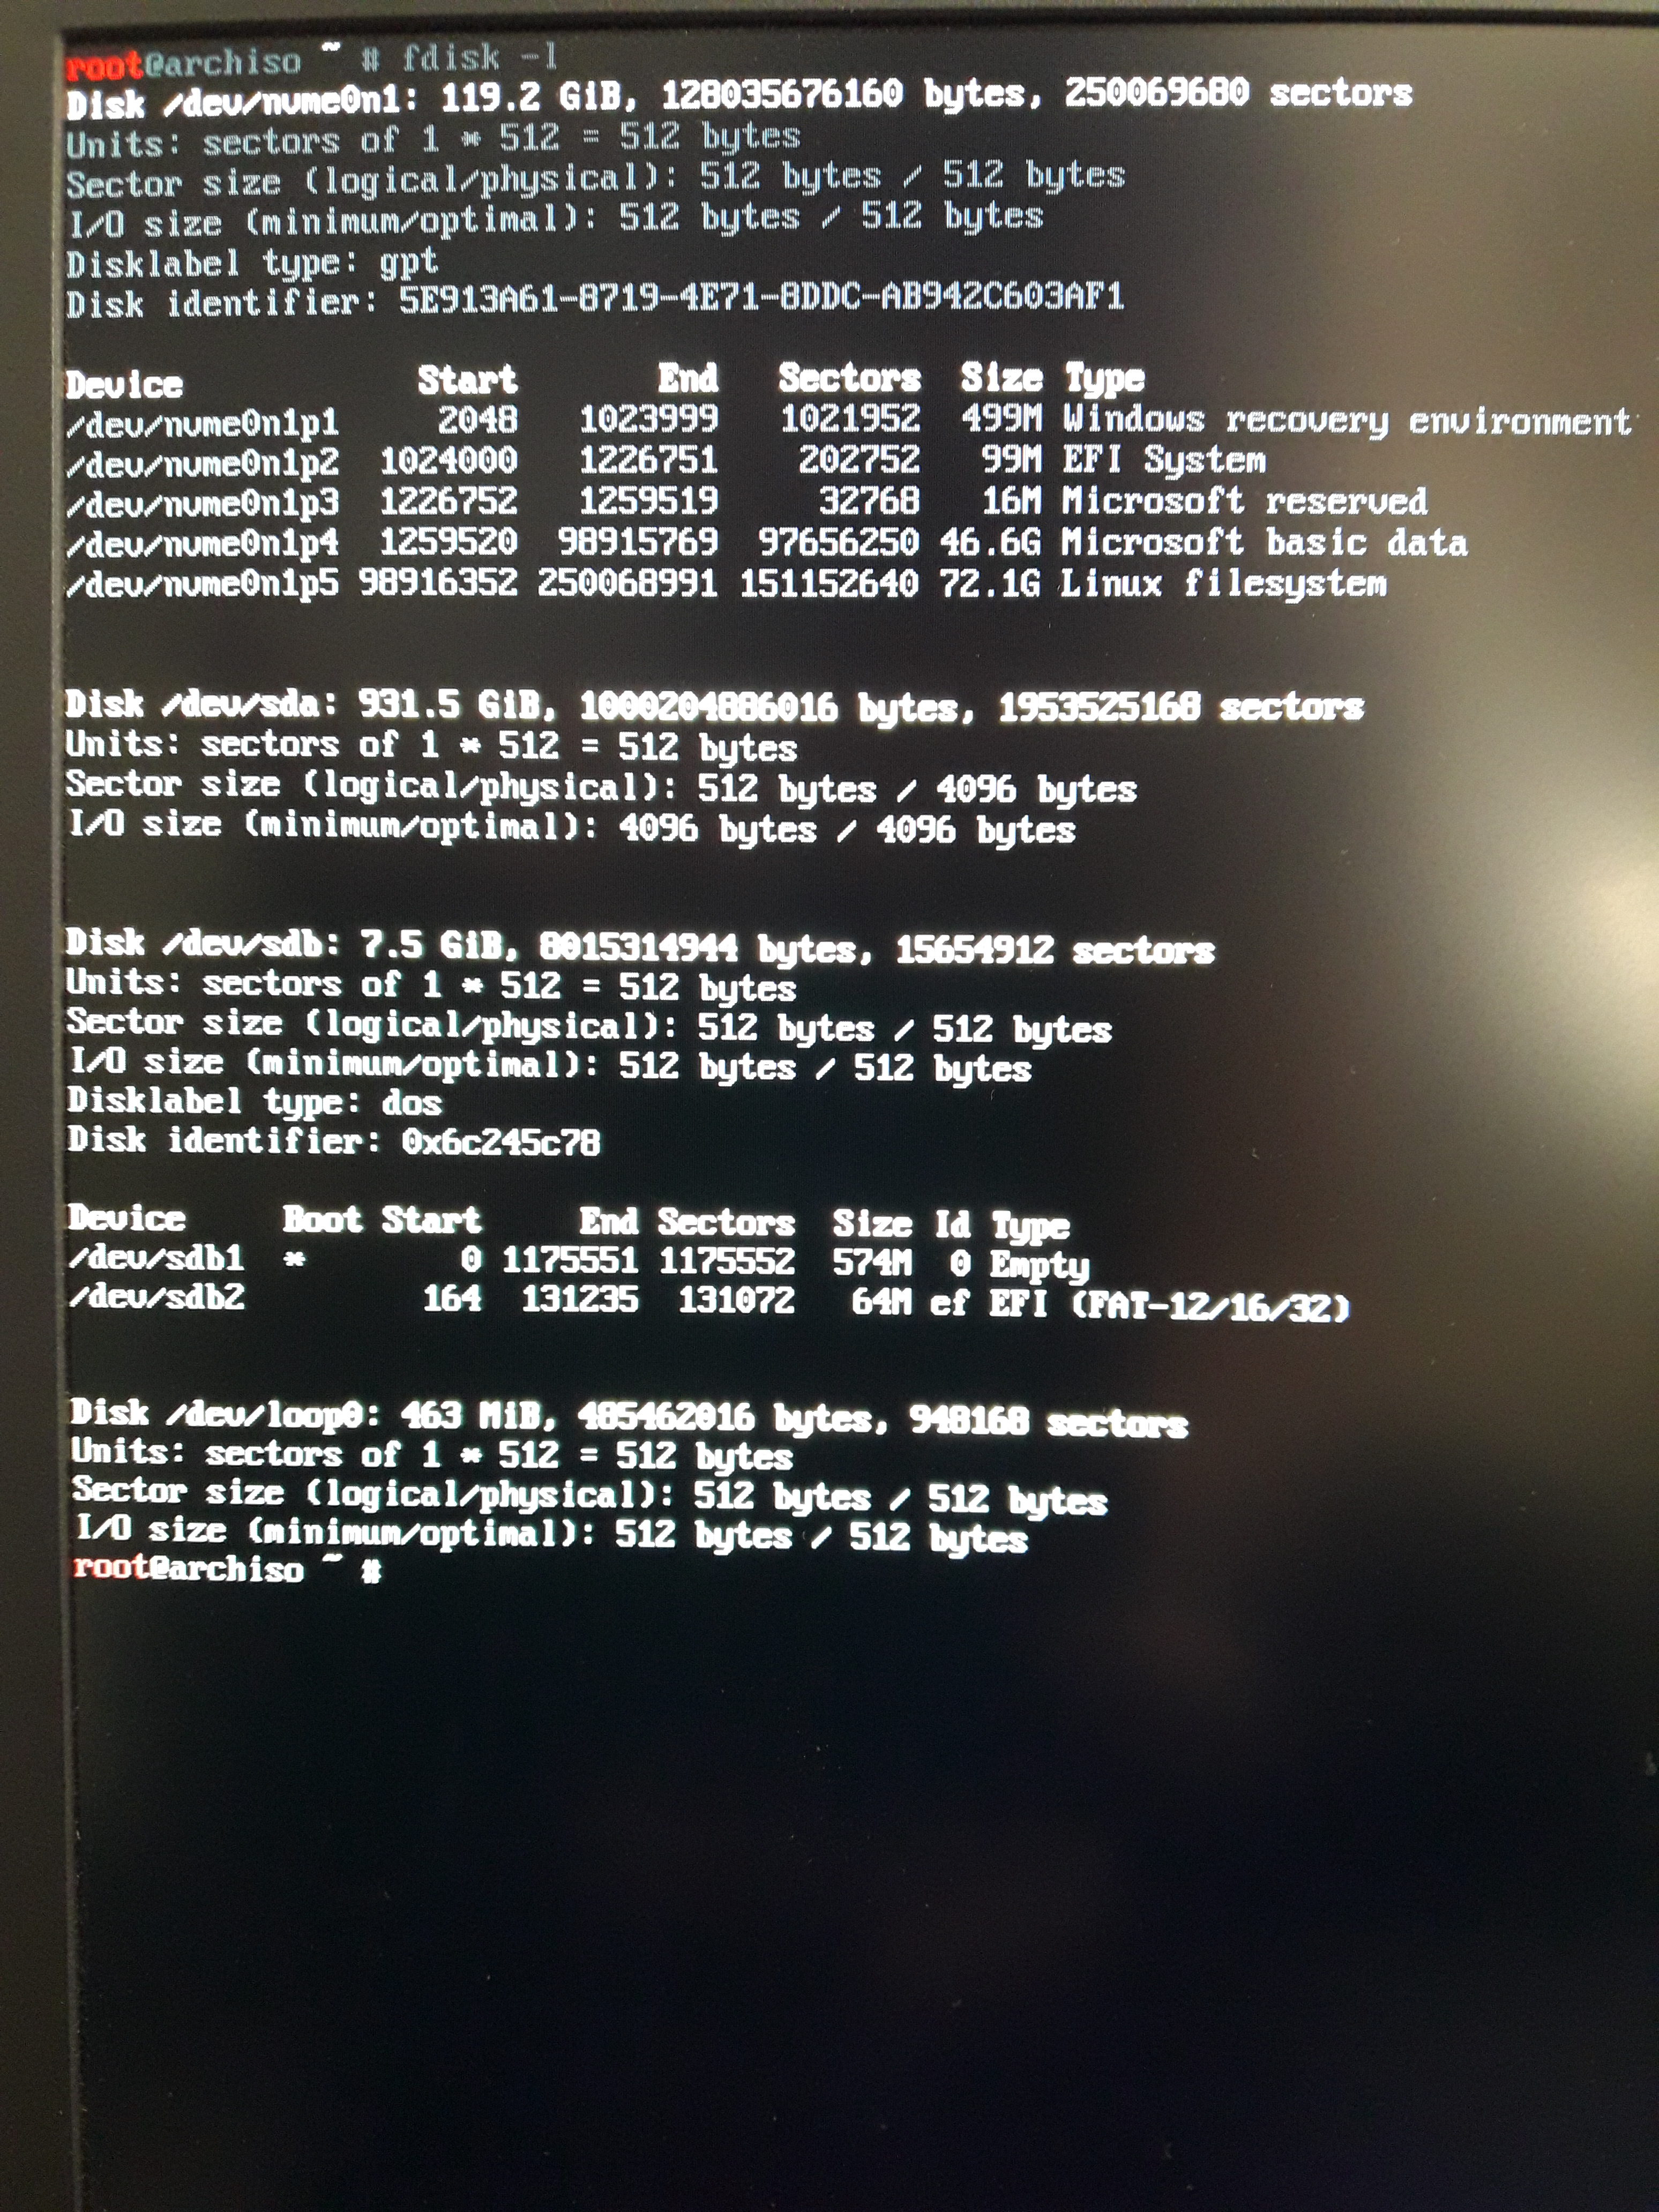
To orient among disks, look at the manufacturer, the volume and the number of partitions.
For example, in the screenshot above you can see the /dev/nvme0n1 disk, which Windows system shredded into four disks, and on the fifth where I installed Kali Linux in the previous manual.
It has such a strange name, because it is an SSD drive, which is not connected to a SATA connector, but NVM Express.
Next is the /dev/sda disk with capacity is almost terabyte.
The /dev/sdb disk with capacity 7.5 Gigabytes is the USB flash drive.
I want to demolish everything that is on the /dev/nvme0n1 disk – all partitions and all data - and install Arch on it. Therefore, in the subsequent commands I will use /dev/nvme0n1, as well as /dev/nvme0n1p1 and /dev/nvme0n1p2 referring to its partitions. In the subsequent commands, replace these names with the names of your disks, for example, /dev/sda, /dev/sda1, /dev/sda2, and so on.
We start with a full cleaning of the disk /dev/nvme0n1.
Open it with the gdisk program:
gdisk /dev/nvme0n1
To switch in expert mode, enter
x
Then, to remove the GPT, type
z
Double agree to completely clean the disk.
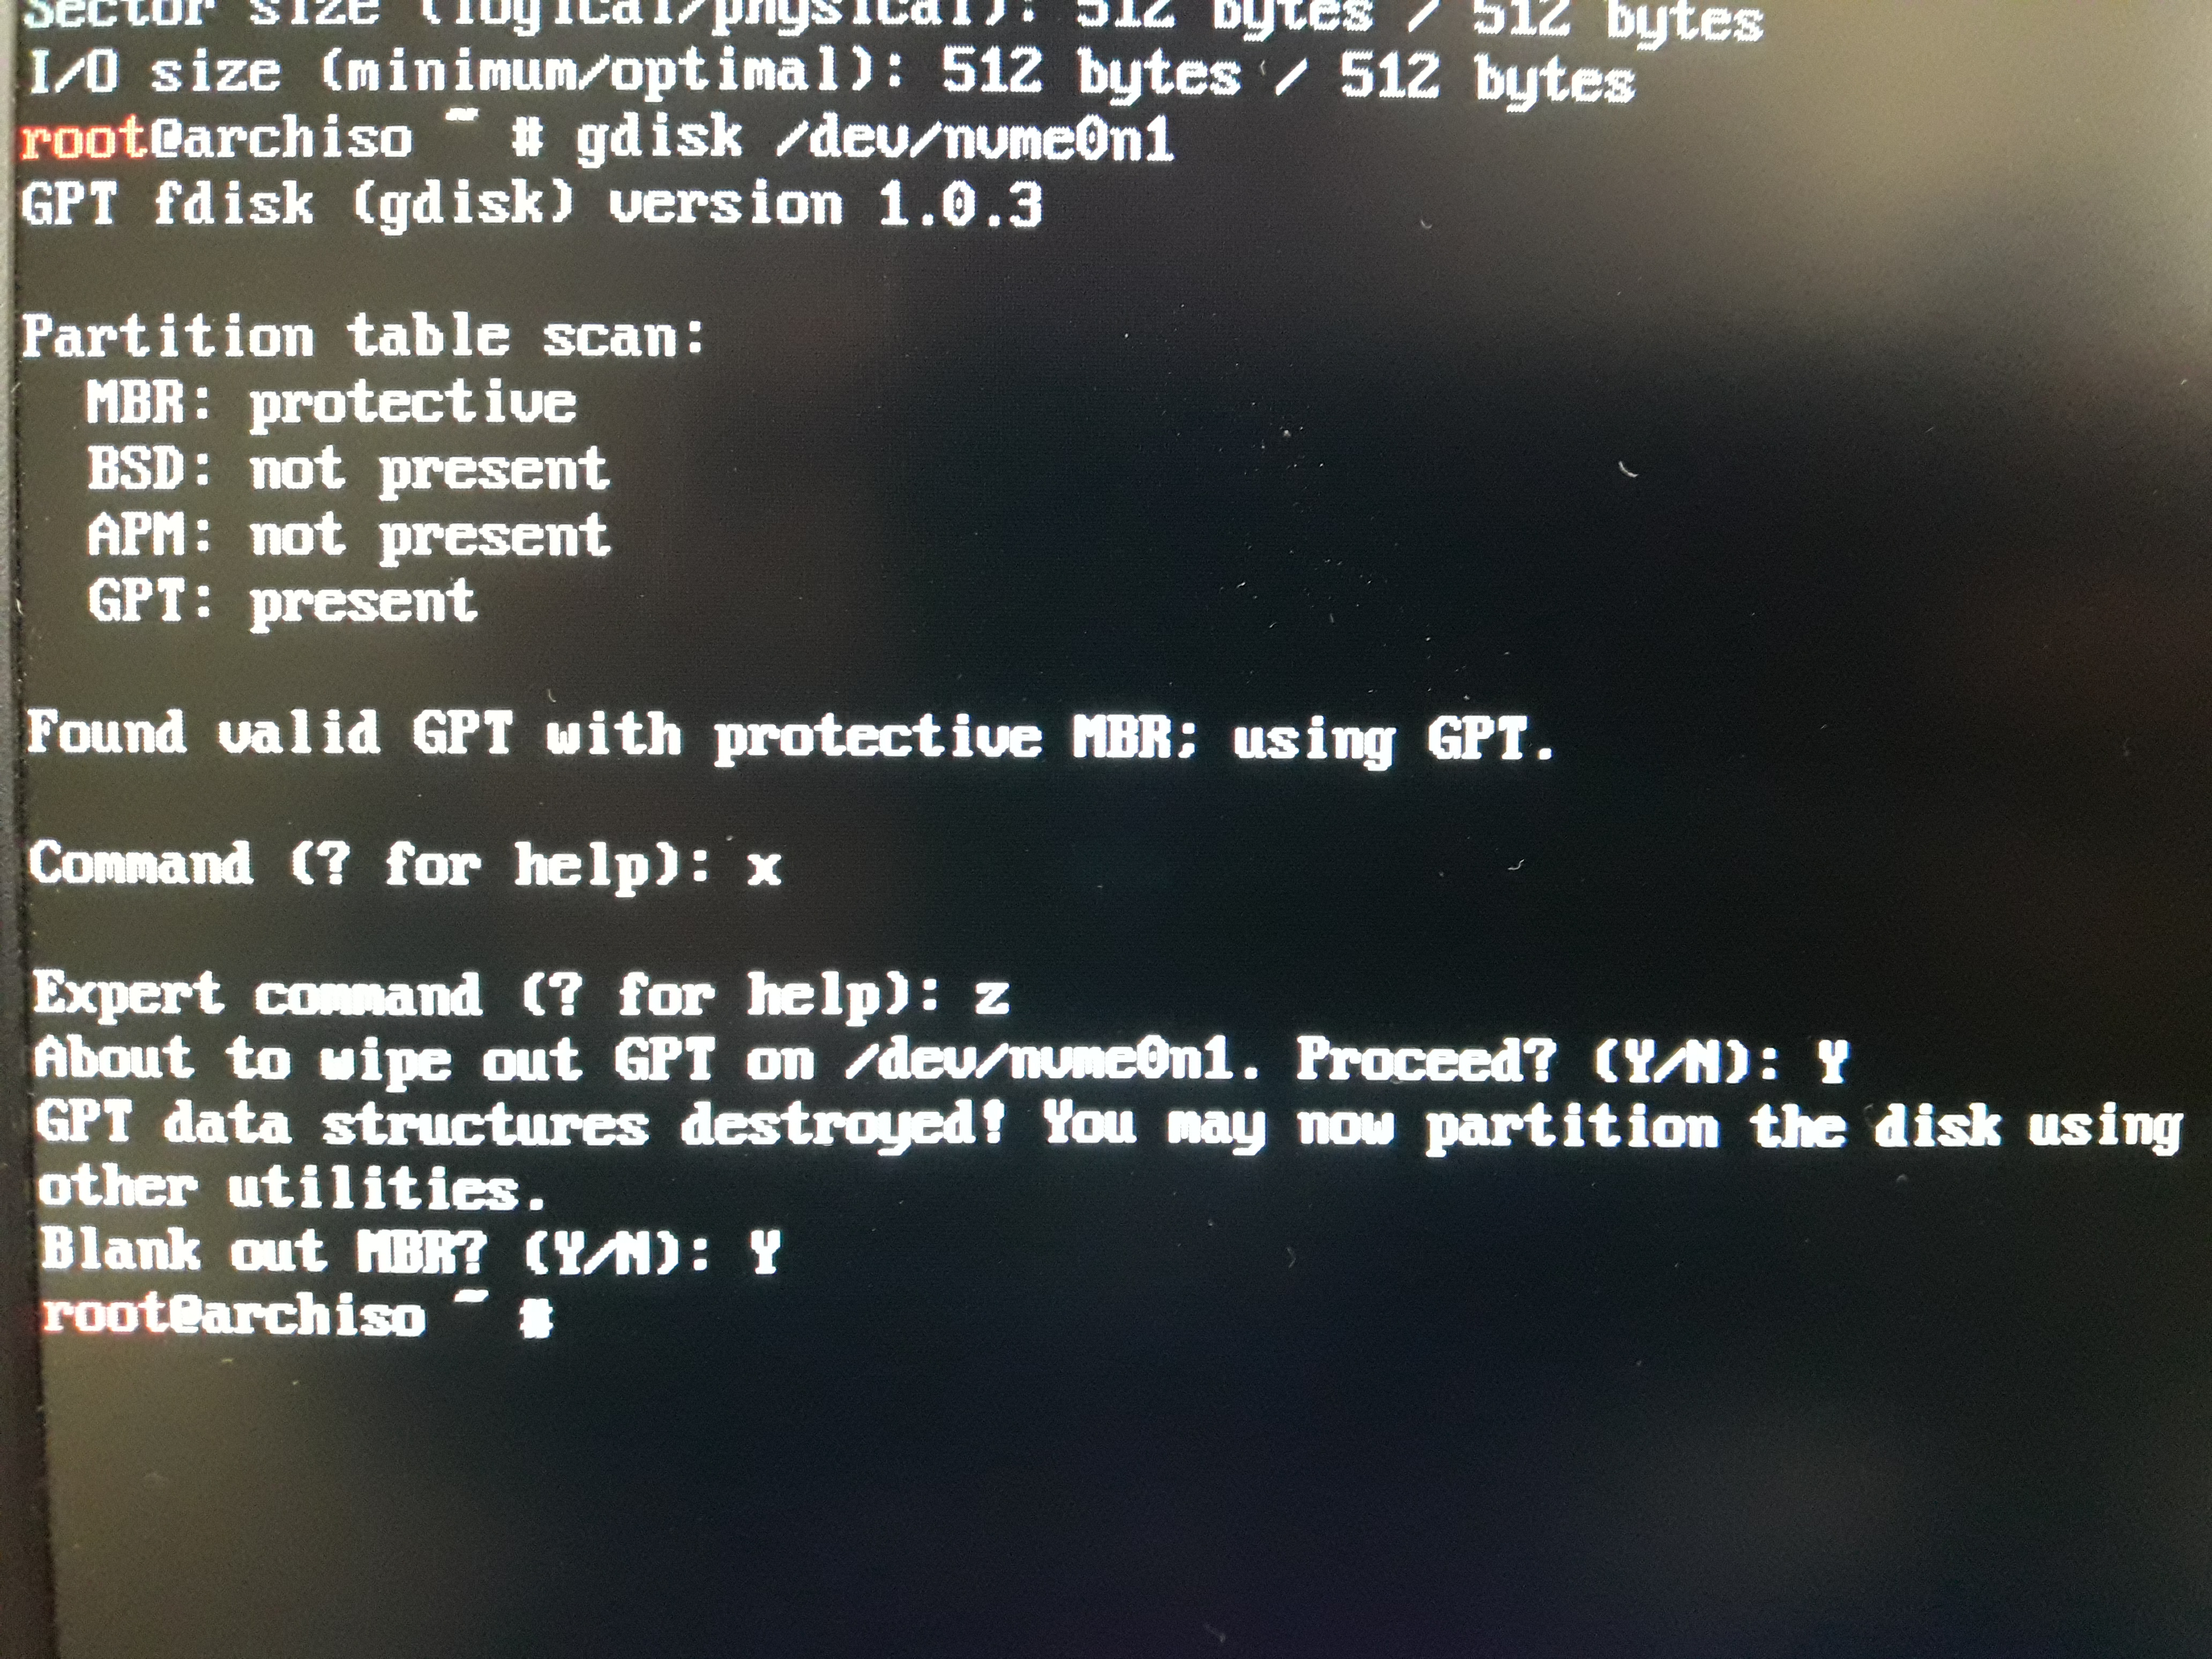
We leave the program.
You can check the output of the command again to make sure that the changes are saved:
fdisk -l

Disk partitioning
Oh, in this manual we are installing the system on a computer with UEFI. This analogue of BIOS is actively used for 6-7 years, so the guide should work for the majority of computers. If you have an older system with a usual BIOS, let me know in the comment section - I’ll provide more instructions, where I explained how to do for BIOS.
Now open our drive in the cfdisk program.
cfdisk /dev/nvme0n1
We need to create two or three sections manually. Two mandatory sections are:
- boot area
- main partition with system (root /)
As an additional third section, you can create a swap partition - it is needed in case the operating system does not have enough RAM. I have 16 gigabytes of RAM already preinstalled and there is a slot for another 16 GB. So I will not make a swap partition.
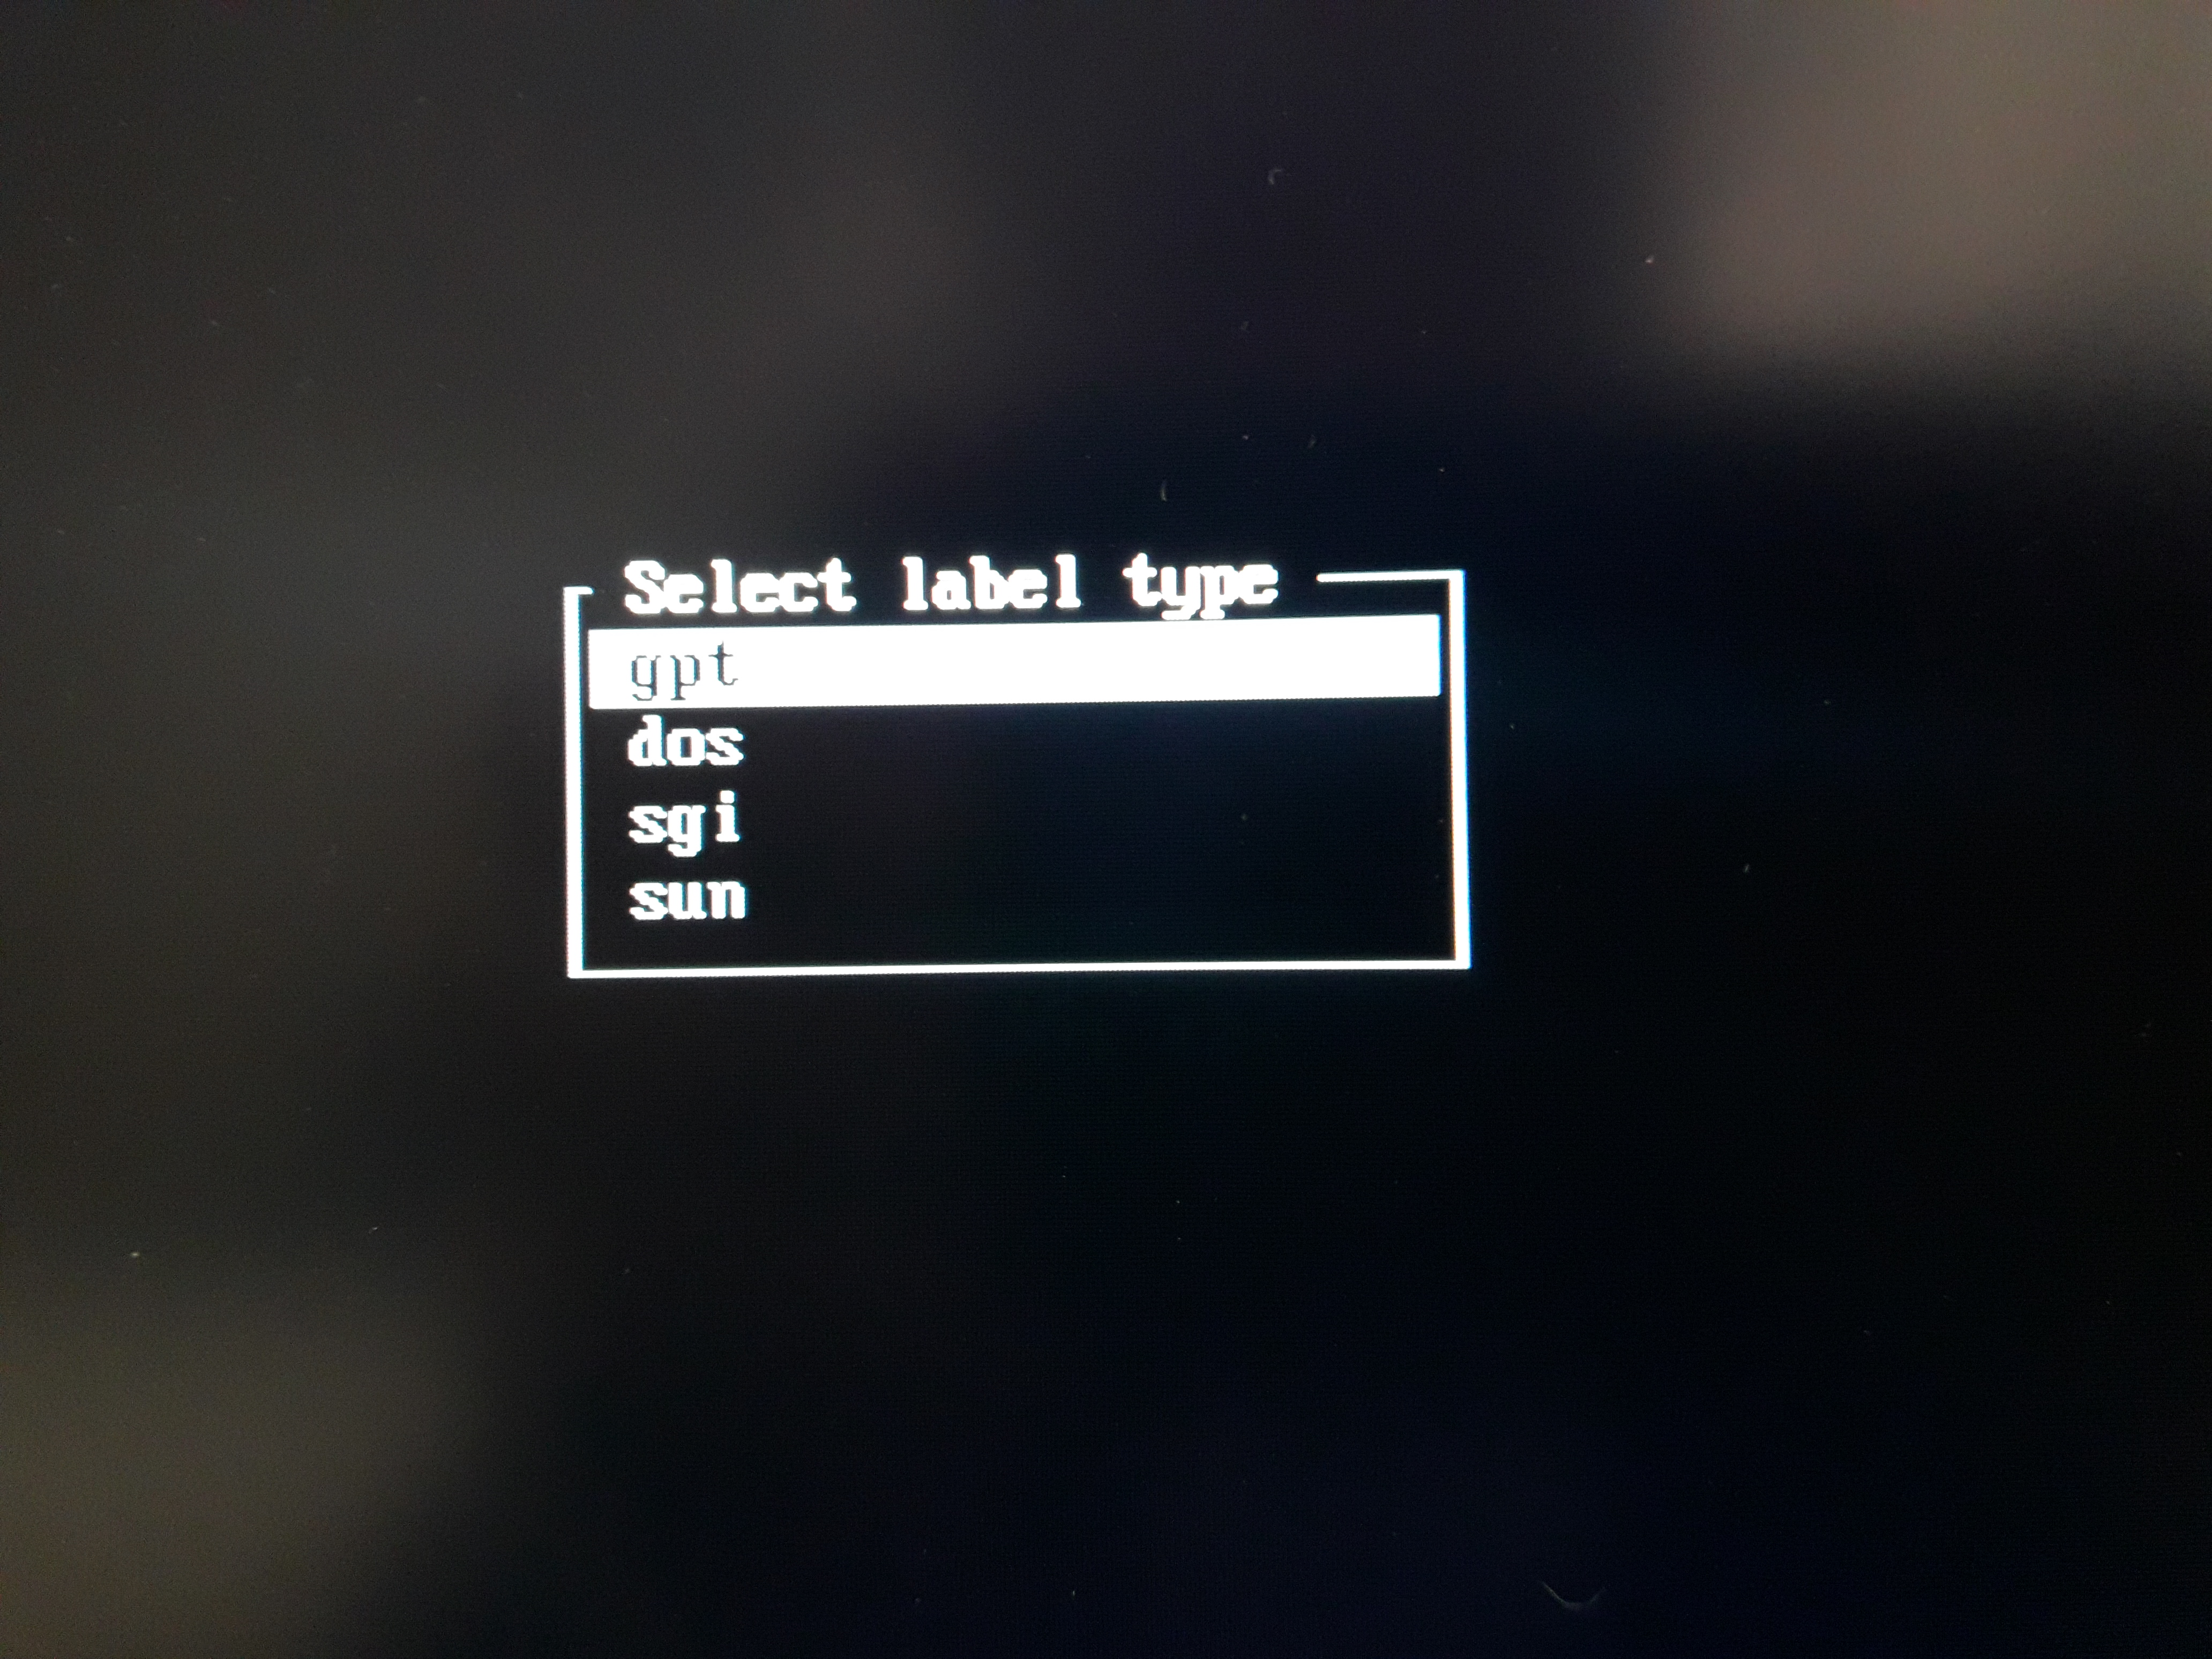
Choose gpt:
Now click New.
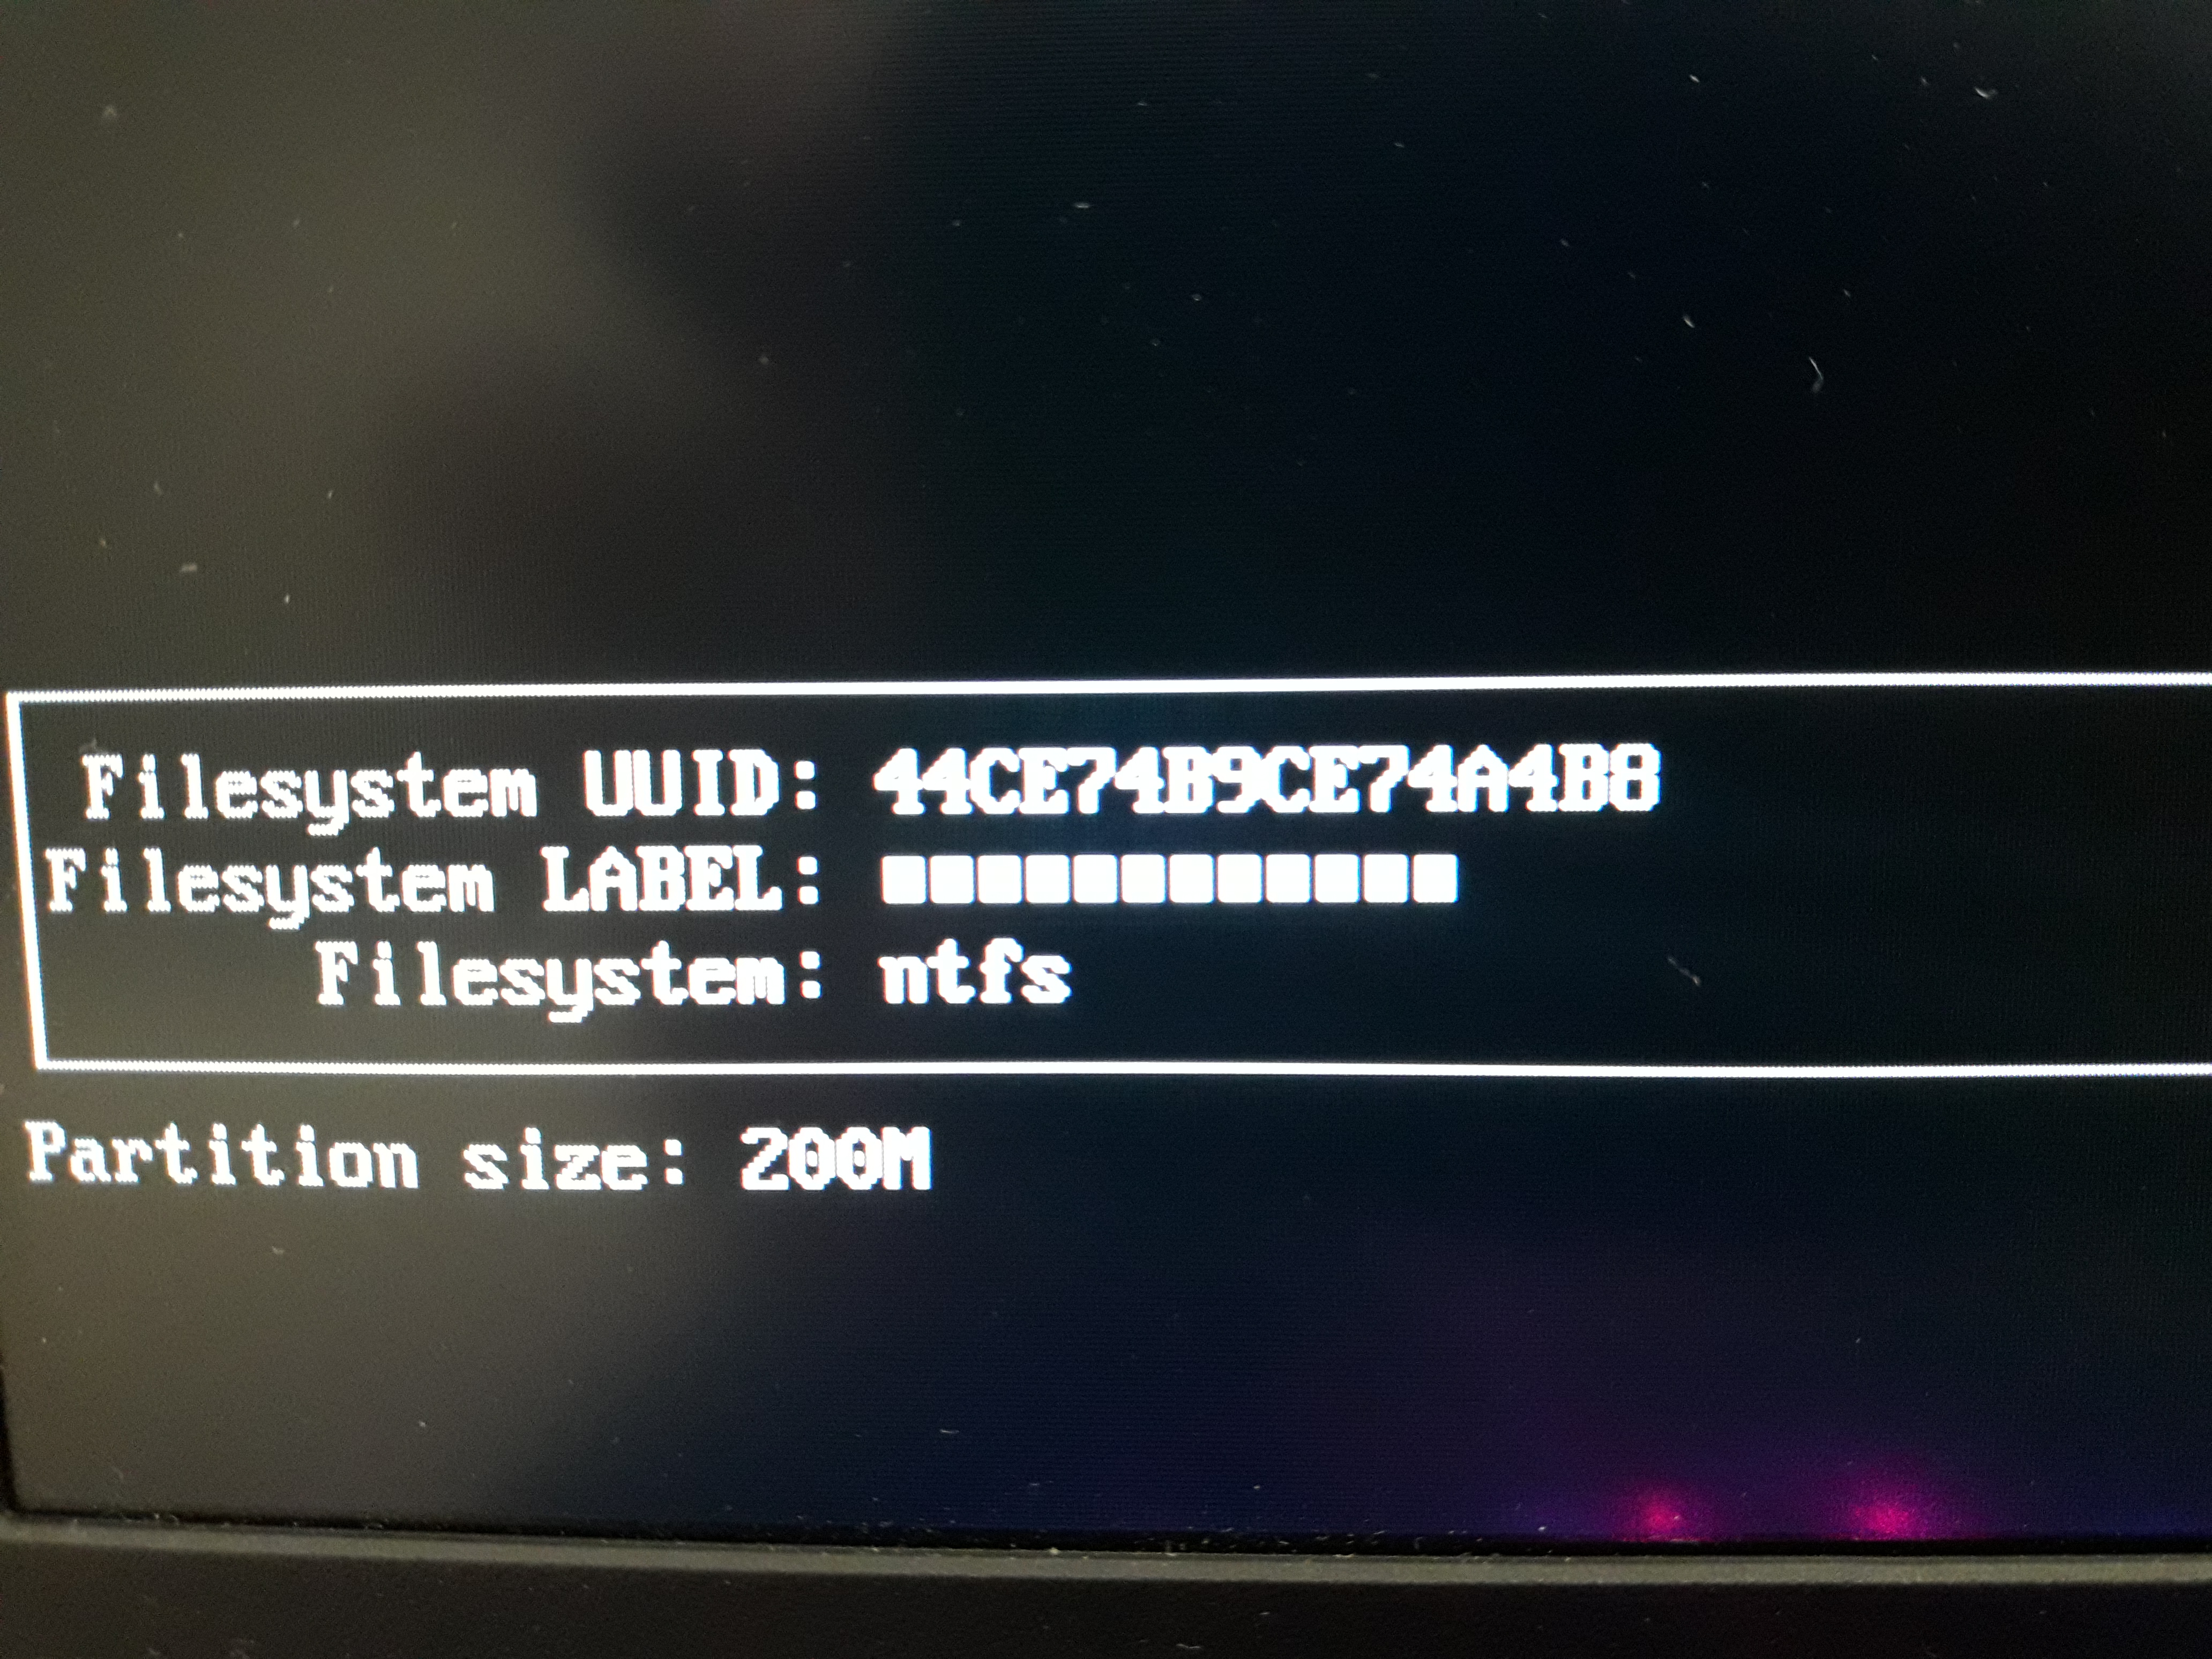
Set the size (for the boot partition 200 MB is enough):
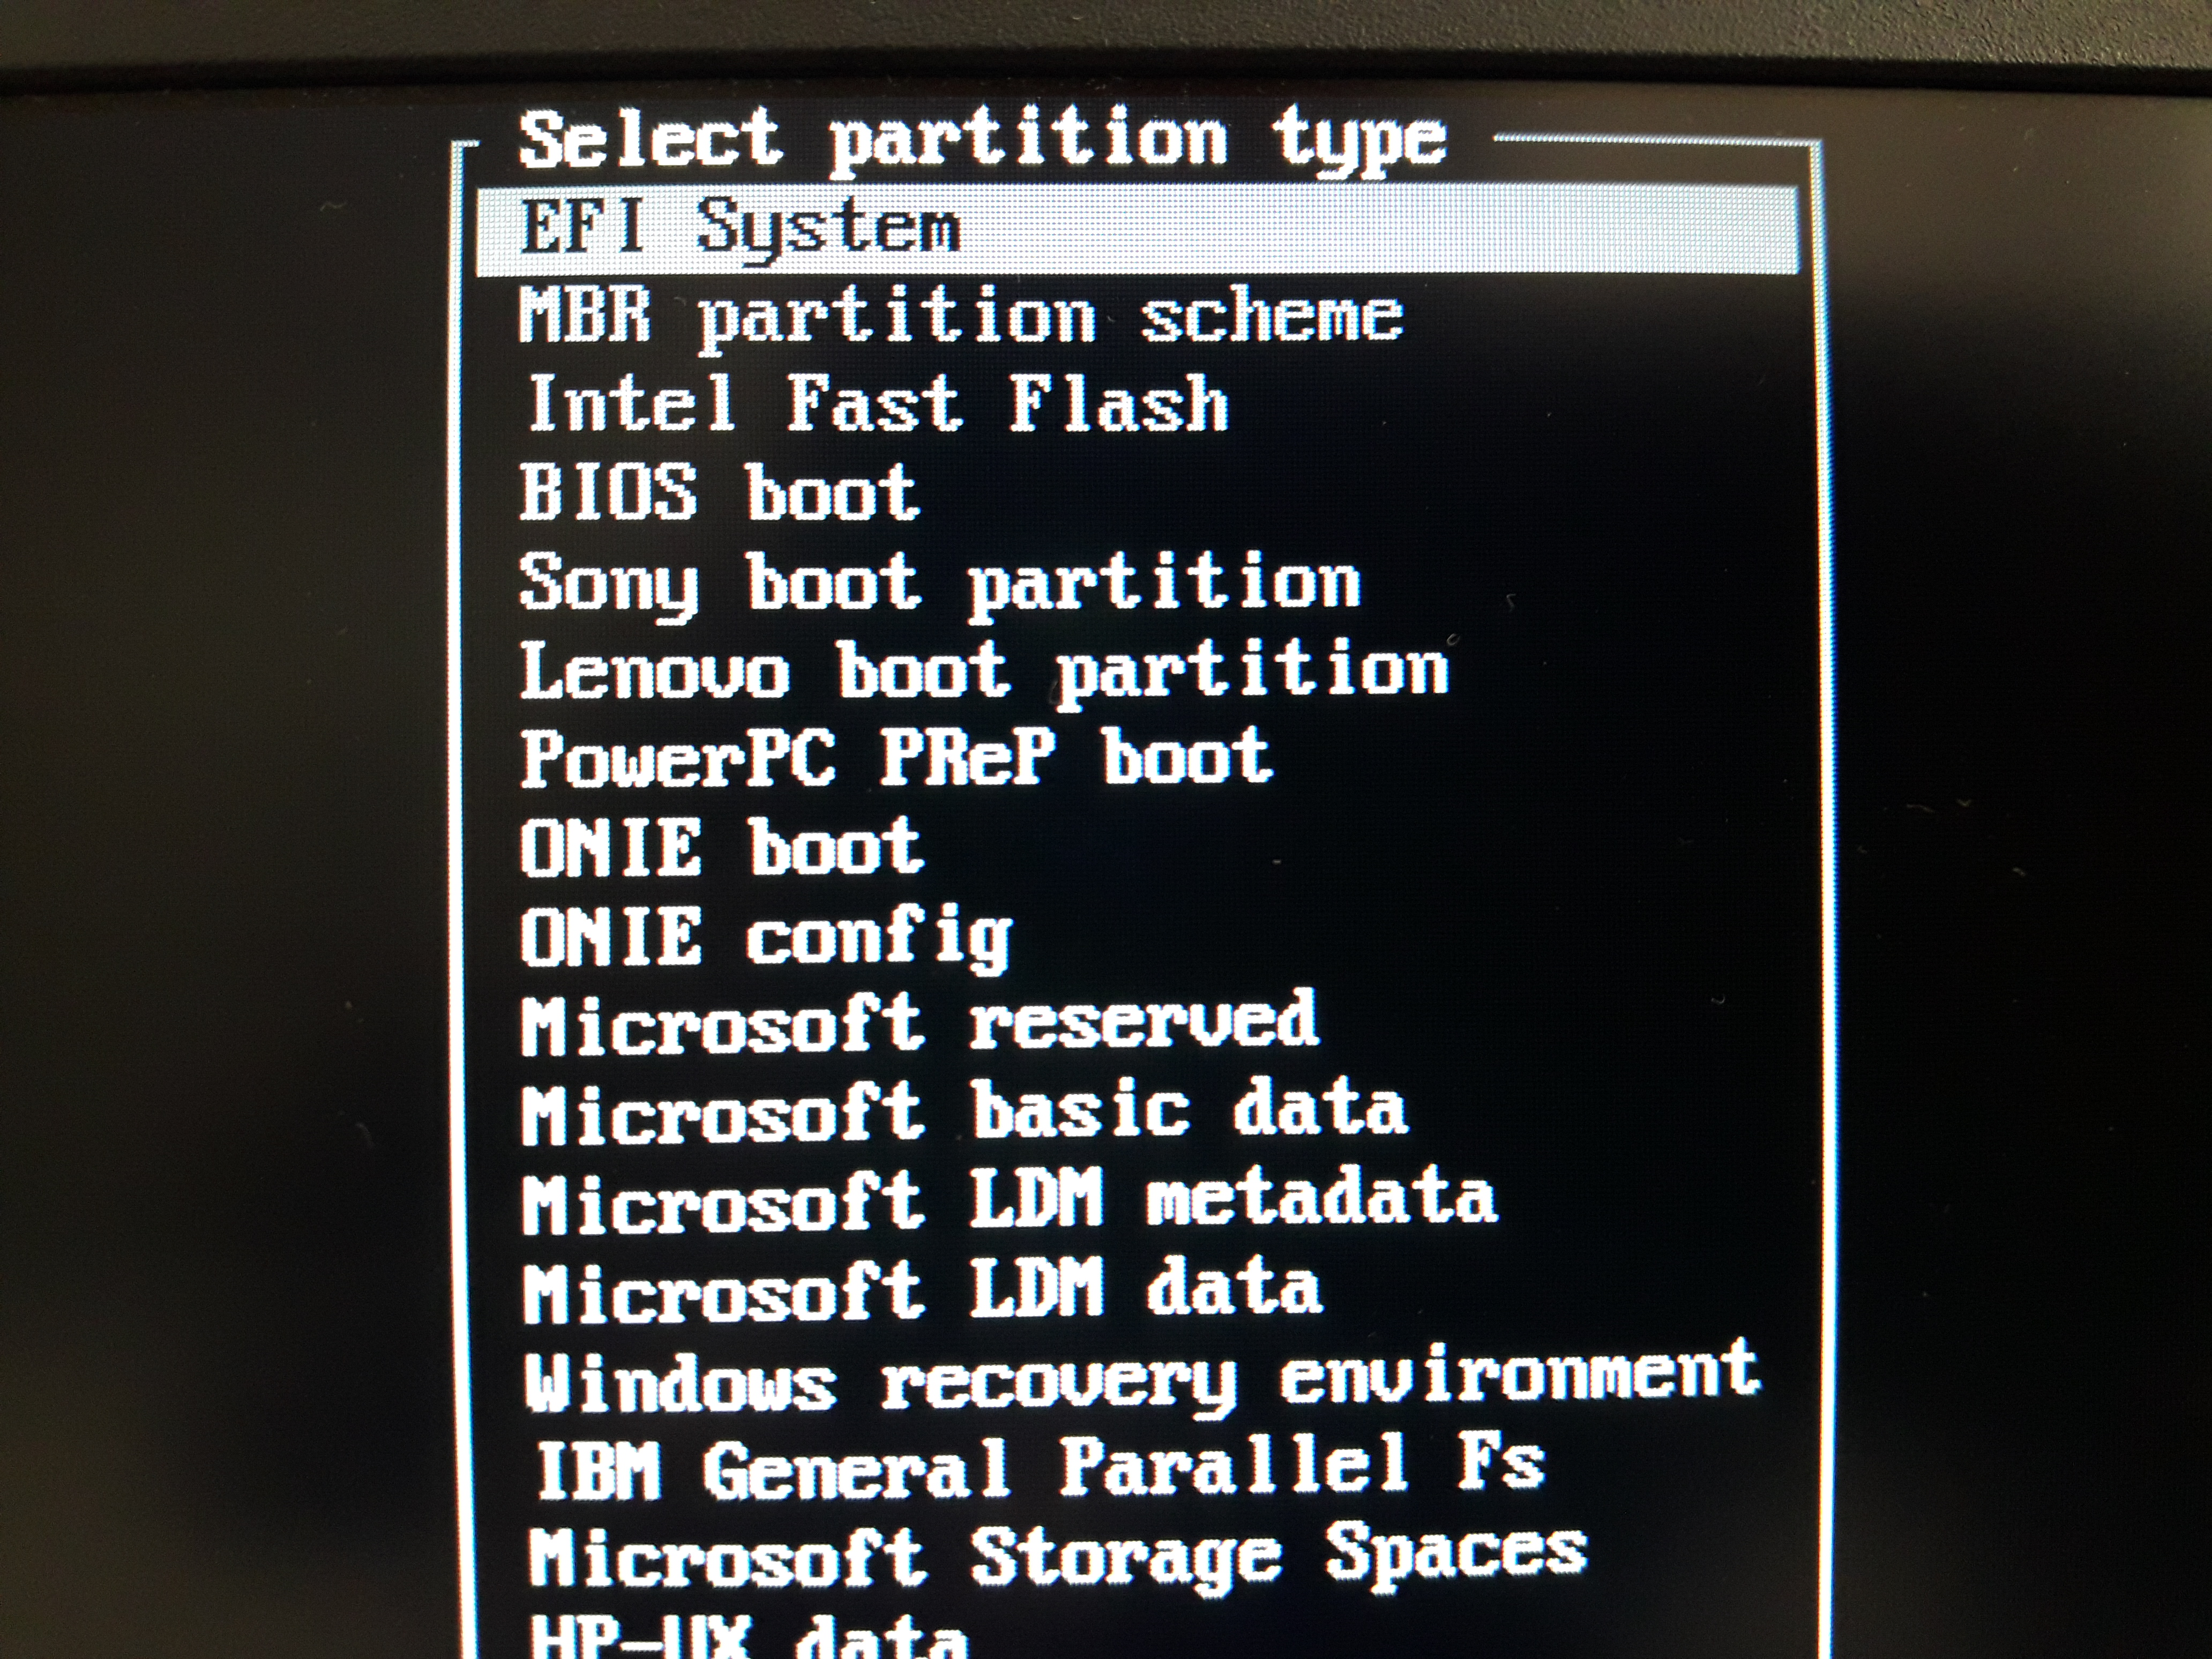
Specify the type:

We need to choose EFI System:
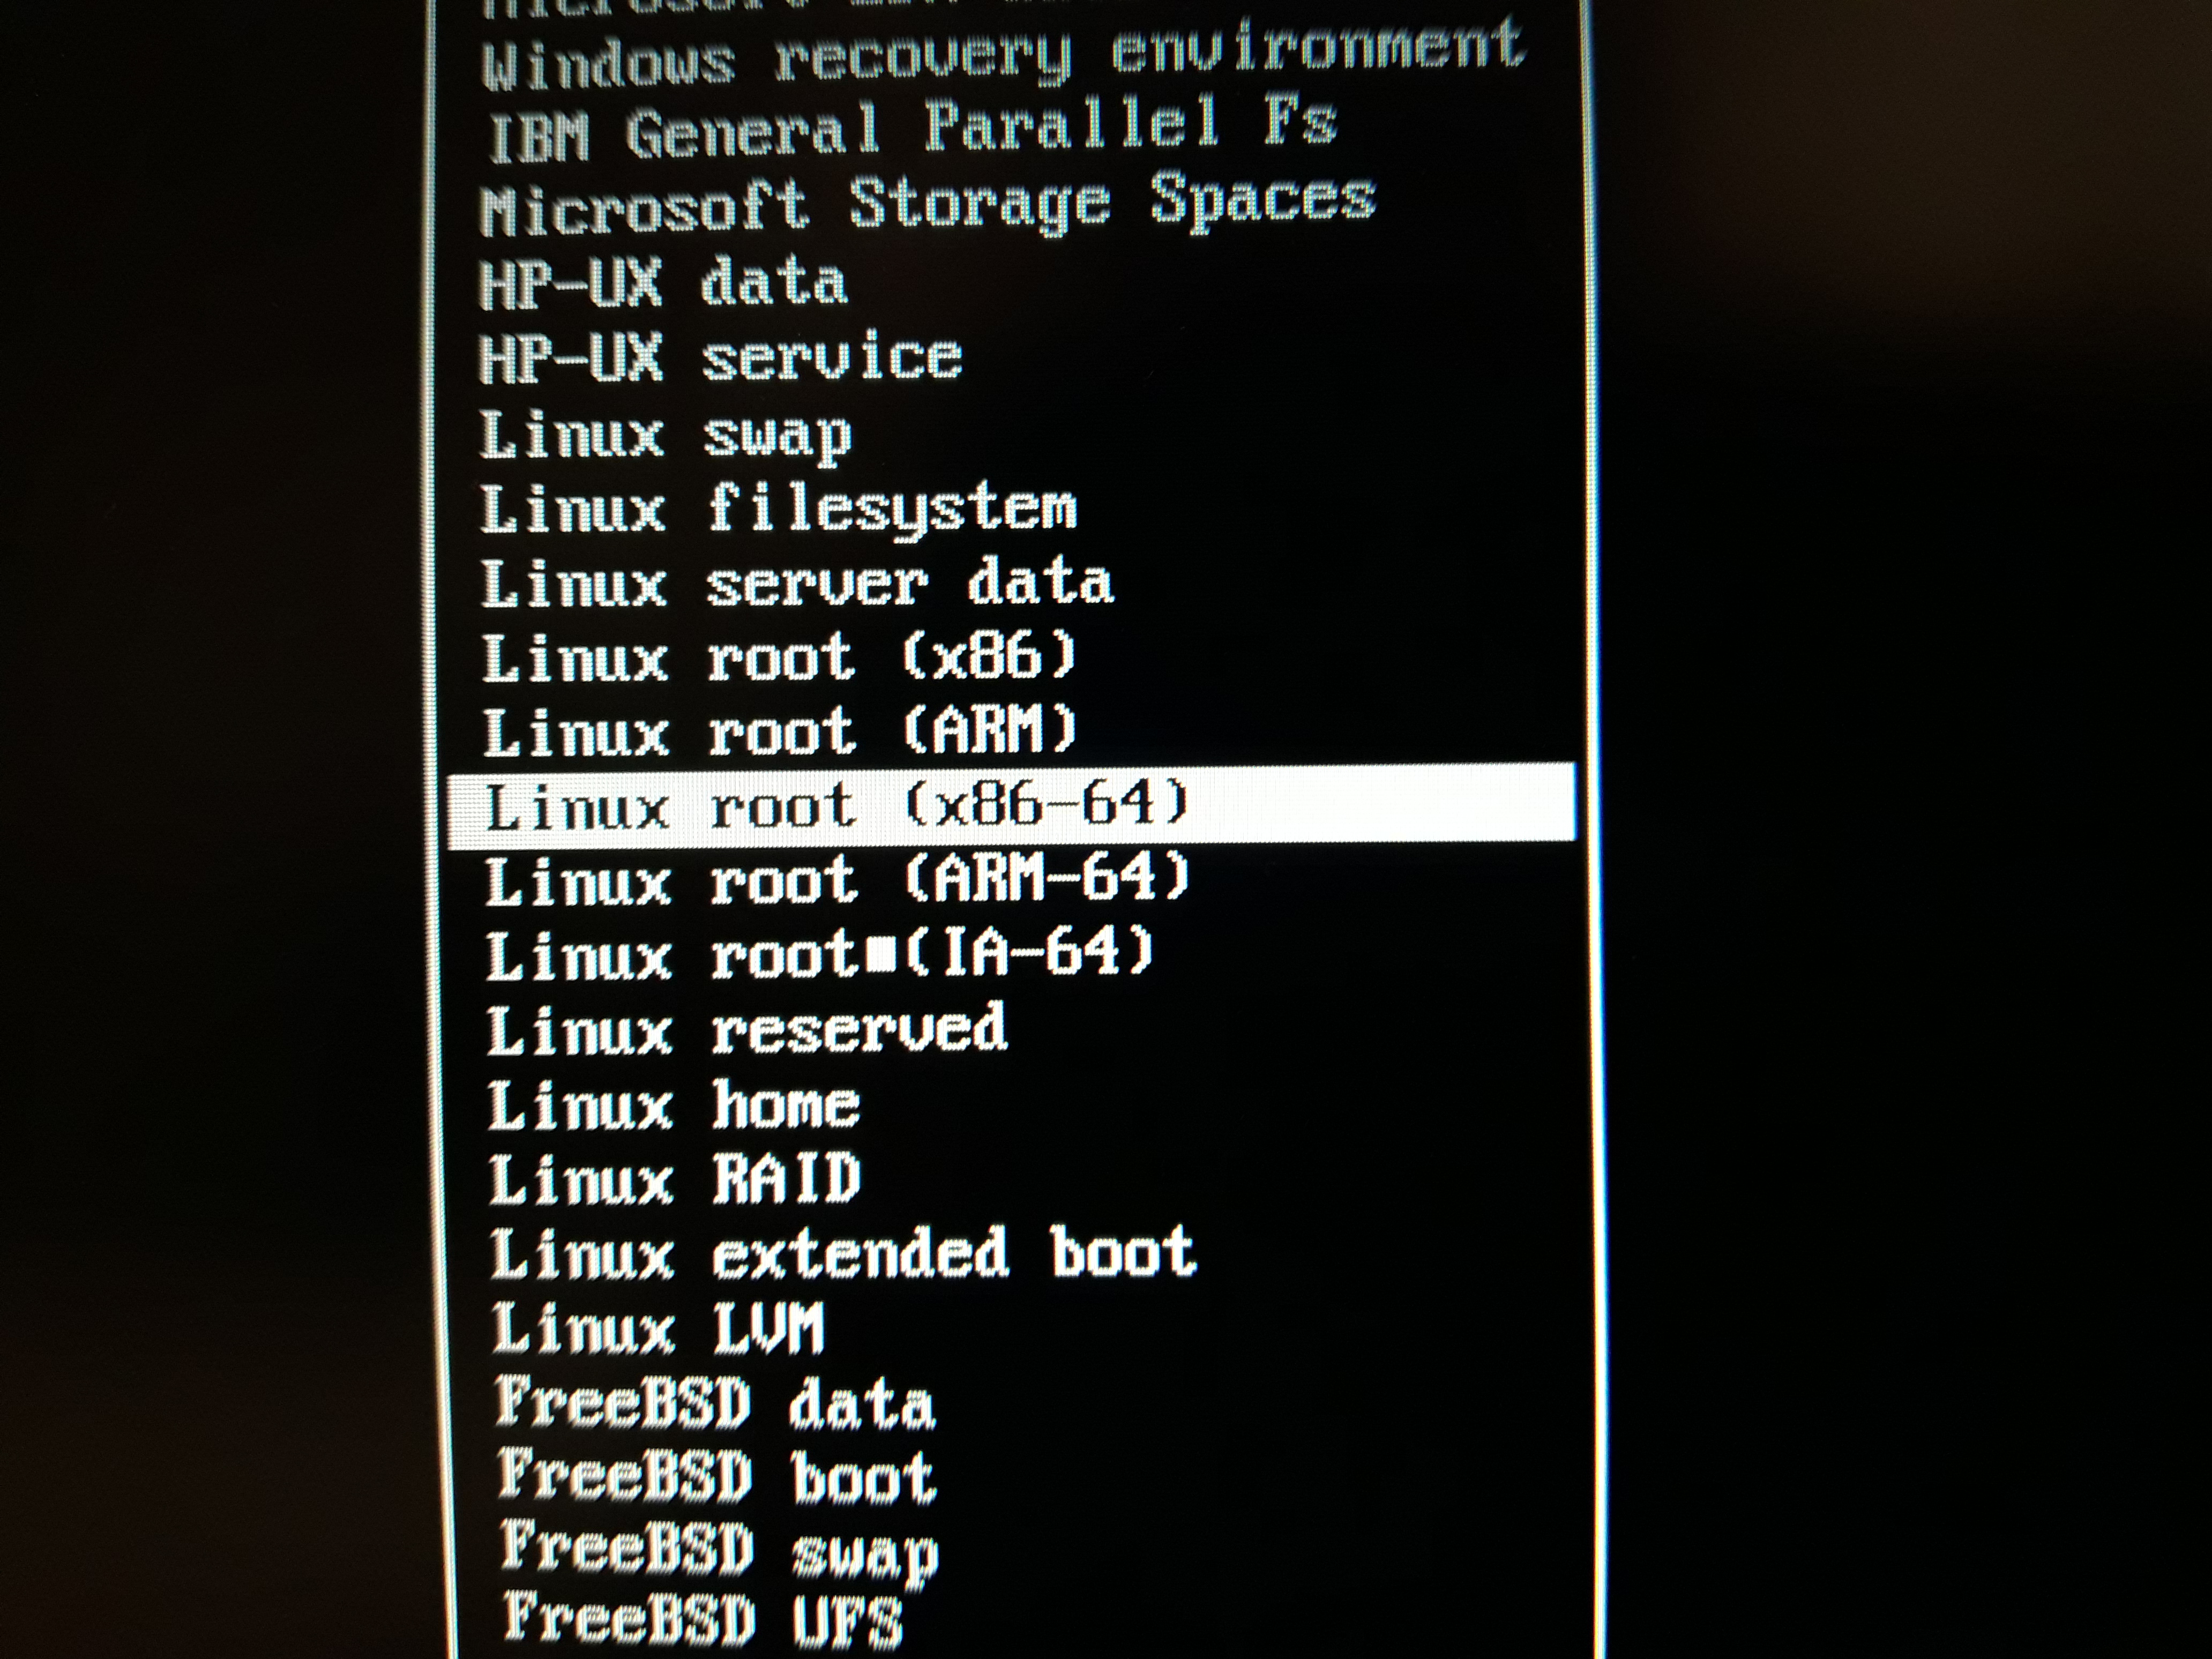
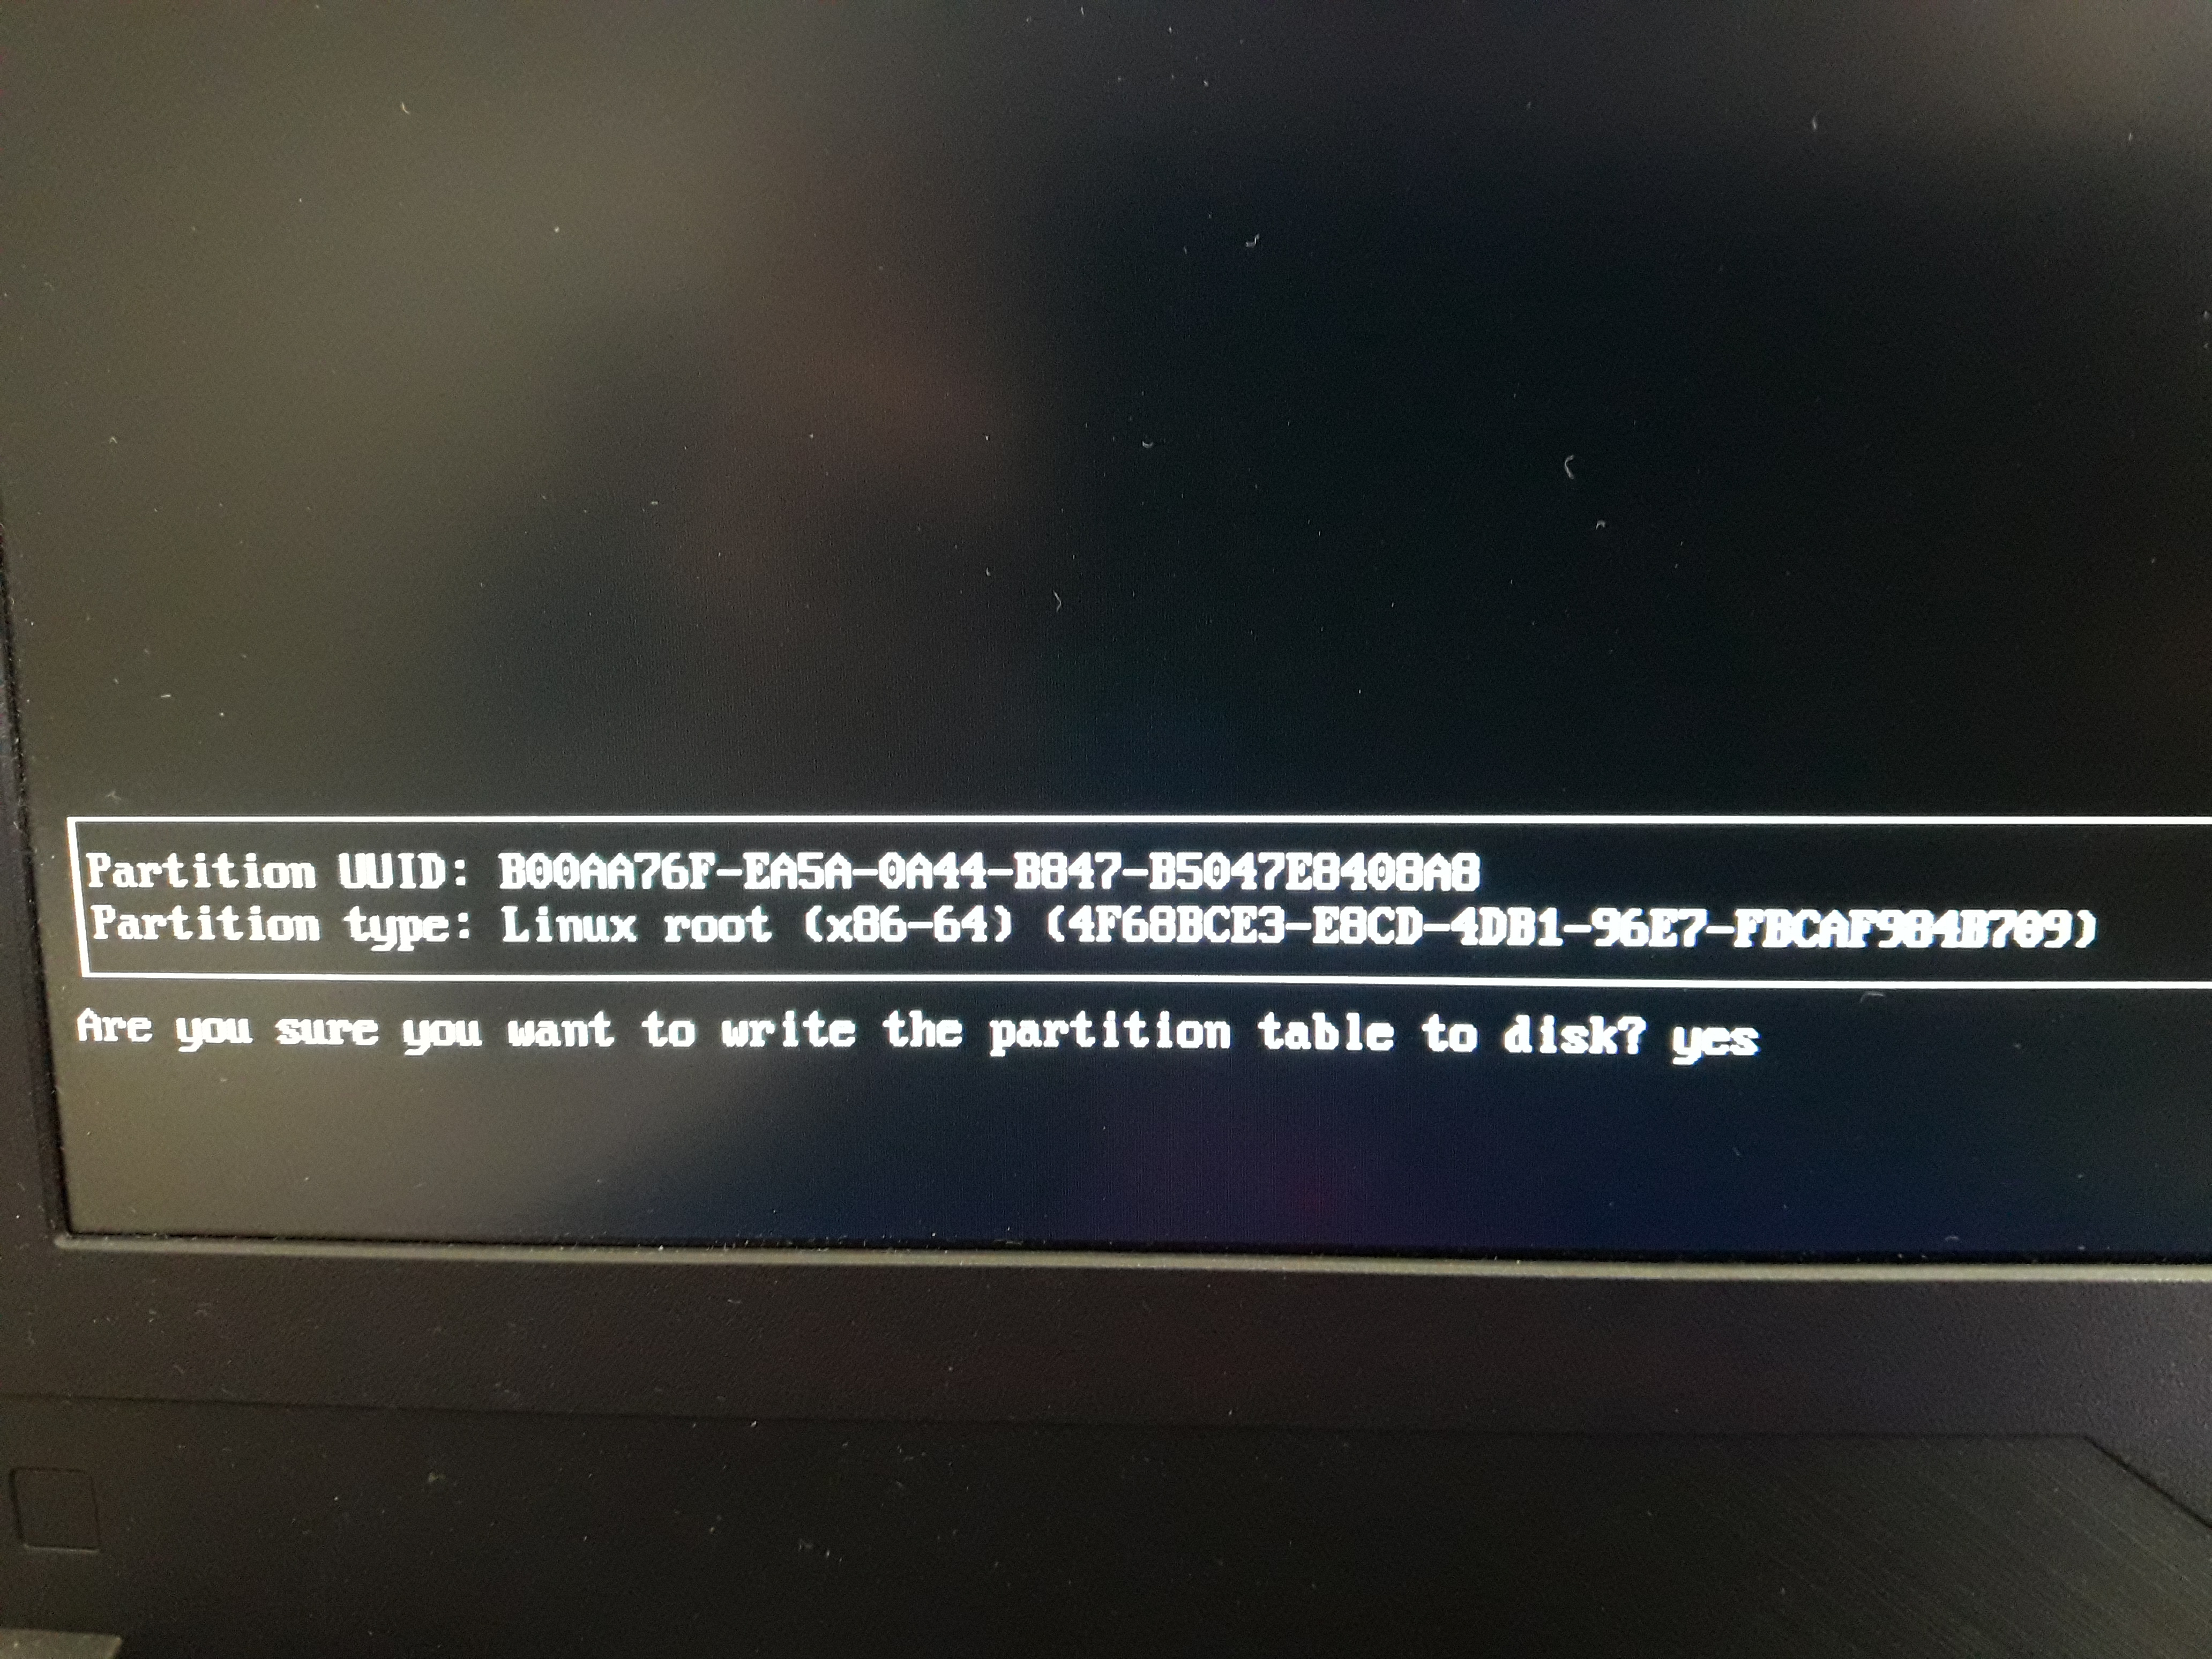
Go to the remaining free area (arrow down), click New again, select the entire unallocated size, type Linux root (x86-64) as the type, or another that matches the architecture of your processor:
Now select Write to record the made changes.
We write yes:
We leave the program.
You can check the output of the command again to make sure that the changes are saved:
fdisk -l
Format partitions:
mkfs.fat -F32 /dev/nvme0n1p1
mkfs.ext4 /dev/nvme0n1p2
Installing the Base Arch Linux
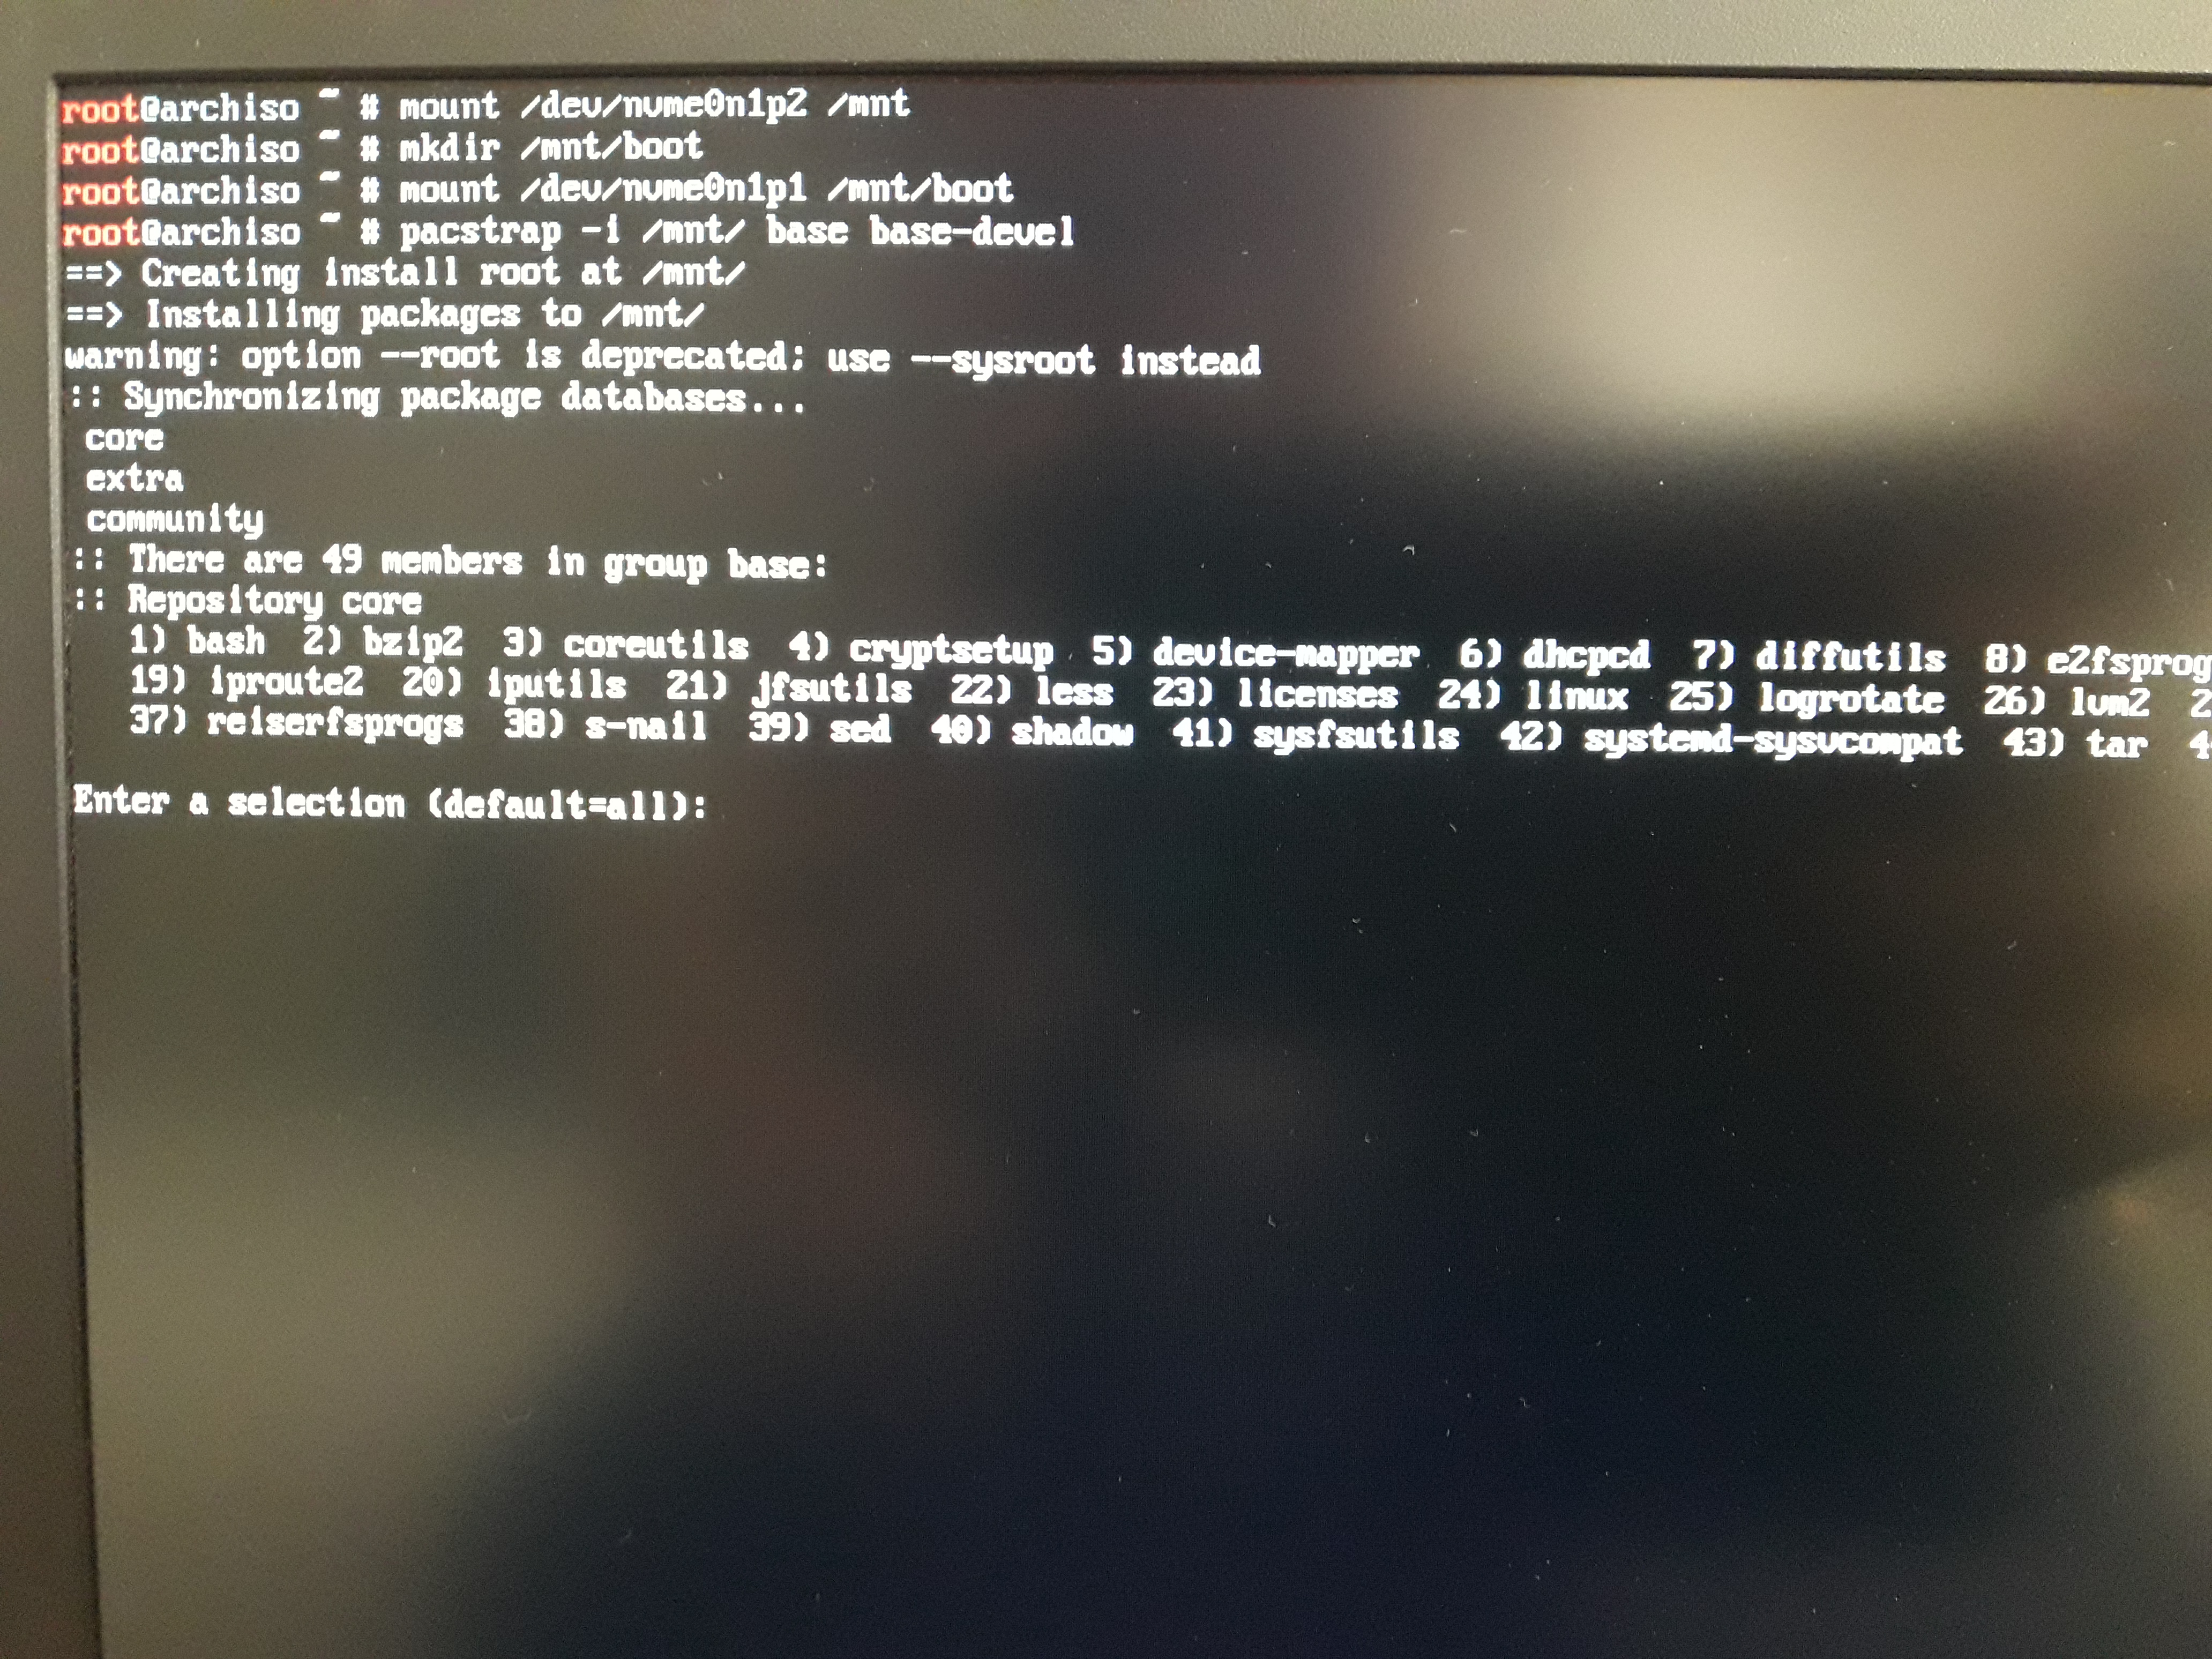
Now we need to mount the created partitions of the SSD/hard disk. To do this, execute the following commands in the following sequence:
mount /dev/nvme0n1p2 /mnt
mkdir /mnt/boot
mount /dev/nvme0n1p1 /mnt/boot
We begin the installation:
pacstrap -i /mnt base linux linux-firmware dhcpcd
A message will be displayed that three providers are available for the initramfs, select the default value, that is, 1, just press “ENTER” to do this.

When the list of packages is built, then press ENTER twice to approve it when the size of the downloaded data is written, and also the size after installation, press ENTER again for agreement:
Create the fstab file:
genfstab -U -p /mnt >> /mnt/etc/fstab
System Setup
Run the following command:
arch-chroot /mnt
Install Vim:
pacman -Sy
pacman -S vim
If you prefer to the console text editor nano, then install it.
Now in the locale.gen file we need to uncomment the two lines, for this
vim /etc/locale.gen
We search there and uncomment the lines:
en_US.UTF-8 UTF-8
ru_RU.UTF-8 UTF-8
Instead of ru_RU.UTF-8 UTF-8, select your native language. If you a English native speaker, so the only one line en_US.UTF-8 UTF-8 is enough for you.
Quite briefly about vim - it has two modes: edit mode and command mode. Editing mode is enabled when you press the Insert button, the Esc button switches on the command mode. In editing mode as in a normal text editor - press the letter, get the letter on the screen. In the command mode, the keys has other meanings. For example, to search for a line, press / (slash) and start typing a line. Press n to go to the next occurrence of the search string.
To save and exit the document, go to the command mode (press Esc), then press :wq and Enter (that is, a colon, w, q and Enter).
After that we perform:
locale-gen
Create locale.conf and export the locale:
echo LANG=en_US.UTF-8 > /etc/locale.conf
export LANG=en_US.UTF-8
We specifically chose the English locale for the installation time, because if errors occur, then in the non-English locale, messages will be displayed as squares and it will be difficult to understand what the cause of the problem is.
Set the Time Zone by associating the time zone information with localtime. To see all time zones:
ls /usr/share/zoneinfo
To see subcategories
ls /usr/share/zoneinfo/Europe
Now that you have chosen the city, make a link (replace Europe/Moscow to your city):
ln -s /usr/share/zoneinfo/Europe/Moscow /etc/localtime
Install the hardware clock on UTC:
hwclock --systohc --utc
Set the hostname (you can select any):
echo HackWare > /etc/hostname
We configure the network. If you have a wired connection, then configure your system to get IP address automatically:
systemctl enable dhcpcd.service
If you have a Wi-Fi connection, you will need to configure it manually the first time you reboot.
Attention to those who have a Wi-Fi connection: be sure to install the packages:
pacman -S wpa_supplicant dhclient iw
We set the root password:
passwd
Create a new user with sudo (replace <username> with real name):
useradd -m -g users -G wheel,video -s /bin/bash <имя пользователя>
Installing sudo:
pacman -S sudo
In the /etc/sudoers file
visudo
find and uncomment the line:
%wheel ALL=(ALL:ALL) ALL
Set the password for the created user:
passwd <username>
Bootloader installation
bootctl install
Edit the contents of the file:
vim /boot/loader/loader.conf
Delete what is there and write there:
default arch
Create a configuration file to add the Arch Linux item to the systemd-boot manager:
vim /boot/loader/entries/arch.conf
The contents of the file should be as follows:
title  BlackArch
linux  /vmlinuz-linux
initrd  /initramfs-linux.img
options  root=/dev/nvme0n1p2 rw
Pay attention to /dev/nvme0n1p2 - this is the path to my disk with the system, replace it with your own.
Leave the chroot, unmount the mounted partitions and reboot:
exit
umount -R /mnt/boot
umount -R /mnt
reboot
You can remove the installation disc.
Installing the Xorg Server and Video Drivers
After logging into the system, we need to do a complete update with the following command:
sudo pacman -Syu
But before that you need to connect to the Internet. If you have a wire, then everything should work itself, and if you have Wi-Fi, then do as shown above (at the beginning of the installation).
Before we install all the necessary software, we need the help of the bash-completion package, which, when the TAB key is pressed, completes commands or shows a list of possible commands or files for substitution.
sudo pacman -S bash-completion
The next step is to install the default X environment, which provides the default settings for the Xorg server and 3D support.
sudo pacman -S xorg-server xorg-apps xorg-xinit mesa
For additional functionality of Xorg, also install the following packages.
sudo pacman -S xorg-twm xterm xorg-xclock
For laptops and netbooks, also install drivers to support the touchpad.
sudo pacman -S xf86-input-synaptics
Now we need to install a driver specific to your VGA (video card) system, but first we need to identify your system graphics. And you need to go through a small educational program.
Video cards are:
- NVidia
- AMD
- Intel
Intel graphics is a built-in video processor core. Now most processors have a video core. Therefore, your system may most likely have two video adapters: NVidia and Intel or AMD and Intel.
For additional confusion, there are proprietary (from the manufacturer) and open drivers for NVidia and AMD.
To make things really difficult, these drivers conflict with each other and their ‘conflicts’ usually consist in the fact that the system simply does not load into the graphical interface.
Type the following command to determine your video card.
lspci -k | grep -E "(VGA|3D)"
Example output:
00:02.0 VGA compatible controller: Intel Corporation Device 3e9b
01:00.0 3D controller: NVIDIA Corporation GP107M [GeForce GTX 1050 Ti Mobile] (rev a1)
I have Intel and NVIDIA.
Attention, if you install VirtualBox into the virtual machine, i.e. you see:
00:02.0 VGA compatible controller: InnoTek Systemberatung GmbH VirtualBox Graphics Adapter
Then you do not need to install the driver for your real video card, because the OS in the virtual computer still can not use the real graphics card. Therefore, skip the installation of the video driver, and instead, type this command:
pacman -S virtualbox-guest-utils linux-headers
Which driver to choose? The proprietary NVIDIA driver provides the best performance. If you are going to use Hashcat and Pyrit, then you need it.
An open NVIDIA driver (called nouveau) can switch from an Intel video card to NVIDIA and vice versa. But it lacks functionality in other. If you install a proprietary and open driver at the same time, the system can hang so that it will not even be possible to switch to the console and fix it … (More precisely, during boot, you need to press Cntr+Alt+F2 before the system completely freezes).
For Intel, there is no proprietary driver (only open).
Once you have determined your graphics card, now it is time to install the appropriate driver. By default, Arch offers the default video driver Vesa - xf86-video-vesa, which can work with a large number of graphics chipsets, but does not support 2D or 3D acceleration.
To install an open AMD driver, run the command:
sudo pacman -S xf86-video-amdgpu
To install the nVidia open driver:
sudo pacman -S xf86-video-nouveau
OR to install the proprietary nVidia driver:
sudo pacman -S nvidia nvidia-utils
If you have an Intel graphics card, install the mesa package, which provides a DRI driver for 3D acceleration. It is not recommended to install the xf86-video-intel driver:
sudo pacman -S mesa
To support Vulkan (Ivy Bridge and newer) install:
sudo pacman -S vulkan-intel vulkan-mesa-layer
After the corresponding driver of your video card has been installed, it is time to test the Xorg server and video drivers, make it the next command.
sudo startx
If everything is configured correctly, the X session will be started as in the screenshot below. From here it is possible to leave writing exit in the largest console.
exit

Note: I had a nVidia card and a proprietary driver, the image was more like a black screen, but the display manager still works.
Installing the Cinnamon Desktop Environment
Now it's time to get super graphical user interface - a complete desktop environment for our system. Install the package Cinnamon. Run the following command to install Cinnamon and another dependency from the official arch repository.
sudo pacman -S cinnamon nemo-fileroller
The next step is to install the SDDM display manager package, which helps the system run the X server and provides a graphical user interface for users when entering the Cinnamon desktop environment.
sudo pacman -S sddm
The next step is to enable and test SDDM, to log into Arch Linux, use your credentials.
sudo systemctl enable sddm
sudo systemctl start sddm
After loading SDDM, a login window appears with an invitation to enter credentials. Select your user -> click on the icon to the left of the Sign In and make sure that you have selected Cinnamon, then enter your password and click the Sign In button or the Enter button.
Select your user and make sure you have Cinnamon selected, then enter your password and hit the Enter button.

Note: You might be wondering why SDDM was chosen as the display manager instead of the more well-known GDM or LightDM? The GDM display manager does not work well in virtual machines when trying to fit the screen size (sometimes it is simply impossible to log in and do anything to fix it). And LightDM just doesn't work on my OSes at all. SDDM testing has shown that it does not cause any problems with any settings of the VirtualBox graphics adapter. Ultimately, the display manager only shows up on the initial screen to enter the user's password.
Our Internet connection is controlled via the command line, but if you want to manage your network connections from the GUI, you need to disable the dhcpd service and install and use the Network Manager package. Also install the net-tools package for advanced network commands. From the graphical interface, open the UXterm and run the following commands:
sudo pacman -Syu
sudo pacman -S iproute2 network-manager-applet
Disable dhcpcd:
sudo systemctl stop dhcpcd.service
sudo systemctl disable dhcpcd.service
If you need OpenVPN support in Network Manager, then run the command:
sudo pacman -S networkmanager-openvpn
Start and add Network Manager to startup:
sudo systemctl start NetworkManager
sudo systemctl enable NetworkManager
Now test the Internet connection again by running the ping command against some host.
To complete the system test, reboot your computer to make sure everything is installed and configured correctly, then continue.
Installing the basic software
At the moment there is a minimum of installed software in the system, which will not help much in everyday use of a desktop computer or laptop. Run the following large command to install the basic software.
sudo pacman -S gedit gnome-terminal pulseaudio pulseaudio-alsa pavucontrol firefox vlc eog eog-plugins chromium unzip unrar p7zip pidgin toxcore deluge smplayer audacious qmmp gimp xfburn thunderbird gnome-system-monitor doublecmd-gtk2 gnome-calculator pinta recoll veracrypt bleachbit gnome-screenshot evince mlocate antiword catdoc unrtf djvulibre id3lib aspell-en git calibre ttf-freefont ttf-linux-libertine ntfs-3g libmtp
Together with these programs, fonts will also be installed, after which the inscriptions will become normal.
Let's install your locale (Russian locale as example):
su -
echo LANG=ru_RU.UTF-8 > /etc/locale.conf
Ctrl+d
If you need office tools like Writer, Calc, Impress, Draw, Math and Base, then install the LibreOffice package with the following command.
sudo pacman -S libreoffice-fresh
Dictionaries for spelling and style checking in LibreOffice:
- https://extensions.libreoffice.org/extensions/languagetool
- https://extensions.libreoffice.org/extensions/english-dictionaries
To remove packets, use the -R switch with the pacman command.
sudo pacman -R package-for-removal
If you decide to gain a foothold in Arch Linux, it is strongly recommended that you review the documentation for working with its pacman package manager. At least review:
pacman --help
man pacman
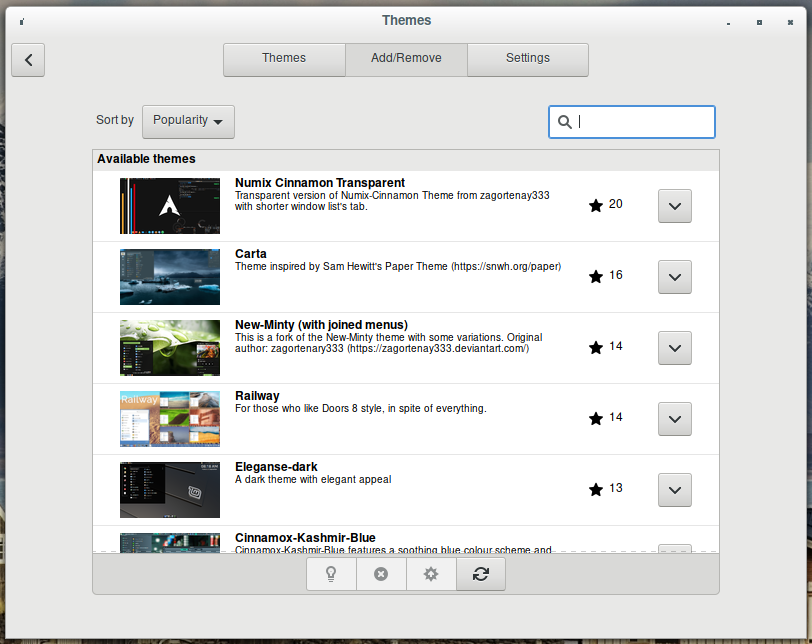
Arch Linux has other Linux desktop environments in its official repositories: KDE, GNOME, Mate, LXDE, XFCE, Enlightenment. The choice of Cinnamon or other desktop environment is a personal matter for everyone. But in my opinion, Cinnamon has better flexibility (themes, applets and extensions), as well as additional advanced features (hot screen corners) that increase productivity.
Installing BlackArch Tools
BlackArch is perfectly compatible with the usual Arch Linux. It acts as an informal repository.
Load and run strap.sh as root:
curl -O https://blackarch.org/strap.sh
sudo bash ./strap.sh
Update the cache:
sudo pacman -Syyu
Installing BlackArch Packages
Now you can install tools from the blackarch repository.
1. To display a list of all available tools, run:
pacman -Sgg | grep blackarch | cut -d ' ' -f2 | sort -u
2. To install all the tools, run:
pacman -S blackarch --force
3. To install a tool category, run:
pacman -S blackarch-<category>
4. To view the categories of blackarch, run
pacman -Sg | grep blackarch
It is also recommended to install a list of mirrors:
sudo pacman -S blackarch-mirrorlist
You can install all the tools at once, some groups of tools or only those individual tools that you need. For example, I want to install tools for automating hacking, cracking passwords, working with databases, using exploits, networking tools, recon, scanners, sniffers, social engineering, spoofing, working with web applications and working with wireless networks, I'm running the command:
sudo pacman -S blackarch-automation blackarch-cracker blackarch-database blackarch-exploitation blackarch-networking blackarch-recon blackarch-scanner blackarch-sniffer blackarch-social blackarch-spoof blackarch-webapp blackarch-wireless --needed --force
How to install Hashcat in Arch Linux
Hashcat program works only with proprietary video drivers. If you have a nVidia graphics card, you must have the appropriate driver installed.
Then install:
sudo pacman -S opencl-nvidia opencl-headers cuda hashcat
As a result, hashcat will use the video card when hacking passwords.
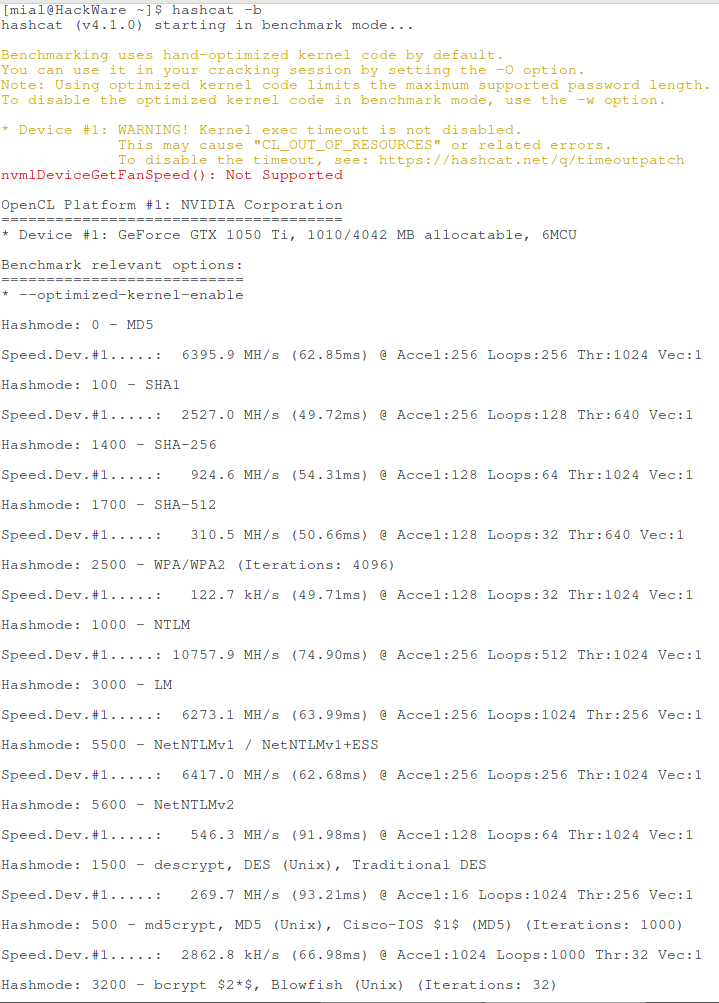
Run benchmark:
hashcat -b
Also, Hashcat can use the CPU, this requires Intel(R) Graphics Compute Runtime for OpenCL(TM). Installation:
git clone https://aur.archlinux.org/compute-runtime-bin.git
cd compute-runtime-bin/
makepkg -si
When I try to execute a benchmark, I receive a message:
* Device #1: Intel's OpenCL runtime (GPU only) is currently broken.
             We are waiting for updated OpenCL drivers from Intel.
             You can use --force to override, but do not report related errors.
When I try to run a benchmark with the --force option:
hashcat -b -D 1,2 --force
It can be seen that the processor is recognized, but it all ends with a segmentation error.

Enabling the multilib repository
If you want to run 32-bit applications on your x86_64, enable the Multilib repository.
By the way, Multilib packages should be activated. This is useful anyway, since many of these packages are dependencies for BlackArch tools. In the same packages are Wine, Skype and other fairly popular programs. To do this, open the file /etc/pacman.conf:
sudo gedit /etc/pacman.conf
Find there two lines:
#[multilib]
#Include = /etc/pacman.d/mirrorlist
And replace them with (uncomment):
[multilib]
Include = /etc/pacman.d/mirrorlist
How to install Wine in Arch Linux
After you enabled the Multilib repository, run the following commands:
sudo pacman -Sy
sudo pacman -S wine wine_gecko wine-mono lib32-mpg123 lib32-gnutls
Speed Up Update
The pacman package manager has a text file with a large list of mirrors, from where it downloads updates. It selects the first mirror from the list and starts the download. If the speed is too small or the mirror is not available, the next mirror is selected and so on. There are mirrors for the whole world, but if you have a fast Internet connection, you may notice that with some of them the download speed is low.
You can choose fast mirror packets and thereby significantly speed up the speed of system updates during the download phase.
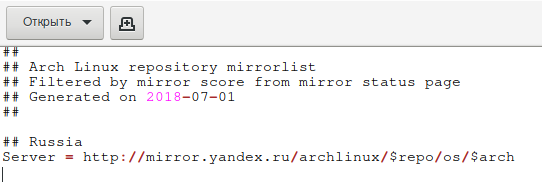
To do this, open the file /etc/pacman.d/mirrorlist:
sudo gedit /etc/pacman.d/mirrorlist
And comment out or delete mirrors that you do not want to use. Or just move to the top the nearest and fastest mirrors to you.
See also: How to find the fastest Arch Linux and BlackArch mirrors
How to restore Arch Linux if it does not boot
If the system does not boot, then switch to another terminal using the keys Ctrl+Alt+F2 or Ctrl+Alt+F3. Log in and roll back the changes that led to the fail.
Even if this does not help, that is, the system hangs tightly and it is impossible to switch to another terminal, then you can still restore your Arch!
To do this, you need a bootable flash drive with Arch Linux. Boot from it, then mount the partition of your hard drive:
mount /dev/nvme0n1p2 /mnt
Attention, instead of /dev/nvme0n1p2 enter your disk, for example, /dev/sda2
Run the following command:
arch-chroot /mnt
As a result, you seem to be in your main operating system (and not the one that booted from the USB flash drive). That is, you can roll back or make any changes on a computer that does not boot.
So that you understand the power of this method: even if the Linux kernel or boot loader is damaged, this method allows you to boot and switch to a broken system and fix everything!
Also, you can change passwords, of course, install and remove packages - all these changes will occur on the main system, and not on the Live-disk.
Conclusion
ArchWiki contains a lot of information for studying Arch Linux, all the most important articles have a translation into different languages.
There is a forum: https://bbs.archlinux.org/
Related articles:
- How to configure Kali Linux to use a static IP address (85.3%)
- How to replace Default Desktop Environment with Cinnamon in Kali Linux (71.2%)
- How to change the desktop environment in Kali Linux without reinstalling the operating system (71.2%)
- How to install AMD / ATI Catalyst drivers AKA Crimson 15.12 in BlackArch / Arch Linux with kernel 4.7, 4.8, 4.9, 4.10, 4.11 (64.8%)
- How to brute-force passwords using GPU and CPU in Linux (64.8%)
- How to make a local web server accessible from the Internet without a white IP (RANDOM - 50%)
Hey this is a great guide but I will tell you that I only happened up on this by mistake. This article is hard to find for some reason when searching for installation guides. I ask that you make this arcticle more search friendly or something to help more people because you just laid pout a great guide and say thanks once again.