Anonymous scanning through Tor with Nmap, sqlmap or WPScan
Anonymity is a very complex problem that not be solved in a single article. Before starting real action, you must double-check everything in the laboratory environment.
In this manual, I will show you how hide your real IP address while scanning by Nmap, sqlmap or WPScan. We will use Tor to route Nmap, sqlmap or WPScan traffic.
How to install and run Tor in Kali Linux
Install necessary packages:
sudo apt-get install torsocks tor
Then open the /etc/tor/torrc file:
sudo gedit /etc/tor/torrc
And append lines:
AutomapHostsOnResolve  1
DNSPort                53530
TransPort              9040
Start and add tor service in autorun:
sudo systemctl start tor
sudo systemctl enable tor
ProxyChains VS ProxyChains-NG (looks like an IPv6 target specification — you have to use the -6 option)
ProxyChains has a bug with nmap usage. If you try to specify a hostname as a target, it will issue the error looks like an IPv6 target specification — you have to use the -6 option.
proxychains nmap -sT -PN -sV -n --open -p 80 mi-al.ru
ProxyChains-3.1 (http://proxychains.sf.net)

Starting Nmap 7.25BETA2 ( https://nmap.org ) at 2016-09-26 15:41 MSK
|DNS-request| mi-al.ru
|S-chain|-<>-127.0.0.1:9050-<><>-4.2.2.2:53-<><>-OK
|DNS-response| mi-al.ru is 185.26.122.50
185.26.122.50/0 looks like an IPv6 target specification -- you have to use the -6 option.
WARNING: No targets were specified, so 0 hosts scanned.
Nmap done: 0 IP addresses (0 hosts up) scanned in 3.17 seconds
To avoid this error you should use ProxyChains-NG.
ProxyChains-NG (new generation) – a preloader which hooks calls to sockets in dynamically linked programs and redirects it through one or more socks/http proxies. It is continuation of the unmaintained proxychains project.
Installing ProxyChains-NG:
sudo apt-get install git gcc
sudo apt-get remove proxychains
git clone https://github.com/rofl0r/proxychains-ng.git
cd proxychains-ng/
./configure --prefix=/usr --sysconfdir=/etc
make
sudo make install
sudo make install-config
Nmap anonymous scanning through Tor
Everything is ready, but you have to know, Tor do not support Nmap traffic. You cannot just use Nmap scanning through Tor in normal manner.
Nmap is one of the danger program in terms of anonymity.
If you want to scan using Nmap with proxy, you really need to use and understand the option -sT. Let’s reed help about this flag and simultaneously learn about the two types of scanning:
- -sT (TCP connect scan)
TCP connect scan is the default TCP scan type when SYN scan is not an option. This is the case when a user does not have raw packet privileges. Instead of writing raw packets as most other scan types do, Nmap asks the underlying operating system to establish a connection with the target machine and port by issuing the connect system call. This is the same high-level system call that web browsers, P2P clients, and most other network-enabled applications use to establish a connection. It is part of a programming interface known as the Berkeley Sockets API. Rather than read raw packet responses off the wire, Nmap uses this API to obtain status information on each connection attempt.
When SYN scan is available, it is usually a better choice. Nmap has less control over the high level connect call than with raw packets, making it less efficient. The system call completes connections to open target ports rather than performing the half-open reset that SYN scan does. Not only does this take longer and require more packets to obtain the same information, but target machines are more likely to log the connection. A decent IDS will catch either, but most machines have no such alarm system. Many services on your average Unix system will add a note to syslog, and sometimes a cryptic error message, when Nmap connects and then closes the connection without sending data. Truly pathetic services crash when this happens, though that is uncommon. An administrator who sees a bunch of connection attempts in her logs from a single system should know that she has been connect scanned.
So we will run nmap with -sT, but without sudo because the program does not require root privilege anymore.
Also you will find useful the following options:
- -Pn: Treat all hosts as online -- skip host discovery
- -sV: Probe open ports to determine service/version info
- --open: Only show open (or possibly open) ports
Usage of any proxy slow down the scanning, increases delay of response, therefore you may be interested in -p option (to determine ports for scanning) or -F: Fast mode - Scan fewer ports than the default scan.
- -n (No DNS resolution)
Tells Nmap to never do reverse DNS resolution on the active IP addresses it finds. Since DNS can be slow even with Nmap's built-in parallel stub resolver, this option can slash scanning times.
At last the option --proxies, you should avoid usage of the option if you are not absolutely sure what it does.
- --proxies Comma-separated list of proxy URLs (Relay TCP connections through a chain of proxies)
Asks Nmap to establish TCP connections with a final target through supplied chain of one or more HTTP or SOCKS4 proxies. Proxies can help hide the true source of a scan or evade certain firewall restrictions, but they can hamper scan performance by increasing latency. Users may need to adjust Nmap timeouts and other scan parameters accordingly. In particular, a lower --max-parallelism may help because some proxies refuse to handle as many concurrent connections as Nmap opens by default.
This option takes a list of proxies as argument, expressed as URLs in the format proto://host:port. Use commas to separate node URLs in a chain. No authentication is supported yet. Valid protocols are HTTP and SOCKS4.
Warning: this feature is still under development and has limitations. It is implemented within the nsock library and thus has no effect on the ping, port scanning and OS discovery phases of a scan. Only NSE and version scan benefit from this option so far—other features may disclose your true address. SSL connections are not yet supported, nor is proxy-side DNS resolution (hostnames are always resolved by Nmap).
As you can see, indeed the --proxies flag does not increase anonymity. It can confuse you.
Ok, now when we got it we can start our anonymous scanning with nmap and ProxyChains-NG to provide true anonymity:
proxychains4 nmap -sT -PN -sV --open -n TARGET
Example:
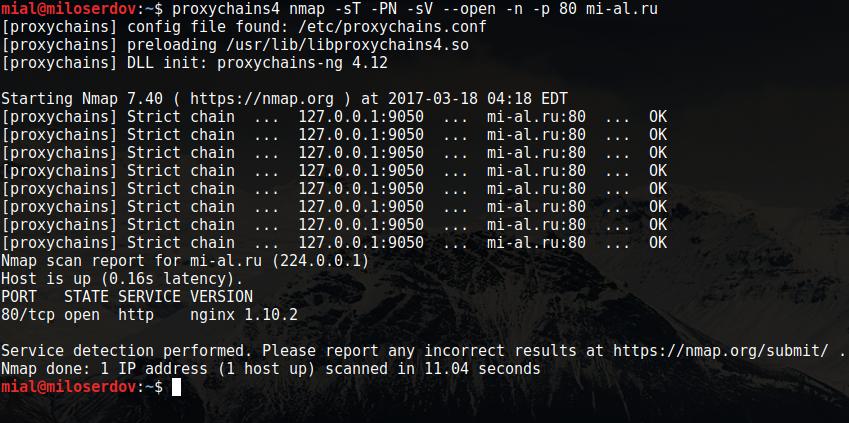
proxychains4 nmap -sT -PN -sV --open -n -p 80 mi-al.ru
[proxychains] config file found: /etc/proxychains.conf
[proxychains] preloading /usr/lib/libproxychains4.so
[proxychains] DLL init: proxychains-ng 4.12

Starting Nmap 7.40 ( https://nmap.org ) at 2017-03-18 04:18 EDT
[proxychains] Strict chain  ...  127.0.0.1:9050  ...  mi-al.ru:80  ...  OK
[proxychains] Strict chain  ...  127.0.0.1:9050  ...  mi-al.ru:80  ...  OK
[proxychains] Strict chain  ...  127.0.0.1:9050  ...  mi-al.ru:80  ...  OK
[proxychains] Strict chain  ...  127.0.0.1:9050  ...  mi-al.ru:80  ...  OK
[proxychains] Strict chain  ...  127.0.0.1:9050  ...  mi-al.ru:80  ...  OK
[proxychains] Strict chain  ...  127.0.0.1:9050  ...  mi-al.ru:80  ...  OK
[proxychains] Strict chain  ...  127.0.0.1:9050  ...  mi-al.ru:80  ...  OK
[proxychains] Strict chain  ...  127.0.0.1:9050  ...  mi-al.ru:80  ...  OK
Nmap scan report for mi-al.ru (224.0.0.1)
Host is up (0.16s latency).
PORT   STATE SERVICE VERSION
80/tcp open  http    nginx 1.10.2

Service detection performed. Please report any incorrect results at https://nmap.org/submit/ .
Nmap done: 1 IP address (1 host up) scanned in 11.04 seconds
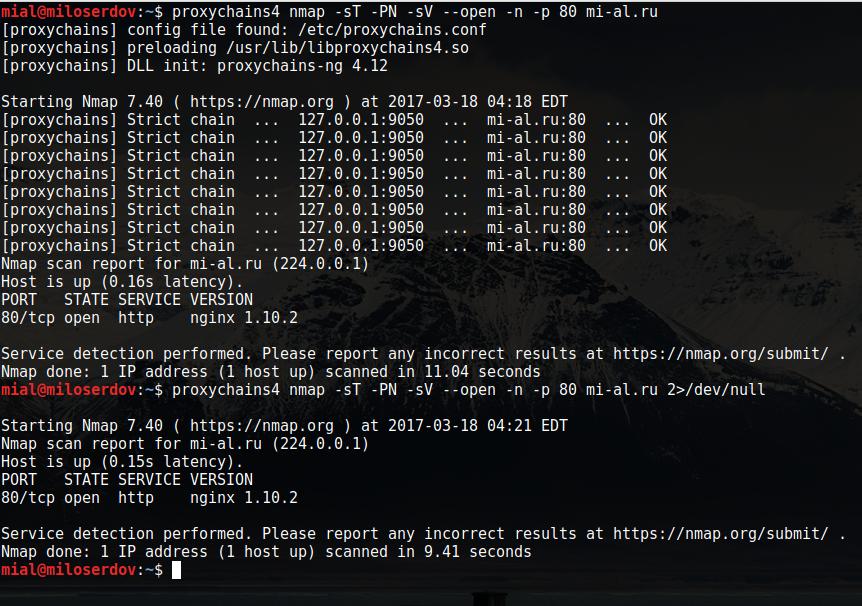
As you see, there are a lot of exceeded information. Try the following construction to suppress the unnecessary output:
proxychains4 nmap -sT -PN -sV --open -n TARGET 2>/dev/null
Example:
proxychains4 nmap -sT -PN -sV --open -n -p 80 mi-al.ru 2>/dev/null

Starting Nmap 7.40 ( https://nmap.org ) at 2017-03-18 04:21 EDT
Nmap scan report for mi-al.ru (224.0.0.1)
Host is up (0.15s latency).
PORT   STATE SERVICE VERSION
80/tcp open  http    nginx 1.10.2

Service detection performed. Please report any incorrect results at https://nmap.org/submit/ .
Nmap done: 1 IP address (1 host up) scanned in 9.41 seconds
Now the output is the normal Nmap output:
sqlmap anonymous scanning through Tor
Sqlmap has the --proxy option, therefore you just need to append --proxy socks5://127.0.0.1:9050 to you command:
sqlmap -u TARGET --proxy socks5://127.0.0.1:9050
WPScan anonymous scanning through Tor
WPScan has the similar --proxy flag, so just append --proxy socks5://127.0.0.1:9050 to you normal command:
wpscan -u TARGET -e p,vt,u --proxy socks5://127.0.0.1:9050
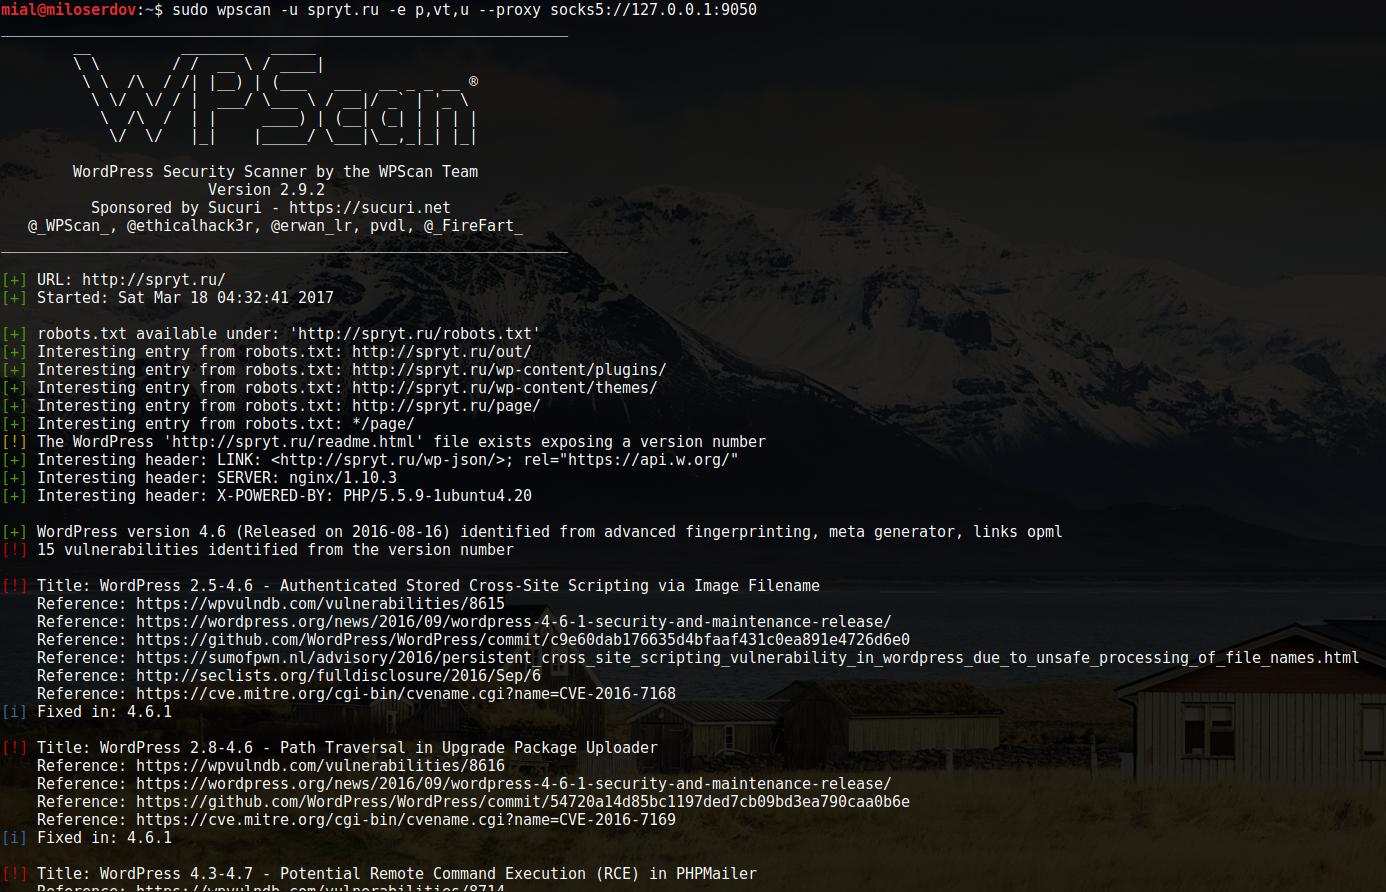
I recommend you consider usage of --request-timeout 500 --connect-timeout 120 options, because scanning through Tor leads to significant delays.
Example:
sudo wpscan -u spryt.ru -e p,vt,u --proxy socks5://127.0.0.1:9050
Related articles:
- How to configure programs to access the Internet in Tails. Internet connection settings for command line utilities (77.6%)
- Best Kali Linux tools in WSL (Windows Subsystem for Linux) (Part 1) (60%)
- How to obfuscate JavaScript code (50%)
- Best Kali Linux tools in WSL (Windows Subsystem for Linux) (Part 2) (50%)
- Online Kali Linux programs (FREE) (44.3%)
- The fastest subdomains enumeration and monitoring (also works on Windows!) (RANDOM - 22.5%)
Hello, my network is heavilly restricted, could not run most commands successfully. permission denied in most cases.
Hello!
It probably means, that the target web-site or host restricted traffic from the Tor network. You can try to change Tor exit node for change your current IP (it happens from time to time automatically) since some hosts could have banned only some IPs of the Tor network.
Hi, when try to use with wpscan I get always the error "seems to be down (Couldn't connect to server)", running from kali on virtual machine. is there any other configuration to do in this case, to make it work?
thank you
Hello! There are various reasons for this behavior:
To check out the third version, open the target site in the Tor Browser. If you get an error like “403 access denied”, it means that any requests from Tor are blocked.
To check if the Tor service is working, see its status:
You may already see the causes of the problem there.
Try restarting and checking the service status again:
You should see messages about the cause of the problem, or if the service successfully started and connected to the Tor network, there will be a line: